MITSUBISHI ELECTRIC Motion Controllers Programming Manual SV22 (VIRTUAL MODE) Q173DCPU Q172DCPU 01 01 2008 IB(NA)-0300137 Version A MITSUBISHI ELECTRIC INDUSTRIAL AUTOMATION
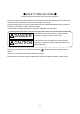
SAFETY PRECAUTIONS (Please read these instructions before using this equipment.) Before using this product, please read this manual and the relevant manuals introduced in this manual carefully and pay full attention to safety to handle the product correctly. These precautions apply only to this product. Refer to the Q173DCPU/Q172DCPU Users manual for a description of the Motion controller safety precautions. In this manual, the safety instructions are ranked as "DANGER" and "CAUTION".
For Safe Operations 1. Prevention of electric shocks DANGER Never open the front case or terminal covers while the power is ON or the unit is running, as this may lead to electric shocks. Never run the unit with the front case or terminal cover removed. The high voltage terminal and charged sections will be exposed and may lead to electric shocks. Never open the front case or terminal cover at times other than wiring work or periodic inspections even if the power is OFF.
3. For injury prevention CAUTION Do not apply a voltage other than that specified in the instruction manual on any terminal. Doing so may lead to destruction or damage. Do not mistake the terminal connections, as this may lead to destruction or damage. Do not mistake the polarity ( + / - ), as this may lead to destruction or damage. Do not touch the heat radiating fins of controller or servo amplifier, regenerative resistor and servomotor, etc.
CAUTION The dynamic brakes must be used only on errors that cause the forced stop, emergency stop, or servo OFF. These brakes must not be used for normal braking. The brakes (electromagnetic brakes) assembled into the servomotor are for holding applications, and must not be used for normal braking. The system must have a mechanical allowance so that the machine itself can stop even if the stroke limits switch is passed through at the max. speed.
CAUTION Use the program commands for the program with the conditions specified in the instruction manual. Set the sequence function program capacity setting, device capacity, latch validity range, I/O assignment setting, and validity of continuous operation during error detection to values that are compatible with the system application. The protective functions may not function if the settings are incorrect.
CAUTION The Motion controller, servo amplifier and servomotor are precision machines, so do not drop or apply strong impacts on them. Securely fix the Motion controller, servo amplifier and servomotor to the machine according to the instruction manual. If the fixing is insufficient, these may come off during operation. Always install the servomotor with reduction gears in the designated direction. Failing to do so may lead to oil leaks. Store and use the unit in the following environmental conditions.
(4) Wiring CAUTION Correctly and securely wire the wires. Reconfirm the connections for mistakes and the terminal screws for tightness after wiring. Failing to do so may lead to run away of the servomotor. After wiring, install the protective covers such as the terminal covers to the original positions. Do not install a phase advancing capacitor, surge absorber or radio noise filter (option FR-BIF) on the output side of the servo amplifier. Correctly connect the output side (terminal U, V, W).
(6) Usage methods CAUTION Immediately turn OFF the power if smoke, abnormal sounds or odors are emitted from the Motion controller, servo amplifier or servomotor. Always execute a test operation before starting actual operations after the program or parameters have been changed or after maintenance and inspection. Do not attempt to disassemble and repair the units excluding a qualified technician whom our company recognized. Do not make any modifications to the unit.
(7) Corrective actions for errors CAUTION If an error occurs in the self diagnosis of the Motion controller or servo amplifier, confirm the check details according to the instruction manual, and restore the operation. If a dangerous state is predicted in case of a power failure or product failure, use a servomotor with electromagnetic brakes or install a brake mechanism externally.
CAUTION When replacing the Motion controller or servo amplifier, always set the new module settings correctly. When the Motion controller or absolute value motor has been replaced, carry out a home position return operation using one of the following methods, otherwise position displacement could occur. 1) After writing the servo data to the Motion controller using programming software, switch on the power again, then perform a home position return operation.
REVISIONS The manual number is given on the bottom left of the back cover. Print Date Jan., 2008 Manual Number IB(NA)-0300137-A First edition Revision Japanese Manual Number IB(NA)-0300129 This manual confers no industrial property rights or any rights of any other kind, nor does it confer any patent licenses. Mitsubishi Electric Corporation cannot be held responsible for any problems involving industrial property rights which may occur as a result of using the contents noted in this manual.
INTRODUCTION Thank you for choosing the Mitsubishi Motion controller Q173DCPU/Q172DCPU. Before using the equipment, please read this manual carefully to develop full familiarity with the functions and performance of the Motion controller you have purchased, so as to ensure correct use. CONTENTS Safety Precautions .........................................................................................................................................A- 1 Revisions .............................................
4.2.5 Synchronous encoder axis monitor devices..................................................................................... 4-66 4.2.6 Current value after synchronous encoder axis main shaft's differential gear ................................. 4-67 4.2.7 Cam axis monitor devices................................................................................................................. 4-69 4.2.8 Common devices ....................................................................................
8.3 Rotary Tables ........................................................................................................................................... 8-13 8.3.1 Operation ........................................................................................................................................... 8-13 8.3.2 Parameter list .................................................................................................................................... 8-14 8.4 Cam .....................
About Manuals The following manuals are also related to this product. In necessary, order them by quoting the details in the tables below.
(2) PLC Manual Number (Model Code) Manual Name QCPU User's Manual (Hardware Design, Maintenance and Inspection) This manual explains the specifications of the QCPU modules, power supply modules, base modules, extension cables, memory card battery and others. SH-080483ENG (13JR73) (Optional) QCPU User's Manual (Function Explanation, Program Fundamentals) This manual explains the functions, programming methods and devices and others to create programs with the QCPU.
1 OVERVIEW 1. OVERVIEW 1 1.1 Overview This programming manual describes the dedicated instructions, positioning control parameters and positioning dedicated devices for mechanical system program comprised of a virtual main shaft or mechanical module required to execute the synchronous control in the Motion controller (SV22 virtual mode). The following positioning control is possible in the Motion controller (SV22 virtual mode).
1 OVERVIEW Generic term/Abbreviation Description Battery holder unit Battery holder unit (Q170DBATC) External battery General name for "Q170DBATC" and "Q6BAT" Intelligent function module Abbreviation for "MELSECNET/H module/Ethernet module/CC-Link module/ Serial communication module" (Note-1) : Q172DEX can be used in SV22.
1 OVERVIEW 1.2 Motion Control in SV13/SV22 Real Mode (1) System with servomotor is controlled directly using the servo program in (SV13/SV22) real mode. (2) Setting of the positioning parameter and creation of the servo program/Motion SFC program are required. (3) The procedure of positioning control is shown below: 1) Motion SFC program is requested to start using the D(P). SFCS instruction of the PLC program. (Motion SFC program can also be started automatically by parameter setting.
1 OVERVIEW 1.3 Motion Control in SV22 Virtual Mode (1) Synchronous control with software is performed using the mechanical system program comprised by virtual main shaft and mechanical module in (SV22) virtual mode. (2) Mechanical system programs is required in addition to the positioning parameter, servo program/Motion SFC program used in real mode. (3) The procedure of positioning control in virtual mode is shown below: 1) Motion SFC program for virtual mode is requested to start using the D(P).
2 STARTING UP THE MULTIPLE CPU SYSTEM 2. STARTING UP THE MULTIPLE CPU SYSTEM The procedure for virtual mode positioning control is shown below. 2.1 Starting Up the System The procedure to start up for virtual mode system is shown below. START Install the MT Developer Start the MT Developer Refer to Chapter 3 of the "Q173DCPU/Q172DCPU Motion controller Programming Manual (COMMON).
2 STARTING UP THE MULTIPLE CPU SYSTEM 1) Create the Motion SFC program and servo program Turn the power supply of Multiple CPU system ON Write the following data to the Motion CPU using MT Developer System setting data Servo setting data Motion SFC parameter Motion SFC program Servo program Mechanical system program Cam data (Cam use) Starting up the servo amplifier using MT Developer Execute the JOG operation, manual pulse generator operation and home position return test Adjust cam setting axis (Cam use)
2 STARTING UP THE MULTIPLE CPU SYSTEM 2.2 Differences Between Incremental System and Absolute System The procedure for virtual mode operation is shown below. 2.2.1 Operation for incremental system The operation procedure for incremental system is shown below.
2 STARTING UP THE MULTIPLE CPU SYSTEM 2.2.2 Operation for absolute (absolute position) system The operation procedure for absolute system is shown below.
2 STARTING UP THE MULTIPLE CPU SYSTEM 2.3 Differences Between Real Mode and Virtual Mode Specifications of the positioning data, positioning devices and servo programs, etc. used in the real mode differ in part in the virtual mode. When using them in the virtual mode, refer to the "Q173DCPU/Q172DCPU Motion controller (SV13/SV22) Programming Manual (REAL MODE)" after checking about a different point in the real mode. 2.3.1 Positioning data Positioning data used in the virtual mode are shown in Table 2.
2 STARTING UP THE MULTIPLE CPU SYSTEM 2.3.3 Servo programs (1) Servo program area (a) The same servo program (Kn) No. cannot be used in both the real mode and virtual modes. The range of servo program (Kn) used in the virtual mode must be set using MT Developer in advance.
2 STARTING UP THE MULTIPLE CPU SYSTEM 2.3.4 Control change (Current value change/speed change) When a control change is executed in the virtual mode, the feed current value/speed of the drive module is changed. Control changes are not possible for the output module (except for cam). Differences between control changes in the real mode and virtual modes are shown in Table 2.4 below. Table 2.
2 STARTING UP THE MULTIPLE CPU SYSTEM MEMO 2-8
3 PERFORMANCE SPECIFICATIONS 3. PERFORMANCE SPECIFICATIONS Performance specifications of the Motion CPU are shown in Table 3.1 below. Table 3.
3 PERFORMANCE SPECIFICATIONS Table 3.
4 POSITIONING DEDICATED SIGNALS 4. POSITIONING DEDICATED SIGNALS The internal signals of the Motion CPU and the external signals to the Motion CPU are used as positioning signals. (1) Internal signals The following five devices of the Motion CPU are used as the internal signals of the Motion CPU. • Internal relay (M) .......................... M2000 to M5487 (3488 points) • Special relay (SM) ....................... SM0 to SM2255 (2256 points) • Data register (D) ..........................
4 POSITIONING DEDICATED SIGNALS The positioning dedicated devices are shown below. It indicates the device refresh cycle of the Motion CPU for status signal with the positioning control, and the device fetch cycle of the Motion CPU for command signal with the positioning control. The operation cycle and main cycle of the Motion CPU are shown below. (a) Operation cycle Item Number of control axes Operation cycle (Default) Q173DCPU Up to 32 axes 0.44[ms] / 1 to 4 axes 0.88[ms] / 5 to 12 axes 1.
4 POSITIONING DEDICATED SIGNALS 4.1 Internal Relays (1) Internal relay list Q173DCPU Device No. M0 to M2000 Purpose Q172DCPU Real Virtual Device No. M0 User device (2000 points) to Purpose M2000 to Common device (320 points) M2320 to Unusable (80 points) M2320 M2400 Axis status (20 points 32 axes) Real mode …...
4 POSITIONING DEDICATED SIGNALS POINT (1) Total number of user device points 4704 points (2) (Note-1) : Do not set M4000 to M5487 as the latch range in virtual mode. (3) (Note-2) : This signal occupies only the area of the axis set in the mechanical system program. The unused axis areas in the mechanical system program can be used as an user device. (4) (Note-3) : The cam axis command signal and smoothing clutch complete signal can be set as the optional device at the parameter.
4 POSITIONING DEDICATED SIGNALS (2) Axis status list Axis No. Device No.
4 POSITIONING DEDICATED SIGNALS (3) Axis command signal list Axis No. Device No.
4 POSITIONING DEDICATED SIGNALS (4) Virtual servomotor axis status list Axis No. Device No.
4 POSITIONING DEDICATED SIGNALS (5) Virtual servomotor axis command signal list Axis No. Device No.
4 POSITIONING DEDICATED SIGNALS (6) Synchronous encoder axis status list Axis No. Device No.
4 POSITIONING DEDICATED SIGNALS (8) Common device list Device Signal name No. Refresh cycle M2000 PLC ready flag Fetch cycle Main cycle Signal Remark Device direction (Note-4) No.
4 POSITIONING DEDICATED SIGNALS Common device list (Continued) Device Signal name No. Refresh cycle Fetch cycle Signal Remark Device direction (Note-4) No.
4 POSITIONING DEDICATED SIGNALS Common device list (Continued) Device No. Signal name Refresh cycle Fetch cycle Signal Remark Device direction (Note-4) No.
4 POSITIONING DEDICATED SIGNALS (9) Common device list (Command signal) Device No.
4 POSITIONING DEDICATED SIGNALS 4.1.1 Axis statuses (1) In-position signal (M2402+20n) ............…................... Status signal (a) This signal turns on when the number of droop pulses in the deviation counter becomes below the "in-position range" set in the servo parameters. It turns off at the start. Number of droop pulses In-position range t In-position signal ON (M2402+20n) OFF (b) An in-position check is performed in the following cases. • When the servo power supply is turned on.
4 POSITIONING DEDICATED SIGNALS (b) This signal turns off when the error reset command (M3207+20n) turns on. Error detection ON Error detection signal OFF (M2407+20n) ON Error reset command OFF (M3207+20n) REMARK (Note-1) : Refer to APPENDIX 2 for the error codes with detection of major/minor errors. (4) Servo error detection signal (M2408+20n) ...…...........
4 POSITIONING DEDICATED SIGNALS (b) When using an absolute position system 1) This signal turns on in the following cases: • When not executing a home position return once after system start. • Home position return start in the real mode (Unless a home position return is completed normally, the home position return request signal does not turn off.
4 POSITIONING DEDICATED SIGNALS (b) The state for the upper stroke limit switch input (FLS) when the FLS signal is ON/OFF is shown below. (Note-2) 1) Q172DLX use FLS signal : ON Q172DLX FLS FLS signal : OFF Q172DLX FLS FLS COM 2) Servo amplifier input use COM (Note-3) FLS signal : ON MR-J3- B FLS FLS DI1 FLS signal : OFF MR-J3- B FLS DICOM DI1 DICOM (Note-1): Refer to the "Q173DCPU/Q172DCPU Motion controller Programming Manual (COMMON)" for an external signal.
4 POSITIONING DEDICATED SIGNALS 2) Servo amplifier input use (Note-3) RLS signal : ON MR-J3- B RLS DI2 RLS signal : OFF MR-J3- B RLS DI2 DICOM DICOM (Note-1): Refer to the "Q173DCPU/Q172DCPU Motion controller Programming Manual (COMMON)" for an external signal. (Note-2): Refer to the "Q173DCPU/Q172DCPU User’s Manual" for a pin configuration. (Note-3): Refer to the "MR-J3- B Servo Amplifier Instruction Manual" for a pin configuration. (9) STOP signal (M2413+20n) ....................................
4 POSITIONING DEDICATED SIGNALS 2) Servo amplifier input use (Note-3) DOG/CHANGE signal : OFF MR-J3- B DOG/CHANGE DOG/CHANGE signal : ON MR-J3- B DOG/CHANGE DI3 DI3 DICOM DICOM (Note-1): Refer to the "Q173DCPU/Q172DCPU Motion controller Programming Manual (COMMON)" for an external signal. (Note-2): Refer to the "Q173DCPU/Q172DCPU User’s Manual" for a pin configuration. (Note-3): Refer to the "MR-J3- B Servo Amplifier Instruction Manual" for a pin configuration. (11) Servo ready signal (M2415+20n) .
4 POSITIONING DEDICATED SIGNALS (13) Virtual mode continuation operation disable warning signal (M2418+20n) ..................................................….......
4 POSITIONING DEDICATED SIGNALS 4.1.2 Axis command signals (1) Error reset command (M3207+20n) ..................... Command signal This command is used to clear the minor/major error code storage register of an axis for which the error detection signal has turn on (M2407+20n: ON), and reset the error detection signal (M2407+20n).
4 POSITIONING DEDICATED SIGNALS (b) M3213+20n : OFF • If the drive module is a virtual servomotor or an incremental synchronous encoder, operation will be continued from the current value within 1 virtual axis revolution for the main shaft and auxiliary input axis in the previous virtual mode.
4 POSITIONING DEDICATED SIGNALS (b) M3214+20n : OFF (Final servo command value in previous virtual mode operation) (Current servo current value) (In-position) ……………………….1) • For formula 1) Operation will be continued by making the lower stroke limit value and current value within 1 cam shaft revolution into the lower stroke limit value and current value within 1 cam shaft revolution at the previous virtual mode operation.
4 POSITIONING DEDICATED SIGNALS CAUTION Turn the power supply of the servo amplifier side off before touching a servomotor, such as machine adjustment. (6) Gain changing command (M3216+20n) .......….....Command signal This signal is used to change the gain of servo amplifier in the Motion controller by the gain changing command ON/OFF. • ON .......... Gain changing command ON • OFF ..........
4 POSITIONING DEDICATED SIGNALS POINTS (1) When the servo amplifier is not started (LED: "AA", "Ab", "AC", "Ad" or "AE"), if the control loop changing command is turned ON/OFF, the command becomes invalid. (2) When the followings are operated during the fully closed loop, it returns to the semi closed loop control.
4 POSITIONING DEDICATED SIGNALS 4.1.3 Virtual servomotor axis statuses (1) Positioning start complete signal (M4000+20n) .......…….. Status signal (a) This signal turns on with the start completion for the positioning control of the axis specified with the servo program. It does not turn on at the starting using JOG operation or speed control. It can be used to read a M-code (Note-1) at the positioning start.
4 POSITIONING DEDICATED SIGNALS (2) Positioning complete signal (M4001+20n) ...........…... Status signal (a) This signal turns on with the completion for the positioning control of the axis specified with the servo program. It does not turn on at the start or stop on the way using JOG operation or speed control. It does not turn on at the stop on the way during positioning. It can be used to read a M-code at the positioning completion.
4 POSITIONING DEDICATED SIGNALS (b) Command in-position check is continually executed during position control. This check is not executed during speed control. V Command in-position setting Position control start Speed control start t Command in-position ON (M4003+20n) OFF Execution of command in-position check (4) Speed controlling signal (M4004+20n) ................…....
4 POSITIONING DEDICATED SIGNALS (c) When the error reset command (M4807+20n) turns on in the state where the virtual servomotor or output module connected to the virtual servomotor turns on is normal, the error detection signal turns off. REMARK (Note-1) : Refer to APPENDIX 2.4 for details of the virtual servomotor minor/major error codes. Refer to APPENDIX 2.6 for details of the output module minor/major error codes. (Note-2) : Refer to Section 4.2.
4 POSITIONING DEDICATED SIGNALS 4.1.4 Virtual servomotor axis command signals (1) Stop command (M4800+20n) ...............…............ Command signal (a) This command stops a starting axis from an external source and becomes effective at leading edge of signal. (An axis for which the stop command is turning on cannot be started.
4 POSITIONING DEDICATED SIGNALS (2) Rapid stop command (M4801+20n) ...........…...... Command signal (a) This command stops a starting axis rapidly from an external source and becomes effective at leading edge of signal. (An axis for which the rapid stop command is turning on cannot be started.
4 POSITIONING DEDICATED SIGNALS (3) Forward rotation JOG start command (M4802+20n)/Reverse rotation JOG start command (M4803+20n) ......... Command signal (a) JOG operation to the address increase direction is executed while forward rotation JOG start command (M4802+20n) is turning on. When M4802+20n is turned off, a deceleration stop is executed in the deceleration time set in the parameter block.
4 POSITIONING DEDICATED SIGNALS (5) Error reset command (M4807+20n) ..................... Command signal (a) This command is used to clear the minor/major error code storage register of an axis for which the error detection signal has turn on (M4007+20n : ON), and reset the error detection signal (M4007+20n). (b) The following processing is executed when the error reset command turns on.
4 POSITIONING DEDICATED SIGNALS (7) FIN signal (M4819+20n) ....................................... Command signal When a M-code is set in a servo program, transit to the next block does not execute until the FIN signal changes as follows: OFF ON OFF. Positioning to the next block begins after the FIN signal changes as above. It is effective, only when the FIN acceleration/deceleration is set and FIN signal wait function is selected.
4 POSITIONING DEDICATED SIGNALS 4.1.5 Synchronous encoder axis statuses (1) Error detection signal (M4640+4n) ............................ Status signal (a) This signal turns on when a minor error or major error is detected in a synchronous encoder or output module connected to the synchronous encoder. It is used as judgement of the error available/not available by turning the error detection signal on/off.
4 POSITIONING DEDICATED SIGNALS 4.1.6 Synchronous encoder axis command signals (1) Error reset command (M5440+4n) ....................... Command signal (a) This command is used to clear the minor/major error code storage register of synchronous encoder of an axis for which the error detection signal has turn on (M4640+4n : ON), and reset the error detection signal (M4640+4n). (b) The following processing is executed when the error reset command turns on.
4 POSITIONING DEDICATED SIGNALS 4.1.7 Common devices POINT (1) Internal relays for positioning control are not latched even within the latch range. In this manual, in order to indicate that internal relays for positioning control are not latched, the expression used in this text is "M2000 to M2319". (2) The range devices allocated as internal relays for positioning control cannot be used by the user even if their applications have not been set. (1) PLC ready flag (M2000) ............………….……….
4 POSITIONING DEDICATED SIGNALS V Positioning start Deceleration stop t ON PLC ready flag OFF (M2000) ON PCPU READY OFF complete flag (SM500) PCPU READY complete flag (SM500) does not turn on because during deceleration. Clear a M-code. (d) The following processings are performed when the M2000 turns ON to OFF. 1) Processing details • Turn the PCPU READY complete flag (SM500) off. • Deceleration stop of the starting axis. • Stop to execute the Motion SFC program.
4 POSITIONING DEDICATED SIGNALS (2) Virtual servo start accept flag (M2001 to M2032) .......…….. Status signal (a) This flag turns on when the servo program is started. The start accept flag corresponding to an axis specified with the servo program turns on. (b) The ON/OFF processing of the start accept flag is shown below. 1) When the servo program is started using the Motion SFC program or Motion dedicated PLC instruction (D(P).
4 POSITIONING DEDICATED SIGNALS The start accept flag list is shown below. Axis No. Device No. Axis No. Device No. Axis No. Device No. Axis No. 1 M2001 9 M2009 17 M2017 25 Device No.
4 POSITIONING DEDICATED SIGNALS (a) By turning M2040 on before the starting of the constant speed control (before the servo program is started), control with the change speed can be executed from the first of pass point. • OFF .......... Speed is changed to the specified speed from the pass point of the constant speed control. • ON .......... Speed has been changed to the specified speed at the pass point of the constant speed control.
4 POSITIONING DEDICATED SIGNALS (8) All axes servo ON command (M2042) ......…........ Command signal This command is used to enable servo operation. (a) Servo operation enabled ……M2042 turns on while the servo OFF command (M3215+20n) is off and there is no servo error. (b) Servo operation disable ........
4 POSITIONING DEDICATED SIGNALS (10) Real mode/virtual mode switching status flag (M2044) .........…... Status signal This flag checks the switching completion between the real mode and virtual modes, and the current mode. • This flag turns off with during the real mode or switching completion from the virtual mode to real mode. • This flag turns on with switching completion from the real mode to virtual mode.
4 POSITIONING DEDICATED SIGNALS (13) Motion slot fault detection flag (M2047) .................... Status signal This flag is used as judgement which modules installed in the motion slot of the main base unit is "normal" or "abnormal". • ON................Installing module is abnormal • OFF .............Installing module is normal The module information at the power supply on and after the power supply injection are always checked, and errors are detected.
4 POSITIONING DEDICATED SIGNALS REMARK (Note) : Refer to the "Q173DCPU/Q172DCPU User's Manual" for P1 to P3 connector of the Q173DPX. (17) Operation cycle over flag (M2054) .................…....... Status signal This flag turns on when the time concerning motion operation exceeds the operation cycle of the Motion CPU setting (SD523). Perform the following operation, in making it turn off.
4 POSITIONING DEDICATED SIGNALS (19) Automatic decelerating flag (M2128 to M2159) ….... Status signal This signal turns on while automatic deceleration processing is performed during the positioning control or position follow-up control. (a) This flag turns on while automatic deceleration to the command address at the position follow-up control, but it turns off if the command address is changed.
4 POSITIONING DEDICATED SIGNALS (d) In any of the following cases, this flag does not turn off. • When deceleration due to JOG signal off • During manual pulse generator operation • During deceleration due to stop command or stop cause occurrence • When travel value is 0 V t ON Automatic decelerating flag OFF The automatic decelerating flag list is shown below. Axis No. Device No. Axis No. Device No. Axis No. Device No. Axis No. 1 M2128 9 M2136 17 M2144 25 Device No.
4 POSITIONING DEDICATED SIGNALS The speed change "0" accepting flag list is shown below. Axis No. Device No. Axis No. Device No. Axis No. Device No. Axis No. 1 M2240 9 M2248 17 M2256 25 Device No.
4 POSITIONING DEDICATED SIGNALS (b) The flag turns off if a stop cause occurs after speed change "0" accept. Speed change "0" V Stop cause t Start accept flag ON Speed change "0" accepting flag OFF (c) The speed change "0" accepting flag does not turn on if a speed change "0" occurs after an automatic deceleration start.
4 POSITIONING DEDICATED SIGNALS (21) Control loop monitor status (M2272 to M2303) ............................... Command signal When using the fully closed loop control servo amplifier, this signal is used to check the fully closed loop control/semi closed loop control of servo amplifier. • ON .......... During fully closed loop control • OFF ..........
4 POSITIONING DEDICATED SIGNALS 4.2 Data Registers (1) Data register list Q173DCPU Device No. Purpose Q172DCPU Real D0 to Axis monitor device (20 points 32 axes) Real mode ........... Each axis Virtual mode ........ Output module Virtual Device No. Purpose D0 Axis monitor device (20 points 8 axes) Real mode ........... Each axis Virtual mode ........
4 POSITIONING DEDICATED SIGNALS POINT (1) Total number of points for the user devices 6632 points (2) (Note-1) : This device occupies only the areas of the axes set in the mechanical system program. The unused axis areas in the mechanical system program can be used as an user side. (3) This manual describes only details for data registers used in the virtual mode. If it is required, refer to the "Q173DCPU/Q172DCPU Motion controller (SV13/SV22) Programming Manual (REAL MODE)".
4 POSITIONING DEDICATED SIGNALS (2) Axis monitor device list Axis No. Device No.
4 POSITIONING DEDICATED SIGNALS (3) Control change register list Axis No. Device No.
4 POSITIONING DEDICATED SIGNALS (4) Virtual servomotor axis monitor device list Axis No. Device No. 1 D800 to D809 Signal name 2 D810 to D819 3 D820 to D829 4 D830 to D839 5 D840 to D849 6 D850 to D859 0 7 D860 to D869 1 8 D870 to D879 2 Minor error code 9 D880 to D889 3 Major error code 10 D890 to D899 4 Execute program No. 11 D900 to D909 5 M-code 12 D910 to D919 Virtual Signal name 13 D920 to D929 14 D930 to D939 15 D940 to D949 8 Error search output axis No.
4 POSITIONING DEDICATED SIGNALS (5) Synchronous encoder axis monitor device list Axis No. Device No.
4 POSITIONING DEDICATED SIGNALS (6) Cam axis monitor device list Axis No. Device No. 1 D1240 to D1249 Signal name 2 D1250 to D1259 3 D1260 to D1269 4 D1270 to D1279 5 D1280 to D1289 1 Execute cam No.
4 POSITIONING DEDICATED SIGNALS (7) Common device list Device No. Signal name Refresh cycle Fetch cycle Signal direction Device No.
4 POSITIONING DEDICATED SIGNALS 4.2.1 Axis monitor devices The monitoring data area is used by the Motion CPU to store data such as the feed current value during positioning control, the real current value and the deviation counter value. It can be used to check the positioning control state using the Motion SFC program. The user cannot write data to the monitoring data area (except the travel value change register).
4 POSITIONING DEDICATED SIGNALS (5) Major error code storage register (D7+20n) ...….... Monitor device (a) This register stores the corresponding error code (Refer to APPENDIX 2.4 and 2.6) at the major error occurrence. If another major error occurs after error code storing, the previous error code is overwritten by the new error code. (b) Major error codes can be cleared by an error reset command (M3207+20n). (6) Servo error code storage register (D8+20n) .........
4 POSITIONING DEDICATED SIGNALS 4.2.2 Control change registers This area stores the JOG operation speed data of the virtual servomotor axis. Table 4.
4 POSITIONING DEDICATED SIGNALS 4.2.3 Virtual servomotor axis monitor devices (1) Feed current value storage register (D800+10n) .........….. Monitor device (a) This register stores the target address output to the servo amplifier based on the positioning address/travel value specified with the servo program. (b) The stroke range check is performed on this feed current value data. (c) Ring address is –2147483648 (-231) [PLS] to 2147483647 (231-1) [PLS] in the infinite operation.
4 POSITIONING DEDICATED SIGNALS (3) Major error code storage register (D803+10n) .........….. Monitor device (a) This register stores the corresponding error code (refer to APPENDIX 2.4 and 2.6) at the major error occurrence in the virtual servomotor or output module. If another major error occurs after error code storing, the previous error code is overwritten by the new error code. (b) Major error codes in the virtual servomotor can be cleared by an error reset command (Note-1) of the drive module.
4 POSITIONING DEDICATED SIGNALS 4.2.4 Current value after virtual servomotor axis main shaft's differential gear (1) Current value after virtual servomotor axis main shaft’s differential gear storage register (D806+10n, D807+10n) .........….. Monitor device Differential gear is connected with the main shaft.
4 POSITIONING DEDICATED SIGNALS (2) Error search output axis No. storage register (D808+10n) .........….. Monitor device (a) This register stores the axis No. of the output module in error by the error search function in the virtual mode. (b) If there are no errors at the virtual servomotor axes of the main shaft and auxiliary input axis, the error occurrence output axis No. is stored into the error search output axis No. storage register of the corresponding drive module No.
4 POSITIONING DEDICATED SIGNALS 4.2.5 Synchronous encoder axis monitor devices (1) Current value storage register (D1120+10n, D1121+10n) .........….. Monitor device (a) This register stores the synchronous encoder current value of the drive module. (b) Ring address is "-2147483648 ( -231) to 2147483647 (231-1)" [PLS]. (c) The current value storage register data is also stored in a backup memory at the power supply off or resetting of the Multiple CPU system.
4 POSITIONING DEDICATED SIGNALS 4.2.6 Current value after synchronous encoder axis main shaft's differential gear (1) Current value after synchronous encoder axis main shaft’s differential gear storage registers (D1126+10n, D1127+10n) .........….. Monitor device Differential gear is connected with the main shaft.
4 POSITIONING DEDICATED SIGNALS (2) Error search output axis No. storage register (D1128+10n) .........….. Monitor device (a) This register stores the axis No. of the output module in error by the error search function in the virtual mode. (b) If there are no errors at the virtual servomotor axes of the main shaft and auxiliary input axis, the error occurrence output axis No. is stored into the error search output axis No. storage register of the corresponding drive module No.
4 POSITIONING DEDICATED SIGNALS 4.2.7 Cam axis monitor devices (1) Execute cam No. storage register (D1241+10n) ... Monitor device (a) This register stores the cam No. currently being controlled. (b) Cam No. of the execute cam No. storage register is held until next cam is executed. (Cam No. is not cleared, even if cam control is completed.) (2) Execute stroke amount storage register (D1242+10n, D1243+10n) .........….. Monitor device (a) This register stores the cam No. currently being controlled.
4 POSITIONING DEDICATED SIGNALS 4.2.8 Common devices (1) Common bit device SET/RST request register (D704 to D708, D755 to D757) ..…........….................................... Command device Because cannot be turn on/off in every bit from the PLC CPU, the bit device is assigned to D register, and each bit device turns on with the lowest rank bit 0 to 1 and each bit device becomes off with 1 to 0. The details of request register are shown below. (Refer to Section "4.1.
4 POSITIONING DEDICATED SIGNALS (3) Manual pulse generator axis No. setting registers (D714 to D719) .......... Command signal (a) These registers stores the virtual servomotor axis No. controlled with the manual pulse generator.
4 POSITIONING DEDICATED SIGNALS (b) Refer to Section 6.22 of the "Q173DCPU/Q172DCPU Motion controller (SV13/SV22) Programming Manual (REAL MODE)" for details of the manual pulse generator operation. (5) Manual pulse generator smoothing magnification setting registers (D752 to D754) .................................................... Command device (a) These registers set the smoothing time constants of manual pulse generators.
4 POSITIONING DEDICATED SIGNALS 4.3 Motion registers (#) There are motion registers (#0 to #8735) in the Motion CPU. #8000 to #8639 are used as the monitor device and #8640 to #8735 are used as the Motion SFC dedicated device. Refer to the "Q173DCPU/Q172DCPU Motion Controller (SV13/SV22) Programming Manual (Motion SFC)" for details of the motion registers and Motion SFC dedicated device. (1) Monitor devices (#8000 to #8639) Information for each axis is stored in the monitor devices.
4 POSITIONING DEDICATED SIGNALS (a) Servo amplifier type (#8000+20n) .......................................... Monitor device This register stores the servo amplifier type for each axis at the servo amplifier power supply ON. • 0 .............. Unused • 256 ........... MR-J3-B • 257 ........... MR-J3-B (For fully closed loop control) • 258 ........... MR-J3-B (For Linear control) It is not cleared even if the servo amplifier power supply turns ON. (b) Motor current (#8001+20n) ............................
4 POSITIONING DEDICATED SIGNALS 4.4 Special relays (SM) There are 2256 special relay points of SM0 to SM2255 in the Motion CPU. Of these, 8 points of the SM500 to SM503, SM510, SM512, SM513 and SM516 are used for the positioning control. The special relay list used for the positioning control is shown below. (Refer to "Q173DCPU/Q172DCPU Motion controller programming Manual (COMMON)" for the application of special relays except SM500 to SM503, SM510, SM512, SM513 and SM516.) Table 4.
4 POSITIONING DEDICATED SIGNALS (b) If the test mode is not executed in the test mode request from MT Developer, the TEST mode request error flag (SM510) turns on. (3) External forced stop input flag (SM502) ....………… Status signal This flag is used to check the external forced stop input signal ON/OFF. • OFF ........ External forced stop input ON • ON ........
4 POSITIONING DEDICATED SIGNALS (b) When SM513 turns on, the error contents are stored in the manual pulse generator axis setting error information (SD513 to SD515). (8) Servo program setting error flag (SM516) ...........…... Status signal This flag is used as judgement of normal or abnormal for the servo program positioning data. • OFF ...... Normal • ON ......
4 POSITIONING DEDICATED SIGNALS 4.5 Special registers (SD) There are 2256 special register points of SD0 to SD2255 in the Motion CPU. Of these, 20 points of the SD200, SD500 to SD506, SD508, SD510 to SD517, SD522, SD523 and SD803 are used for the positioning control. The special register list used for the positioning control is shown below.
4 POSITIONING DEDICATED SIGNALS (1) State of switch (SD200) ………………………….. Monitor device The switch state of CPU is stored in the form of the following. b15 b14 b13 b12 b11 b10 b9 b8 b7 b6 b5 b4 b3 b2 b1 b0 SD200 Switch state of CPU 0 : RUN 1 : STOP Memory card switch Always OFF (All setting of each digit is "0".) No used (2) Real mode axis information register (SD500, SD501) ....................................................
4 POSITIONING DEDICATED SIGNALS (a) Servo amplifier mounting status 1) Mounting status • Mounted ..…..... The servo amplifier is normal. (Communication with the servo amplifier is normal.) • Not mounted .... The servo amplifier is not mounted. The servo amplifier power is off. Normal communication with the servo amplifier is not possible due to a connecting cable fault, etc. 2) The system settings and servo amplifier mounting status are shown below. Servo amplifier System Settings Used (axis No.
4 POSITIONING DEDICATED SIGNALS (6) Test mode request error information (SD510, SD511) ........... Monitor device If there are operating axis at a test mode request using MT Developer, a test mode request error occurs, the test mode request error flag (SM510) turns on, and the during operation/stop data of the each axis are stored.
4 POSITIONING DEDICATED SIGNALS (7) Motion CPU WDT error cause (SD512) ……......... Monitor device This register is used as judgement of the error contents in the Motion CPU. Error code 1 Operation when error occurs Error cause Action to take • Reset with the reset key. • If the error reoccurs after resetting, 1) Change the operation cycle into a large value in the system setting. 2) Reduce the number of command execution of the event task or NMI task in the system setting.
4 POSITIONING DEDICATED SIGNALS (8) Manual pulse generator axis setting error information (SD513 to SD515) ..............................................….. Monitor device The setting information is checked at leading edge of manual pulse generator enable signal, if an error is found, the following error information is stored into SD513 to SD515 and the manual pulse generator axis setting error flag (SM513) turns on.
4 POSITIONING DEDICATED SIGNALS (12) Operation cycle of the Motion CPU setting (SD523) .........….. Monitor device The setting operation cycle is stored in [µs] unit. When the "Automatic setting" is set in the system setting, the operation cycle corresponding to the number of setting axes. When "0.44[ms] / 0.8[ms] / 1.7[ms] / 3.5[ms] / 7.1[ms] /14.2[ms]" is set in the system setting, the operation cycle corresponding to each setting.
5 MECHANICAL SYSTEM PROGRAM 5. MECHANICAL SYSTEM PROGRAM This section describes the mechanical system program in the virtual mode. In the mechanical system program (Mechanical support language), what was performing synchronous control by hardware using the gear, shaft, belt, pulley, cam or infinitely variable speed changer, etc. is transposed to software, and same operation control is performed.
5 MECHANICAL SYSTEM PROGRAM 5.1 Mechanical Module Connection Diagram The mechanical module connection diagram shows a virtual system diagram which arranged the mechanical modules and was composed. Configuration of the mechanical module connection is shown in Fig. 5.1 below.
5 MECHANICAL SYSTEM PROGRAM (1) Block The term "block" is one relation from the virtual transmission module (gear) connected to the virtual main shaft to the output module. Refer to Section 5.2 for the number of mechanical modules which can be connected in one block. (2) System The term "system" is a generic term of multiple blocks connected to one virtual main shaft. The number of blocks connectable with one system is up to 32 blocks.
5 MECHANICAL SYSTEM PROGRAM (a) Transmission modules which can be connected at "A" and "B" above 1) A clutch, speed change gear, and "clutch + speed change gear" can be connected at "A" and "B". 2) If a "clutch + speed change gear" are used, connection constraints have not restrictions. Clutch (b) Speed change gear Clutch Speed change gear Speed change gear Clutch Transmission module which can be connected at "C" (pattern 3) Only a clutch can be connected at "C".
5 MECHANICAL SYSTEM PROGRAM 5.2 Mechanical Module List An overview of the mechanical modules used at the mechanical module connection diagrams in the virtual mode is shown in Tables 5.1. Refer to Chapter 6 to 8 for details of the each mechanical module. Table 5.
5 MECHANICAL SYSTEM PROGRAM MEMO 5-6
6 DRIVE MODULE 6. DRIVE MODULE The drive module is the source of drive for the virtual axis (virtual main shaft, virtual auxiliary input axis). There are following 2 types drive module. • Virtual servomotor ....................... Refer to Section 6.1 • Synchronous encoder ................. Refer to Section 6.2 6.1 Virtual Servomotor The virtual servomotor is used to operate the virtual axis (virtual main shaft, virtual auxiliary input axis) using the servo program or JOG operation.
6 DRIVE MODULE (b) Start using the JOG operation An individual start and simultaneous start can be executed in the JOG operation (Note-1). 1) Individual start .......It is started by turning on the forward/reverse JOG command (Note-2) of each axis. Motion SFC program for which executes the JOG operation is shown below. Virtual axis1 individual start program JOG operation - Individual start F10 Set the JOG operation speed to D640, D641.
6 DRIVE MODULE 2) Simultaneous start .......The simultaneous start axis No. and directions (forward/reverse) are set by the JOG operation simultaneous start axis setting register (D710 to D713) (Note-3), and it is started by turning on the JOG operation simultaneous start command flag (M2048) (Note-3). Virtual axis 1, 2 simultaneous program Simultaneous start When the 2 axes simultaneous start switch (PX000) turn on, the following JOG operation is executed with speed of 150000 [mm/min].
6 DRIVE MODULE (3) Stopping method during operation When the virtual servomotor is stopped during operation after the start, turn the stop command (M4800+20n)/rapid stop command (M4801+20n) on using the Motion SFC program. (There are no external stop causes (STOP, FLS, RLS) for the virtual servomotor.) (4) Control items (a) It is controlled as the virtual servomotor backlash compensation amount "0" at the positioning control.
6 DRIVE MODULE (6) Error-time operation mode The processings are shown below when major errors occurred with the output modules per 1 system. The following control is executed based on the parameter settings (Refer to Section 6.1.2) of the virtual servomotor connected to the virtual main shaft. (a) Continuation Even if a major error occurs with the output module, the output module continues operation.
6 DRIVE MODULE (7) Virtual servomotor axis infinite operation By setting the upper stroke limit value and lower stroke limit value of the virtual servomotor parameters such that the "upper stroke limit value = lower stroke limit value", the stroke limit becomes invalid and infinite operation becomes possible. When the stroke limit is invalid, it is also possible for the start of the feed current value to take place in a direction that exceeds 32 bits.
6 DRIVE MODULE (8) Reverse return during positioning By specifying a negative speed and making a speed change request by the CHGV instruction during the start, allow the axis start deceleration at that point and return in the opposite direction upon completion of deceleration. The following operations by the servo instruction are shown below.
6 DRIVE MODULE [Control contents] (1) If a speed change is made to a negative speed, control is executed with the control mode during the start as indicated in the front page. (2) The returning command speed is the absolute value of the change speed. If it exceeds the speed limit value, the minor error [305] occurs, and it is controlled the speed limit value. (3) When the axis is waiting at the return position (a) Signal states • Start accept (M2001+n)………………………..
6 DRIVE MODULE [Operation at the constant-speed control] The operation when a reverse return is requested for the constant-speed control is shown below.
6 DRIVE MODULE POINT • Precautions at speed change (1) A speed change may be invalid if the speed change is executed until the "positioning start complete signal" status changes to ON at servo program start request . When making a speed change at almost the same timing as a start, create a program to execute speed change after the "positioning start complete signal" has turned on.
6 DRIVE MODULE 6.1.2 Parameter list The virtual servomotor parameters are shown in Table 6.1 and the parameters shown in this table are explained in items (1) to (4) below. Refer to the help of MT Developer for the parameter setting method of virtual servomotor. A parameter is requested except for the above for program operation of the virtual servomotor. Refer to the item (5) for precautions of the parameter blocks. Table 6.1 Virtual Servomotor Parameter List No.
6 DRIVE MODULE Error code 106 Contents Operation Command position is outside the stroke limit range at Operation does not start. start. Error code 207 208 220 Contents Operation Feed current value is outside the stroke limit range during start. Feed current value of another axis is outside the stroke limit range at the circular interpolation start. Deceleration stop.
6 DRIVE MODULE (3) Command in-position range The command in-position is the difference between the positioning address (command position) and feed current value. Once the value for the command in-position has been set, the command inposition signal (M2403 + 20n) turns on when the difference between the command position and the feed current value enters the set range [(command position - feed current value) (command in-position range)].
6 DRIVE MODULE POINT (1) Unit is fixed at [PLS] regardless of the interpolation control unit setting of parameter block in the JOG operation. (2) Even if the JOG speed of virtual servomotor is within the JOG speed restriction, when the JOG speed has not satisfied the condition "(Command speed [PLS/s]) (Operation cycle [ms]) (Number of input side gear teeth) < 2147483647 103", the speed of output module becomes abnormal. Be sure to use within the range of above conditional expression.
6 DRIVE MODULE (5) The parameter block No. for the program operation of virtual servomotor is set in the servo program for virtual mode. (If the parameter block No. setting is omitted, it is controlled with the contents of parameter block No.1.) The valid parameter block data are shown below.
6 DRIVE MODULE 6.1.3 Virtual servomotor axis devices (Internal relays, data registers) (1) Virtual servomotor axis status Refer to Section 4.1.3 for details of the virtual servomotor axis statuses. (2) Virtual servomotor axis command signal Refer to Section 4.1.4 for details of the virtual servomotor axis command signals. (3) Virtual servomotor axis monitor device Refer to Section 4.2.3 for details of the virtual servomotor axis monitor devices.
6 DRIVE MODULE 6.2 Synchronous Encoder The synchronous encoder is used to operate the virtual axis (virtual main shaft, virtual auxiliary input axis) with the external input pulse. Synchronous encoder operation and parameters are shown below. 6.2.1 Operation description (1) Operations Although a synchronous encoder does not need to start using the servo program etc.
6 DRIVE MODULE 2) When the input pulse is inputted from an external synchronous encoder. a) The input pulse is started to input from the external synchronous encoder, when the clutch is switched on.
6 DRIVE MODULE REMARK (Note-1) : Refer to Section 4.1.7 (9) (10) for details of the real mode/virtual mode switching request flag and real mode/virtual mode switching status flag. Refer to Chapter 9 for switching from real mode to virtual mode. (Note-2) : The synchronous encoder input start signal is inputted to the Q173DPX "TREN" terminal. Refer to the "Q173DCPU/Q172DCPU User's Manual" for details of the Q173DPX "TREN" terminal. (Note-3) : Refer to Section 7.2.1 for details of the clutch control mode.
6 DRIVE MODULE (f) Error-time operation mode The processings are shown below when major errors occurred with the output modules per 1 system. The following control is executed based on the parameter settings (Refer to Table 6.2) of the synchronous encoder connected to the virtual main shaft. 1) Continuation Even if a major error occurs with the output module, the output module continues operation.
6 DRIVE MODULE 6.2.2 Parameter list The synchronous encoder parameters are shown in Table 6.2 and the parameters shown in this table are explained in items (1) below. Refer to the help of MT Developer for the parameter setting method of synchronous encoder. Table 6.2 Synchronous Encoder Parameter List No. Setting item Default value 1 Synchronous encoder No.
6 DRIVE MODULE 6.2.3 Synchronous encoder axis devices (Internal relays, data registers) (1) Synchronous encoder axis status Refer to Section 4.1.5 for details of the synchronous encoder axis statuses. (2) Synchronous encoder axis command signal Refer to Section 4.1.6 for details of the synchronous encoder axis command signals. (3) Synchronous encoder axis monitor device Refer to Section 4.2.5 for details of the synchronous encoder axis monitor devices.
6 DRIVE MODULE 6.3 Virtual Servomotor/Synchronous Encoder Control Change The current value change and JOG speed change of the virtual servomotor and the current value of synchronous encoder. Refer to the "Q173DCPU/Q172DCPU Motion controller (SV13/SV22) Programming Manual (Motion SFC)" for details of the current value change/speed change. 6.3.1 Virtual servomotor control change (1) Control change registers Axis No. Device No.
6 DRIVE MODULE (a) JOG speed setting registers (D640+2n, D641+2n) ...…….. Command device 1) This register stores the JOG speed at the JOG operation. 2) Setting range of the JOG speed is 1 to 2147483647 [PLS/s]. 3) The JOG speed is the value stored in the JOG speed setting registers at leading edge of JOG start signal. Even if data is changed during JOG operation, JOG speed cannot be changed. (Note) : Refer to Section 6.
6 DRIVE MODULE 6.3.2 Synchronous encoder control change (1) Current value change by the CHGA-E instruction Motion SFC program for which executes the servo program is shown below. Current value change CHGA-E Current value change G10 PX000*M2043*M2044*!M2101 K10 CHGA-E Axis 1, 20000PLS G20 Wait until PX000, real mode/virtual mode switching request and switching status turn on, and current value changing flag turns off. Synchronous encoder axis current value change control. Used axis . . . . . . . . . . .
6 DRIVE MODULE MEMO 6 - 26
7 TRANSMISSION MODULE 7. TRANSMISSION MODULE The transmission module transmits the pulse outputted from the drive module to output module. There are following 4 types transmission modules. • Gear .................................. Section 7.1 • Clutch ................................ Section 7.2 • Speed change gear .......... Section 7.3 • Differential gear ................ Section 7.
7 TRANSMISSION MODULE (2) Device data input The all device data set indirectly is inputted as "initial value" at the switching from real mode to virtual mode, thereafter the input control for module is executed during the virtual mode operation. The input timing of each setting device and refresh cycle of setting device are shown below.
7 TRANSMISSION MODULE 7.1 Gear This section describes the gear operation and the parameters required to use a gear. 7.1.1 Operation Relation between the number of pulses outputted from the synchronous encoder or virtual servomotor and the output module is adjusted by parameter setting of the encoder resolution of servomotor, the gear ratio in consideration of the deceleration ratio for machine system etc. and rotation direction. The gear operation is shown below.
7 TRANSMISSION MODULE (1) Gear ratio (a) The number of pulses transmitted to the output axis through 1 pulse outputted from the drive module by the gear module is set in the gear ratio. (b) The gear ratio is based on the settings for the input axis side tooth count (GI) and output axis side tooth count (GO).
7 TRANSMISSION MODULE 7.2 Clutch The clutch is used to transmit/disengage the command pulse from drive module side to output module side, and to control the operation/stop of servomotor. There are two types for clutch: smoothing clutch and direct clutch. These two clutches operate in the same way, but these have the difference in whether the acceleration/deceleration processing by the smoothing processing is executed or not at the switching of the clutch on/off.
7 TRANSMISSION MODULE REMARK (1) Clutch ON/OFF state is shown below. Input side (Input axis) to the clutch Clutch Output axis • Clutch ON state..........The state in which pulses inputted to the clutch are output to the output axis. • Clutch OFF state........The state in which pulses inputted to the clutch are not output to the output axis. (2) Smoothing processing (a) Time constant system 1) Since the time constant is fixed, the slippage of clutch changes according to the speed of drive module.
7 TRANSMISSION MODULE 2) If input to clutch (travel value after the main shaft's differential gear) changes after smoothing completion, the smoothing processing is executed at that point.
7 TRANSMISSION MODULE b) Since the slippage remains constant even if the drive module speed changes, the clutch ON/OFF position can be controlled without any influence from speed changes.
7 TRANSMISSION MODULE 2) Linear acceleration/deceleration system a) Set the slippage indicated by the shaded area in the diagram below. Slippage is recommended to be set greater than input to clutch (travel value after the main shaft's differential gear). V Input to clutch Slippage [PLS] t ON Clutch status OFF b) Execute the smoothing processing so that the slippage may become the shaded area by the linear acceleration/deceleration system at clutch ON/OFF.
7 TRANSMISSION MODULE d) If input to clutch (travel value after the main shaft's differential gear) changes after smoothing completion, the smoothing processing is not executed and output directly. V Input to clutch Travel value after the main shaft's differential gear t Internal clutch status V Slippage [PLS] Output to output axis by the smoothing clutch for linear acceleration/ deceleration system Slippage [PLS] Smoothing processing is not executed.
7 TRANSMISSION MODULE 7.2.1 Operation There are following five clutch operation modes. Operation mode ON/OFF mode Description Clutch ON/OFF control is executed by turning the clutch ON/OFF command device on/off. Clutch ON/OFF control is executed by turning the clutch ON/OFF Address mode command device on/off and an address of clutch ON/OFF address setting device. Address mode 2 After clutch ON/OFF command device turns on, Clutch ON/OFF control by an address of clutch ON/OFF address setting device.
7 TRANSMISSION MODULE (d) The refresh cycle of clutch status signal is an operation cycle. ON Clutch ON/OFF command device (Note) OFF ON Clutch status signal OFF Maximum 1 operation cycle Maximum 1 operation cycle Current value of virtual axis (input axis) Maximum 1 operation cycle Continuance from current value at clutch OFF Current value of output axis Clutch OFF state Clutch ON state Clutch OFF state Continuance from current value at clutch OFF (Note) : Refer to Section "7.2.
7 TRANSMISSION MODULE (c) Turn the clutch ON/OFF command device on/off after setting an address of clutch ON/OFF address setting device. 1) When the clutch ON/OFF command device is OFF, even if the current value of virtual axis reaches an address of clutch ON address setting device, the clutch is not set to the ON state. 2) When the clutch ON/OFF command device is ON, even if the current value of virtual axis reaches an address of clutch OFF address setting device, the clutch is not set to the OFF state.
7 TRANSMISSION MODULE (3) Address mode 2 (a) When the current value of virtual axis reaches an address of clutch ON/OFF address setting device, the clutch ON/OFF is executed. (Mode setting device is "2".) (b) When the clutch ON/OFF command device is ON, the following controls are executed according to the current clutch status. 1) When the current clutch status is OFF. When the current value of virtual axis reaches an address set in the clutch ON address setting device, the clutch is set to the ON state.
7 TRANSMISSION MODULE (d) The clutch ON/OFF control is executed for every operation cycle. When the current value passes through an address set in the clutch ON/OFF address setting device for 1 operation cycle, the internal control is executed correctly but the clutch status signal does not change. 1) When the clutch status signal is OFF and the current value passes through an address set in the clutch ON/OFF address setting device.
7 TRANSMISSION MODULE (f) The procedure to execute the axis servo OFF or power supply OFF of servo amplifier during operation is shown below. 1) Turn the clutch ON/OFF command device off. The clutch status is set to the OFF state. After that, the axis servo OFF command becomes valid. 2) Execute the axis servo OFF command or the power supply OFF of servo amplifier. (g) The procedure to resume an operation after the axis servo OFF or power supply OFF of servo amplifier during operation is shown below.
7 TRANSMISSION MODULE (c) When the mode setting device is "4", the clutch ON/OFF command device becomes invalid, and the clutch remains OFF. However, when the mode setting device is changed from "3" to "4" during execution of clutch ON/OFF processing by turning the clutch ON/OFF command device on, the clutch ON/OFF processing in execution is executed till the end and the next clutch ON/OFF command or later becomes invalid.
7 TRANSMISSION MODULE POINT (1) The mode setting device of except for "0 to 4" is regarded as an error, and control is continued at the previous setting value. (2) Clutch control mode changes are valid at any time. (3) Clutch ON/OFF address setting device changes are valid at any time. Since they have 2-word data, set it as 32-bit integer type data. (e) The clutch ON/OFF control is executed for every operation cycle.
7 TRANSMISSION MODULE (g) When the mode setting device becomes "3", the clutch status turns OFF, while the clutch ON/OFF command device is OFF and the clutch status is ON. Mode setting device value 3 Drive module current value Clutch ON/OFF OFF command device (Note) ON Clutch status OFF (Note) : Refer to Section "7.2.2 Parameters" for details. (h) When the mode setting device is changed from "except 3" to "4", the clutch status turns off regardless of the clutch ON/OFF command device.
7 TRANSMISSION MODULE (l) When the travel direction of drive module changes during the clutch ON/OFF processing by turning the clutch ON/OFF command device on, the clutch ON/OFF control is executed at the position in which not the travel value of drive module but the setting travel value before clutch ON/ setting travel value after clutch ON to the position where the clutch ON command is given was added.
7 TRANSMISSION MODULE (o) When the "Clutch OFF" is set in the parameter "Error-time operation mode" of drive module and a major error occurs in the output module, the operating system software turns off the clutch. The procedure to resume an operation after an error occurrence is shown below. 1) Remove a major error factor. 2) Turn the clutch ON/OFF command device off. It returns to normal state. 3) Turn the clutch ON/OFF command device on. The clutch control of one-shot mode is resumed.
7 TRANSMISSION MODULE (b) Turn the external input (TREN signal) on after turning the clutch ON/OFF command device on. In this mode, a time for maximum 2 operation cycles is required to turn the external input on after the clutch ON/OFF command device turns on. 1) If the external input turns from off to on when the clutch ON/OFF command device is OFF, the clutch is not set to the ON state. 2) If the clutch ON/OFF device turns on when the external input is ON, the clutch is not set to the ON state.
7 TRANSMISSION MODULE (f) A synchronous encoder, external input and external input mode clutch can be set in only 1:1 ratio. The relationship between the synchronous encoder and external input is shown in the table below. Synchronous External input Synchronous External input encoder No. (TREN signal) encoder No.
7 TRANSMISSION MODULE < Example 2 > Same synchronous encoder is connected to auxiliary input axis Set all the clutches connected to the same synchronous encoder set to the external input mode. (Also set clutch ON/OFF devices to the same setting.) Synchronous encoder No.1 Set both to external input mode. (Also set clutch ON/OFF device to the same setting.) Synchronous encoder No.
7 TRANSMISSION MODULE 7.2.2 Parameters The clutch parameters are shown in Table 7.2 and the parameters shown in this table are explained in items (1) to (11) below. Refer to the help of MT Developer for the clutch parameter setting. Table 7.2 Clutch Parameter List No.
7 TRANSMISSION MODULE (b) If a synchronous encoder is used as the drive module, the operation modes that can be set differ depending on the encoder interface connected to the Q173DPX/Q172DEX.
7 TRANSMISSION MODULE (3) Clutch ON/OFF command device (a) This device is used to execute the clutch ON/OFF command. (b) The following devices can be used as the clutch ON/OFF command device. Name Setting range Input X0 to X1FFF Output Y0 to Y1FFF Internal relay M0 to M8191 (Note-1) Link relay B0 to B1FFF Annunciator F0 to F2047 Multiple CPU area device U \G10000.0 to U \G(10000+p-1).
7 TRANSMISSION MODULE (5) Clutch ON/OFF address setting device (only ON/OFF mode, address mode, address mode 2 and one-shot mode combined use, 2 words) (a) This device is used to set an address to turn the clutch on/off in the address mode. (b) The following devices can be used as the clutch ON/OFF address setting devices.
7 TRANSMISSION MODULE (6) Smoothing method (a) The method for smoothing processing of the clutch is set. The following two methods can be set: • Time constant system • Slippage system Exponential function system Linear acceleration/deceleration system (b) Refer to Section 7.2 for each system operation. (7) Smoothing time constant This is the time taken to reach 63[%] of the output axis speed. (8) Slippage setting device (2 words) (a) This device is used to set the slippage of clutch.
7 TRANSMISSION MODULE (9) Slippage in-position range setting device (2 words) (a) This device is used to set the remainder slippage range for judge as smoothing completion. (b) The following devices can be used as the slippage in-position range setting device. Name Data register Link register Setting range (Note-1) D0 to D8191 (Note-2) W0 to W1FFF Motion register #0 to #7999 Multiple CPU area device U \G10000 to U \G(10000+p-1) (Note-3) (Note-1) : Set an even number as the first device.
7 TRANSMISSION MODULE (d) When "(Remainder slippage) < (Slippage in-position range)" is set, the smoothing clutch complete signal turns on. The smoothing clutch complete signal ON/OFF is refreshed by the operation cycle. 1) ON/OFF state of smoothing clutch is indicated. (Only exponential function system and linear acceleration/deceleration system are valid.) • ON ….."(Remainder slippage) < (Slippage in-position range)" • OFF….
7 TRANSMISSION MODULE b) Linear acceleration/deceleration system V Input to clutch Travel value after main shaft's differential gear t Internal clutch status OFF by smoothing ON by acceleration clutch start smoothing completion Smoothing clutch complete signal Output of output axis by slippage smoothing clutch OFF by smoothing ON by deceleration clutch start smoothing completion ON by acceleration smoothing completion V Slippage in-position range Slippage in-position range t Acceleration smoothing c
7 TRANSMISSION MODULE (10) Address mode clutch control system (a) When a clutch is turned on by the setting value of ON/OFF address setting device in the address mode/address mode 2, the current value (current value within 1 virtual axis revolution/current value of virtual axis) of virtual axis to be used is selected. 1) Current value within 1 virtual axis revolution ….. The ON/OFF control is executed by the current value within 1 virtual axis revolution system. 2) Current value of virtual axis …..
7 TRANSMISSION MODULE 7.3 Speed Change Gear Speed change gear is used to change the rotation speed to output module and travel value during operation. The operation of speed change gear and parameters required to use it are shown below. 7.3.1 Operation This section describes the operation of speed change gear. (1) The speed that the input axis speed multiplied by a speed change ratio set in the speed change ratio setting device is transmitted to output axis.
7 TRANSMISSION MODULE (2) When a speed change ratio changes, the acceleration/deceleration processing is executed by the smoothing time constant (t) set in the speed change gear parameters. V Input axis t Speed change ratio 10000 2500 8000 Operation cycle V C Operation cycle D Output axis A B E F t t= A B 100 t= A Time until it becomes t = B C D 100 100 = C D t= 100 = E F E F 100 100 = 63[%] 7.3.2 Parameters The speed change gear parameters are shown in Table 7.
7 TRANSMISSION MODULE (1) Speed change ratio upper/lower limit value (a) The validate range (0.00 to 655.35[%]) of speed change ratio set in the speed change ratio setting device is set. (b) When the setting value of speed change ratio setting device is greater than the speed change ratio upper limit value, an operation is executed by a speed change ratio clamped at the upper limit value.
7 TRANSMISSION MODULE 7.4 Differential Gear The differential gear is used for the following purposes; • Output module phase is shifted or alignment of operation start position is executed. • Individual operation separated from the virtual main shaft is executed. 7.4.1 Operation (1) When the output module phase is shifted or alignment of the operation start position is executed. (a) When the input axis clutch turned on.
7 TRANSMISSION MODULE MEMO 7 - 38
8 OUTPUT MODULE 8. OUTPUT MODULE The command pulse output from drive module is input to output module via the transmission module. The travel value of servomotor is controlled by the command pulse from output module. There are following four output modules. The parameters in accordance with that mechanism is set if necessary. • Roller.................... Section 8.1 • Ball screw............. Section 8.2 • Rotary table.......... Section 8.3 • Cam ..................... Section 8.
8 OUTPUT MODULE (2) Device range of output module parameters and device data input The device range and setting method of items set in the indirect setting by devices among the output module parameters are shown below. (a) Device range The number of device words and device range in the indirect setting are shown below.
8 OUTPUT MODULE POINT (1) Be sure to set an even-numbered device for the items set as 2-word. And, when the data is set to device in the Motion SFC program, set it as 32-bit integer type. (2) When a 2-word monitor device is read in the Motion SFC program, read it as 32-bit integer type. (3) Refer to Chapter 2 of the "Q173DCPU/Q172DCPU Motion controller Programming Manual (COMMON)" for the user setting area points of the Multiple CPU high speed transmission area.
8 OUTPUT MODULE REMARK (Note) : The operation cycle is set in the "operation cycle setting" of system basic setting. Refer to the "Q173DCPU/Q172DCPU Motion controller Programming Manual (COMMON)" for details. The operation cycle of Motion CPU is shown below. Item Q173DCPU Q172DCPU Up to 32 axes Up to 8 axes 0.44[ms] / 1 to 4 axes 0.88[ms] / 5 to 12 axes 1.77[ms] / 13 to 28 axes 3.55[ms] / 29 to 32 axes 0.44[ms] / 1 to 4 axes 0.
8 OUTPUT MODULE 8.1 Rollers The rollers are used in the following cases. • The machine connected to the servomotor is operated continuously. • The system which does not need position control. (It is used when the speed control (cycle speed/number of rotations) mainly is controlled without the current value and position data.) This section describes the roller operation and parameters required to use a roller. 8.1.
8 OUTPUT MODULE (2) Control details (a) The roller has no current value. However, when it switches from the virtual mode to real mode, it reaches the current value corresponding to the position moved in the virtual mode. • The current value is a ring address within the range of -2147483648 (-231) to 2147483647 (231-1) [PLS]. (231-1) Current value -231 (b) Backlash compensation processing is continued with the settings value of fixed parameters even if it switches the real mode/virtual mode.
8 OUTPUT MODULE (2) Roller diameter (L)/Number of pulses per roller revolution (NL) (a) The roller diameter connected to servomotor and the number of pulses per roller revolution are displayed. Number of pulses per roller revolution (NL) Roller diameter (L) (b) The roller cycle speed is calculated by the roller diameter and number of pulses per roller revolution as the formula below.
8 OUTPUT MODULE (c) When the roller axis speed exceeds the speed limit value, the error detection signal (M2407+20n) turns on. However, the roller axis speed is not clamped. Even if the speed limit value is exceeded, it controls with the setting speed. V Speed limit value t (5) Torque limit value setting device (1 word) (a) This device is used to set the torque limit value of roller axis. When the device is set, the torque control is executed with the preset device value.
8 OUTPUT MODULE 8.2 Ball Screw The ball screw is used to make a machine connected to servomotor operate linearly. This section describes the ball screw operation and parameters required to use ball screws. 8.2.1 Operation (1) Operation (a) The ball screw is controlled with the speed that the speed/travel value of drive module multiplied by a gear ratio of transmission module, and the travel value is output.
8 OUTPUT MODULE 8.2.2 Parameter list The ball screw parameters are shown in Table 8.2 and the parameters shown in this table are explained in items (1) to (7) below. Refer to the help of MT Developer for the ball screw parameter setting method. Table 8.2 Ball Screw Parameter List No. Setting Item 1 Output axis No. 2 Output unit 3 Ball screw pith (P) 4 Default Setting range Q173DCPU : 1 to 32 0 Q172DCPU : 1 to 8 mm mm inch Must be not set. It is controlled with the fixed parameter.
8 OUTPUT MODULE (3) Permissible droop pulse value (a) This device is used to set the permissible droop pulse value of deviation counter. (b) The deviation counter value is continually checked, and if it becomes larger than the permissible droop pulse value, the error detection signal (M2407+20n) turns on. However, since the ball screw axis operation continues, execute the error processing by user side. (4) Upper/lower stroke limit value (a) This device is used to set the stroke range in the virtual mode.
8 OUTPUT MODULE (6) Torque limit value setting device (1 word) (a) This device is used to set the torque limit value of ball screw axis. When the device is set, the torque control is executed with the preset device value. In the virtual mode, the torque limit setting is always valid. If the device is not set, the torque limit is set at 300[%]. (b) The following devices can be set as the torque limit value setting device.
8 OUTPUT MODULE 8.3 Rotary Tables The rotary table is used to make a machine connected to servomotor gyrate. This section describes the rotary table operation and parameters required to use rotary table. 8.3.1 Operation (1) Operation (a) The rotary table is controlled with the speed that the speed/travel value of drive module multiplied by a gear ratio of transmission module, and the travel value is output.
8 OUTPUT MODULE 8.3.2 Parameter list The rotary table parameters are shown in Table 8.3 and the parameters shown in this table are explained in items (1) to (8) below. Refer to the help of MT Developer for the rotary table parameter setting method. Table 8.3 Rotary Table Parameter List No. 1 2 Setting Item Default Output axis No. Setting range Q173DCPU : 1 to 32 0 Q172DCPU : 1 to 8 Must be not set. Number of pulses per rotary It is controlled with the fixed parameter.
8 OUTPUT MODULE (b) The travel value per pulse is calculated from the number of pulses per rotary table revolution in accordance with the following formula: [Travel value per pulse] = 360 ND [degree] (2) Permissible droop pulse value (a) This device is used to set the permissible droop pulse value of deviation counter. (b) The deviation counter value is continually checked, and if it becomes larger than the permissible droop pulse value, the error detection signal (M2407+20n) turns on.
8 OUTPUT MODULE (5) Torque limit value setting device (1 word) (a) This device is used to set the torque limit value of rotary table axis. When the device is set, the torque control is executed with the preset device value. In the virtual mode, the torque limit setting is always valid. If the device is not set, the torque limit is set at 300[%]. (b) The following devices can be set as the torque limit value setting device.
8 OUTPUT MODULE (b) The following devices can be set as the current value within 1 virtual axis revolution storage device. Name Data register Link register Setting range (Note-1) D0 to D8191 (Note-2) W0 to W1FFF Motion register #0 to #7999 Multiple CPU area device U \G10000 to U \G(10000+p-1) (Note-3), (Note-4) (Note-1) : Set an even number at the first device.
8 OUTPUT MODULE (f) An example of an address mode clutch operation is shown below. Operation example Set the clutch ON/OFF in this current value (Current value within 1 virtual axis revolution). 1 axis Number of pulses per revolution : 20000[PLS] 1 axis Virtual servomotor current value (Synchronous encoder) Current value within 1 virtual axis revolution 0 0 10000 0 10000 0 20000 Set the clutch status Clutch ON address = 0 Clutch OFF address = 10000 359.
8 OUTPUT MODULE (b) The following devices can be set as the current value within 1 virtual axis revolution storage device. Name Data register Link register Setting range (Note-1) D0 to D8191 (Note-2) W0 to W1FFF Motion register #0 to #7999 Multiple CPU area device U \G 10000 to U \G (10000+p-1) (Note-3), (Note-4) (Note-1) : Set an even number at the first device.
8 OUTPUT MODULE (f) An example of an address mode clutch operation is shown below. Operation example Main shaft side clutch OFF Set the clutch ON/OFF in this current value.
8 OUTPUT MODULE 8.4 Cam Cam is used to make a machine connected to servomotor operate according to the preset cam pattern. (1) For axes at which the cam is set as the output module, the same operation as a cam is executed using a ball screw as shown in the example below.
8 OUTPUT MODULE 8.4.1 Operation This section describes the cam operation. (1) Procedure for switching from the real mode to virtual mode Set the devices by the following procedure using the Motion SFC program at the switching from real mode to virtual mode. (a) Set the following details. • Set the cam No. and stroke amount in the "cam No. setting device" and "stroke amount setting device" set in the each cam shaft parameters.
8 OUTPUT MODULE < Example > Switching between cam No.1 and No.2, and switching timing between stroke amount I1 and I2 when the stroke amount/cam No. change point is set as "0". Current value within 1 cam shaft revolution [PLS] Nc : Number of pulses within 1 cam shaft revolution Nc-1, 0 Nc-1, 0 Nc-1, 0 1 cycle Cam No. setting device value 1 Stroke amount setting device l1 Execute cam No. 1 Execute stroke amount l1 2 l2 2 l2 (c) Error causes at the changing stroke amount/cam No.
8 OUTPUT MODULE (5) Control details (a) The cam feed current value is continued at switching from the real mode to virtual mode/from the virtual mode to real mode. (b) Backlash compensation processing is continued with the settings value of fixed parameters, even if switches the real mode/virtual mode. (c) Upper/lower stroke limit value and speed limit value are not checked.
8 OUTPUT MODULE (7) Program example [Switching real mode/virtual mode] Motion SFC program for switching real mode/virtual mode is shown below. Switching real mode/virtual mode example Switching real mode/virtual mode G10 PX000 turn on, and real mode/virtual mode switching request and switching status turn off. PX000*!M2043*!M2044 F10 D2000=K1 D2002L=K50000 SET M3214 SET M2043 Cam No.
8 OUTPUT MODULE (1) Cam No. This device is used to set the number allocated in created cam data. The number of cam data is set "1 to 64" for each machine. A cam No. is used with the number which offset value attached by the machine name sequence registered on mechanical system editing screen in the mechanical system program. Machine name sequence Setting cam No.
8 OUTPUT MODULE Operation example Cam pattern 32767 Output value (Address) Stroke amount 0 0 1 cycle Lower stroke limit value Resolution-1 Stroke amount (1 cam shaft revolution) Lower stroke limit value t V t 2) Feed cam mode .............With the lower stroke limit value (lower dead point) as the operation start position, positioning is executed by feeding one stroke amount per cycle in a fixed direction.
8 OUTPUT MODULE (5) Cam data table (a) This device is used to set the each point stroke ratio (when the stroke amount is divided into 32767 divisions) in the set resolution. Output value (Address) 32767 Stroke amount Lower stroke limit value (Lower dead point) (0) Cam curve Stroke ratio t 0 1 cycle (b) The cam data table is automatically created by creating the cam curve using MT Developer. The cam curves which can be used in the Motion CPU are shown in Section 8.4.4.
8 OUTPUT MODULE 8.4.3 Parameter list The cam parameters are shown in Table 8.5 and the parameters No.2 to No.12 shown in this table are explained in items (1) to (11) below. Refer to the help of MT Developer for the cam parameter setting method. Table 8.5 Cam Parameter List No. 1 2 Setting item Output axis No.
8 OUTPUT MODULE (1) Number of pulses per cam shaft revolution (Nc) (a) The number of pulses required to rotate the cam one cycle is displayed. Number of pulses per cam shaft revolution (Nc) (b) The setting for the number of pulses per cam shaft revolution is not related to the travel value per pulse (fixed parameter setting). (2) Cam No. setting device (1 word) (a) This device is used to set the device that sets in the Motion SFC program by which the cam No. to control.
8 OUTPUT MODULE (4) Output unit (a) This device is used to set the unit ([mm]/[inch]/[PLS]) of cam. (b) Set the same unit as used in the real mode (unit in the fixed parameters) for the cam shaft. (5) Stroke amount setting device (2 words) (a) This device is used to set the cam stroke amount. (b) The following devices can be set as the stroke amount setting device.
8 OUTPUT MODULE (b) The following devices can be set as the torque limit value setting device. Name Setting range Data register D0 to D8191 Link register (Note-1) W0 to W1FFF Motion register #0 to #7999 Multiple CPU area device U \G10000 to U \G(10000+p-1) (Note-2) (Note-1) : D800 to D1559 are dedicated devices of virtual servomotor axis, synchronous encoder axis and output module "Cam" in the virtual mode. Unused areas of virtual servomotor axis and cam axis can be used as an user device.
8 OUTPUT MODULE (c) The lower stroke limit value is range of -2147483648 (-231) to 2147483647 (231-1). 1) The lower stroke limit value is determined as follows for each unit setting: [mm]: Lower stroke limit value 10-1 [µm] [inch]: Lower stroke limit value 10-5 [inch] [PLS]: Lower stroke limit value 1 [PLS] (9) Current value within 1 virtual axis revolution storage device (Main shaft side) (2 words) This parameter is set when the address mode clutch is set at the cam main shaft side.
8 OUTPUT MODULE (d) The address mode clutch is turned on/off with the specified address of the current value within 1 virtual axis revolution range of 0 to (NC-1) [PLS]. Therefore, set the address value within the range of 0 to (NC-1) [PLS] in the clutch ON/OFF address setting device. (e) The current value within 1 virtual axis revolution reference position "0" is set by turning the address clutch reference setting command (M3213+20n) on and switching to the virtual mode.
8 OUTPUT MODULE (10) Current value within 1 virtual axis revolution storage device (Auxiliary input axis side) (2 words) This parameter is set when the address mode clutch is set at the cam auxiliary input axis side. Drive module Current value within 1 virtual axis revolution Address mode clutch Cam Drive module (a) By setting the current value within 1 virtual axis revolution of auxiliary input axis side, for the current value within 1 virtual axis revolution is stored in the preset device.
8 OUTPUT MODULE (d) The address mode clutch is turned on/off with the specified address of the current value within 1 virtual axis revolution range of 0 to (NC-1) [PLS]. Therefore, set the address value within the range of 0 to (NC-1) [PLS] in the clutch ON/OFF address setting device. (e) The current value within 1 virtual axis revolution reference position "0" is set by turning the address clutch reference setting command (M3213+20n) on and switching to the virtual mode.
8 OUTPUT MODULE (11) Cam/ball screw switching command device (a) This parameter is used to set cam operation. (b) The following devices can be used as the cam/ball screw switching command device. Name Setting range Input X0 to X1FFF Output Y0 to Y1FFF Internal relay M0 to M8191 (Note-1), (Note-2) Link relay B0 to B1FFF Annunciator F0 to F2047 Multiple CPU area device U \G10000.0 to U \G(10000+p-1).
8 OUTPUT MODULE (f) "Continue Virtual Mode" is set for operation on servo error, if the feed current value of output axis is outside the range of cam operation ("Lower stroke limit value to Stroke amount") by servo error for two-way cam, return the output axis to within cam operation range. 1) Remove servo error cause. 2) Turn the cam/ball screw switching command ON. 3) Execute the servo error reset (M3208+20n).
8 OUTPUT MODULE 8.4.4 Cam curve list This section describes the cam curves which can be used in the virtual mode. (1) Cam curve characteristics comparison The cam curve characteristics comparison is shown below. Table 8.6 Cam Curve Characteristics Comparison Table Class Cam curve name Acceleration curve shape Vm Am (A • V)m (V • V)m (S • V)m 1.00 1.00 Remark Constant speed 1.00 Constantacceleration 2.00 ± 4.00 ± 8.00 4.00 1.09 5th curve 1.88 ± 5.77 ± 6.69 3.52 1.19 Cycloid 2.
8 OUTPUT MODULE 8.5 Phase Compensation Function When carrying out a position follow-up control (synchronous operation) by synchronous encoder, delays in the progresses, etc. cause the phase to deviate at servomotor shaft end in respect to the synchronous encoder. The phase compensation function compensates in this case so that the phase does not deviate. (1) Parameter list Set the following devices for axes to execute the phase compensation function. (Set in the output module parameter.) Table 8.
8 OUTPUT MODULE (a) Phase advance time It is used to set whether a phase is advanced/delayed. Phase advance time is calculated in the formula below. Phase advance time = Delay time peculiar to system [s] + 1/PG1 [rad/s] Delay time peculiar to system [t] : Refer to Table 8.8 : Model control gain "Command speed[PLS/s] Phase advance time[s]" is added to the servo command value as an amount of compensation. Table 8.
8 OUTPUT MODULE (2) Operating method Operating method for phase compensation function is shown below. (a) Set a phase advance time. (b) Set a suitable time constant as a phase compensation time constant. (c) Turn the phase compensation processing valid flag on for every axis before the servomotor start. (d) For cam axis, make a gain adjustment in the servo amplifier side to improve the flattery for cam pattern.
9 REAL MODE/VIRTUAL MODE SWITCHING AND STOP/RE-START 9. REAL MODE/VIRTUAL MODE SWITCHING AND STOP/RE-START This section describes the check details and switching method for the real mode/virtual mode switching. (1) Real mode/virtual mode switching Real mode/virtual mode switching is executed by turning the real mode/virtual mode switching request flag (M2043) ON/OFF. • Real mode ......... Switching request to the real mode by turning the M2043 OFF. • Virtual mode ......
9 REAL MODE/VIRTUAL MODE SWITCHING AND STOP/RE-START (1) Check to determine if switching to the virtual mode is possible (a) The items in Table 9.1 are checked to determine if switching to the virtual mode is possible. When all check items of Table 9.1 are normal, switching to the virtual mode is executed. (b) If an error of at least one item of Table 9.
9 REAL MODE/VIRTUAL MODE SWITCHING AND STOP/RE-START (2) Output module check (a) The items in Table 9.2 below are checked to determine the output module state. If an error is detected, it switches to the virtual mode, but the applicable system cannot be started. Correct the error cause in the real mode, and switch to virtual mode again.
9 REAL MODE/VIRTUAL MODE SWITCHING AND STOP/RE-START (3) Synchronous encoder axis check (a) The items in Table 9.3 below are checked to determine the synchronous encoder state. If an error is detected, it switches to the virtual mode, but the applicable system cannot be started. Correct the error cause in the real mode, and switch to virtual mode again.
9 REAL MODE/VIRTUAL MODE SWITCHING AND STOP/RE-START 9.2 Switching from the Virtual Mode to Real Mode There are following methods for switching from the virtual mode to real mode. • Switching by user • Switching automatically by the operating system software 9.2.1 Switching by user (1) When the virtual mode to real mode switching is requested (M2043 ON OFF), the item in Table 9.4 is checked. If normal, it switches to the real mode. (Confirm the check items in Table 9.
9 REAL MODE/VIRTUAL MODE SWITCHING AND STOP/RE-START 9.2.3 Continuous operation on servo error in virtual mode (1) Processing on servo error in virtual mode can be set using MT Developer (Mechanical system program editor screen). (Default: "Return to real mode") • Mechanical system program editor screen [Operation on Servo Error] menu • Operation on servo error setting screen Operation conditions for continuous operation on servo error in virtual mode are shown below.
9 REAL MODE/VIRTUAL MODE SWITCHING AND STOP/RE-START 9.3 Precautions at Real Mode/Virtual Mode Switching This section describes the precautions at real mode/virtual mode switching.
9 REAL MODE/VIRTUAL MODE SWITCHING AND STOP/RE-START (b) Motion control step in the real mode Example of Motion SFC program is shown below. Real mode example Real mode G10 PX000*!M2043*!M2044*!M2001 PX000 turn on, real mode/virtual mode switching request and switching status turn off, and axis 1 start accept flag turn off. K10 ABS-1 Axis 1, Speed 20000PLS 2000PLS/s G20 1 axis linear control Axis used................ Axis 1 End address............ 20000[PLS] Positioning speed.........
9 REAL MODE/VIRTUAL MODE SWITCHING AND STOP/RE-START 9.4 Stop and re-start The basic method for stopping the system (output module) in the virtual mode operation is to stop the main shaft. If an auxiliary input axis is used, also stop the auxiliary input axis. (1) Virtual axis stop The stop operation or causes of virtual axis, the stop processing and re-start after stop are shown below. The following three methods for the virtual servomotor axis stop processing.
9 REAL MODE/VIRTUAL MODE SWITCHING AND STOP/RE-START 9.4.1 Stop operation/stop causes during operation and re-starting operation list Table 9.5 Stop Operation/stop Causes during Operation and Re-starting Operation List Affected virtual axis No.
9 REAL MODE/VIRTUAL MODE SWITCHING AND STOP/RE-START Error set Output module operation Operation continuation enabled ( )/ disabled ( ) Re-start operation after stop — • Deceleration stop based on the smoothing time constant. • Continuous operation is possible by turning the stop command off (not necessary when on) and starting. — • Deceleration stop based on the smoothing time constant. • Continuous operation is possible by turning the stop command off (not necessary when on) and starting.
9 REAL MODE/VIRTUAL MODE SWITCHING AND STOP/RE-START MEMO 9 - 12
10 AUXILIARY AND APPLIED FUNCTIONS 10. AUXILIARY AND APPLIED FUNCTIONS This section describes the auxiliary and applied functions for positioning control in the Multiple CPU system. Items Details Applications Positioning control for preset axis is It is used in the system for which Mixed function of virtual executed during synchronous conveys while executing synchronous mode/real mode control/cam control in the control. mechanical system program. 10.
10 AUXILIARY AND APPLIED FUNCTIONS (2) Setting method Set the axis to control as real mode axis in the [Option] – [Real Mode Axis Setting] menu of mechanical system program editor screen of MT Developer. • Mechanical system program editor screen [Real Mode Axis Setting] menu • Real mode axis setting screen POINT (1) Execute "Mechanical System Program Conversion" after setting "Real mode axis setting" in the mechanical system program editor. (2) Axis No.
10 AUXILIARY AND APPLIED FUNCTIONS (a) Usable instructions and controls Items Usable/unusable Remarks Linear positioning control Linear interpolation control Circular interpolation control Helical interpolation control Fixed-pitch feed control Speed control ( ) Servo instructions Positioning control with the Speed control ( ) Speed-position switching control Position follow-up control torque limit value set in the servo program (parameter block) Constant-speed control Simultaneous start Speed contro
10 AUXILIARY AND APPLIED FUNCTIONS (b) Control methods Items Control method Remarks • When the ZERO, OSC, CHGA-C or CHGA-E instruction is executed to real mode axis, "Servo program setting error" (error code: 905) occurs. Servo program start • Use a Motion SFC program start or D(P).SVST instruction • When the real mode axis is set to the virtual servo program and it starts, "Servo program setting • Set a real mode axis No. as axis No.. error" (error code: 906) occurs.
10 AUXILIARY AND APPLIED FUNCTIONS (d) Difference for operation between the output axis of mechanical system program and real mode axis Operation details for "output axis of mechanical system program" and "real mode axis" on error are shown below. Items Operation for output axis of mechanical system program Operation for real mode axis Feed current value • Minor error (error code: 105) occurs at exceeds the stroke limit • Minor error (error code: 5000) occurs.
10 AUXILIARY AND APPLIED FUNCTIONS (e) Difference for operation between the real mode axis in virtual mode and real mode When the servo OFF command (M3215+20n) turns on at using the mixed function of virtual mode with real mode in virtual mode, positioning control stops. Operation for real mode axis in virtual mode Items Servo OFF command (M3215+20n) Any time valid at using real mode axis in virtual mode. Operation for axis in real mode Invalid during positioning control.
APPENDICES APPENDICES APP. APPENDIX 1 Cam Curves The cam acceleration curve formulas used in the virtual mode are shown below. (1) Acceleration curve formula •A : Dimensionless acceleration • Am : Dimensionless maximum acceleration •T : Dimensionless time • Ta, Tb, Tc : T borderlines when section divisions are used (a) Discontinuity curve 1) Constant-speed curve A = C0 2) Constant-acceleration curve • Section (0 T 0.5) A = 4 + C0 • Section (0.
APPENDICES 4) Distorted sine curve Ta = 1 8 1 Am = 2Ta 8Ta 2 + 2 • Section (0 T Ta) A = Amsin • Section (Ta < T 1 (T A = Amcos • Section A= T + C0 2Ta Ta) 1 (1 Ta) + C0 2Ta Ta < T 1) (T Amcos 1 + Ta) 2Ta + C0 5) Distorted constant-speed curve Ta = Tb = Am = 1 16 1 4 1 2 8 2 TaTb + ( 4 • Section (0 T Ta) A = Amsin • Section (Ta < T Tb) A = Amcos • Section T + C0 2Ta (T Ta) 2 (Tb Ta) (Tb < T 1 + C0 Tb) A = 0 + A0 • Section A= Amsin • Section A= (1 (1 Amcos
APPENDICES (c) Two-dwelling asymmetrical curve 1) Trapecloid curve Ta = Tb = Tc = 1 8 2 6Ta + Ta 2+ 2 2Ta + 3 Ta 2+ 1 4 3 4 ( + + 2 ) Ta2 + (1 + 2 ) TaTb + 1 Tb2 ( 2 2 2 Am = 4 ) (1 Tc)2 2 • Section (0 T Ta) A = Amsin • Section T + C0 2Ta (Ta < T Tb) A = Am + C0 • Section (Tb < T Tc) (T A = Amcos • Section 6T) 2Ta + C0 (Tc < T 1) A = Amcos (T Tc) 2 (1 Tc) + C0 2) Reverse trapecloid curve Ta = Tb = Tc = 8 2 6Ta + 2+ 2 2Ta + 3 Ta 2+ = 2TaAm Vb = Am (Tb Sa = Sb =
APPENDICES • Section (0 T 1 (1 A = Amcos • Section Tc 2 (1 (1 T) (1 1 Tb) Tb T) + C0 2Ta • Section (1 Tb < T 1 A = Am + C0 • Section (1 Ta < T 1) T) (1 A = Amsin + C0 Tc) Tc < T Amcos A= Tc) 2Ta Ta) + C0 (d) One-dwelling curve 1) Double hypotenuse curve A = 2 (cos 2 T cos 2 T) + C0 (e) Non-dwelling curve 1) Single hypotenuse curve A = 2 2 cos T + C0 (2) Cam curve coefficient (a) Distorted trapezoid • Section Default Value : 0.125 (1/8) 0 < Section < 0.
APPENDICES APPENDIX 2 Error Codes Stored Using The Motion CPU The following errors are detected in the Motion CPU. • Servo program setting error • Positioning error • Control mode switching error • Motion SFC error (Note-1) • Motion SFC parameter error (Note-1) • Multiple CPU related error (Note-2) (Note-1): Refer to the "Q173DCPU/Q172DCPU Motion controller (SV13/SV22) Programming Manual (Motion SFC)" for details.
APPENDICES The error applicable range for each error class are shown below.
APPENDICES (c) If another error occurs after an error code has been stored, the existing error code is overwritten, deleting it. However, the error history can be checked using MT Developer. (d) Error detection signals and error codes are held until the error reset command (M3207+20n) or servo error reset command (M3208+20n) turns on. POINT (1) Even if the servo error reset (M3208+20n) turns on at the servo error occurrence, the same error code might be stored again.
APPENDICES APPENDIX 2.1 Expression Method for Word Data Axis No. The axis No. may be expressed to correspond to each bit of word data for the positioning dedicated signal. Example of the TEST mode request error information (SD510, SD511) is shown below.
APPENDICES APPENDIX 2.2 Related Systems and Error Processing There are following 2 types for the related systems of virtual mode. • System consisting of a drive module and output module. • Multiple systems used the same drive module. The following processing occurs, when the error is detected at an output module. • If an error is detected at least one output module, a drive module cannot start and that system cannot be operate.
APPENDICES APPENDIX 2.3 Servo program setting errors (Stored in SD517) The error codes, error contents and corrective actions for servo program setting errors are shown in Table 2.1. In the error codes marked with "Note" indicates the axis No. (1 to 32). Table 2.1 Servo program setting error list Error code stored in SD517 1 n03 (Note) Error name Error contents Error processing Parameter block No. The parameter block No. is outside Execute the servo program setting error the range of 1 to 64.
APPENDICES Table 2.1 Servo program setting error list (Continued) Error code stored in SD517 n08 n09 n10 (Note) (Note) (Note) 11 12 13 14 Error name Auxiliary point setting error (At the auxiliary point-specified circular interpolation. ) (At the auxiliary point-specified helical interpolation.) Error contents Error processing Positioning control does not (1) If the control unit is (1) The auxiliary point address is start.
APPENDICES Table 2.1 Servo program setting error list (Continued) Error code stored in SD517 15 16 Error name Rapid stop deceleration time setting error Torque limit value setting error Allowable error range for circular interpolation setting error Error contents mm inch degree PLS 18 Repeat count error START instruction setting error 19 20 21 22 23 24 25 Corrective action The rapid stop deceleration time is Control with the default value Set the rapid stop deceleration set to "0". "1000".
APPENDICES Table 2.1 Servo program setting error list (Continued) Error code stored in SD517 26 27 28 41 900 901 902 903 904 905 Error name Error contents Error processing Positioning control does not High-Speed Operation cannot be started start. oscillation command because the starting angle starting angle error specified with the high-speed oscillation function is outside the range of 0 to 3599 ( 0.1[degrees]).
APPENDICES Table 2.1 Servo program setting error list (Continued) Error code stored in SD517 Error name Axis No. setting error 906 Start error 907 Start error 908 Error contents Error processing Positioning control does not (1) Unused axis of the system start. setting is set in the Motion SFC program set in the servo program start. (2) It was started by setting the real mode axis in the virtual servo program.
APPENDICES APPENDIX 2.4 Drive module errors Table 2.2 Drive module error (100 to 1199) list 100 Position follow-up Synchronous encoder Manual pulse generator JOG Constant-speed Speed switching Speed Error code Fixed-pitch feed Error class Positioning Control mode of virtual servo axis Error cause • The PLC ready flag (M2000) or PCPU ready flag (SM500) is OFF. • The start accept flag (M2001 to M2032) for applicable axis is ON.
APPENDICES Table 2.2 Drive module error (100 to 1199) list (Continued) 110 (Note) 116 Minor error 117 140 141 151 152 Position follow-up Synchronous encoder Manual pulse generator JOG Constant-speed Speed switching Speed Error code Fixed-pitch feed Error class Positioning Control mode of virtual servo axis Error cause • The difference between the end point address and ideal end point is outside the allowable error range for circular interpolation at the circular interpolation.
APPENDICES Table 2.2 Drive module error (100 to 1199) list (Continued) 204 207 208 Minor error 211 214 215 220 Position follow-up Synchronous encoder Manual pulse generator JOG Constant-speed Speed switching Speed Error code Fixed-pitch feed Error class Positioning Control mode of virtual servo axis Error cause Error processing • The PLC ready flag (M2000) turned off to on again during deceleration by turning off the PLC No ready flag (M2000).
APPENDICES Table 2.2 Drive module error (100 to 1199) list (Continued) Position follow-up Synchronous encoder Manual pulse generator JOG Constant-speed Speed switching Error cause Error processing Corrective action 225 • The speed at the pass point Control • Set the speed command value exceeded the speed limit value with the within the range of 1 to speed during the constant-speed control. speed limit limit value. value.
APPENDICES Table 2.2 Drive module error (100 to 1199) list (Continued) Position follow-up Synchronous encoder Manual pulse generator JOG Constant-speed Speed switching Speed Error code Fixed-pitch feed Error class Positioning Control mode of virtual servo axis Error cause • Q172DEX or encoder hardware error. • Disconnected encoder cable 1151 Major error • A synchronous encoder set in the system setting differs from a synchronous encoder actually connected. 1152 • Low voltage at Q172DEX.
APPENDICES APPENDIX 2.5 Servo errors (1) Servo amplifier errors (2000 to 2899) These errors are detected by the servo amplifier, and the error codes are [2000] to [2899]. The servo error detection signal (M2408+20n) turns on at the servo amplifier error occurrence. Eliminate the error cause, reset the servo amplifier error by turning on the servo error reset command (M3208+20n) and perform re-start. (The servo error detection signal does not turn on because the codes [2100] to [2599] are for warnings.
APPENDICES Table 2.3 Servo error (2000 to 2899) list Error code Error cause Name Error check Description Error processing • Power supply voltage is low. MR-J3-B: 160VAC or less MR-J3-B1: 83 VAC or less MR-J3-B4: 280 VAC or less Corrective action • Review the power supply. • There was an instantaneous control power failure of 60[ms] or longer. • Shortage of power supply capacity caused the power supply voltage to drop at start, etc.
APPENDICES Table 2.3 Servo error (2000 to 2899) list (Continued) Error code Error cause Name Error check Description Error processing • Encoder connector (CN2) disconnected. • Connect correctly. • Encoder fault • Replace the servomotor. • Encoder cable faulty Encoder error 1 2016 (Wire breakage or shorted) (At power on) • Encoder cable type (2-wire, 4-wire) selection was wrong in parameter setting. 2017 Board error • Repair or replace the cable. • Set the correct encoder type of servo parameter.
APPENDICES Table 2.3 Servo error (2000 to 2899) list (Continued) Error code Error cause Name Error check Description • Check the machine. • Accuracy at initial magnetic pole detection is bad. • Review the parameter No.PS09 setting (magnetic pole detection voltage level). • Wrong wiring of the servomotor wires (U, V, and W). • Correct the wiring. • Linear encoder resolution differs from the setting value. • Review the parameter No.PS02 and PS03 setting (linear encoder resolution).
APPENDICES Table 2.3 Servo error (2000 to 2899) list (Continued) Error code 2030 Error cause Name Regenerative alarm Error check Description Error processing Corrective action • Wrong setting of system setting (regenerative brake) • Check the regenerative brake of system setting and set correctly. • Built-in regenerative brake resistor or regenerative brake option is not connected. • Connect correctly.
APPENDICES Table 2.3 Servo error (2000 to 2899) list (Continued) Error code Error cause Name 2032 Overcurrent Error check Description Error processing • Short occurred in servomotor power (U, V, W). • Correct the wiring. • Transistor (IPM) of the servo amplifier faulty. [Checking method] Servo error [2032] occurs if power is switched on after U, V and W are disconnected. • Replace the servo amplifier. • Ground fault occurred in servomotor power (U, V, W). • Correct the wiring.
APPENDICES Table 2.3 Servo error (2000 to 2899) list (Continued) Error code Error cause Name Linear servo control error 2042 (Linear servo amplifier) Error check Description Error processing Corrective action • Linear encoder signal resolution differs from the setting value. • Review the settings of parameter No.PS02 and PS03 setting (linear encoder resolution). • Check the mounting of linear encoder. • Initial magnetic pole detection has not been performed.
APPENDICES Table 2.3 Servo error (2000 to 2899) list (Continued) Error code 2045 2046 2047 Error cause Name Error check Description Cooling fan alarm Corrective action • Servo amplifier failure • Replace the servo amplifier. • The power supply was turned on and off continuously by overloaded status. • The drive method is reviewed. Main circuit • Ambient temperature of servo amplifier device overheat is over 55[°C] (131[°F]).
APPENDICES Table 2.3 Servo error (2000 to 2899) list (Continued) Error code Error cause Name Error check Description • Review operation pattern. • Install limit switches. • Wrong connection of servomotor. (Servo amplifier's output terminals U, V, W do not match servo motor's input terminals U, V, W.) • Connect correctly. • Servo system is instable and hunting. `• Repeat acceleration/ deceleration to execute auto tuning. • Change auto tuning response setting.
APPENDICES Table 2.3 Servo error (2000 to 2899) list (Continued) Error code Error cause Name Error check Description Error processing • The speed of linear encoder has exceeded the range of use. • Change the speed of linear encoder within the range of use. • Noise entered. • Take the noise reduction measures. Any time during operation 2061 Linear encoder • Alarm of the linear encoder. (AL.2A) error 1 • Contact with the linear encoder manufacturer. • Adjust the positions of the scale and head.
APPENDICES Table 2.3 Servo error (2000 to 2899) list (Continued) Error code Error cause Name Error check Description Error processing • Ambient temperature of servomotor is over 40[°C] (104[°F]). Servo motor 2142 overheat (AL.E2) warning • Review environment so that ambient temperature is 0 to 49[°C] (32 to 104[°F]). Operation • Reduce load. continues • Review operation pattern. • Use servomotor that provides larger output. • Servomotor is overloaded. • Replace the servomotor.
APPENDICES Table 2.3 Servo error (2000 to 2899) list (Continued) Error code Error cause Name Error check Description Error processing Corrective action Parameter error • The servo parameter value is outside the setting range. (Any unauthorized parameter is ignored and the value before setting is held.) 2301 to 2599 Parameter error Error code Parameter No.
APPENDICES Table 2.3 Servo error (2000 to 2899) list (Continued) Error code Error cause Name 2301 Parameter to error 2599 Error check Description Error code Parameter No.
APPENDICES Table 2.3 Servo error (2000 to 2899) list (Continued) Error code Error cause Name Error check Description Error code Parameter No.
APPENDICES Table 2.3 Servo error (2000 to 2899) list (Continued) Error code 2301 to 2599 Error cause Name Parameter error Error check Description Error code Parameter No.
APPENDICES Table 2.3 Servo error (2000 to 2899) list (Continued) Error code Error cause Name Error check Description Error processing Corrective action Initial parameter error • The parameter setting is wrong. • The parameter data was corrupted. Initial 2601 parameter to error 2899 Error code Parameter No.
APPENDICES Table 2.3 Servo error (2000 to 2899) list (Continued) Error code Error cause Name 2601 Initial parameter to error 2899 Error check Description Error code Parameter No.
APPENDICES Table 2.3 Servo error (2000 to 2899) list (Continued) Error code Error cause Name Initial 2601 parameter to error 2899 Error check Description Error code Parameter No.
APPENDICES Table 2.3 Servo error (2000 to 2899) list (Continued) Error code Error cause Name 2601 Initial to parameter 2899 error Error check Description Error code Parameter No.
APPENDICES APPENDIX 2.6 Output Module Errors (1) Output module errors at real mode/virtual mode switching (4000 to 5990) Table 2.4 Output Module Error List (4000 to 5990) Error class Output module Error code Roller Ball Rotary Cam screw table 4050 4060 4070 5000 Minor error 5060 5080 5200 5210 5220 5230 5240 5250 Error cause Processing • The "lower stroke limit setting device value + stroke amount setting device value" exceeded "2147483647 (setting unit)". (At the two-way cam mode.
APPENDICES Table 2.4 Output Module Error List (4000 to 5990) (Continued) Error class Output module Error code Roller Ball Rotary Cam screw table 5260 5270 5280 5290 5300 5310 5320 5330 5340 5350 Minor error 5360 5370 5380 5390 5400 5410 5420 5430 5440 Error cause • The device set to "Stroke amount setting device" is outside the range. • The device set to "Cam No. setting device" is outside the range. • The device set to "Clutch mode setting device" is outside the range.
APPENDICES Table 2.4 Output Module Error List (4000 to 5990) (Continued) Error class Output module Error code Roller Ball Rotary Cam screw table 5450 5460 5480 Minor error 5490 5500 Error cause Processing • The device set to "Smoothing clutch complete signal device" is outside the range. • The device set to "Clutch status device" is outside the range. • The device set to "Cam/ball screw switching command device" is outside the range.
APPENDICES (2) "No-clutch/clutch ON/clutch status ON" output module errors (6000 to 6990) Table 2.5 Output Module Error List (6000 to 6990) Error class Output module Error Ball Rotary code Roller Cam screw table 6000 6010 6020 6030 6040 6050 Minor error 6060 6080 6090 6120 6130 6140 Error cause Processing • The servo OFF command (M3215+20n) turned on during operation. • The output speed exceeded the speed limit value during operation.
APPENDICES Table 2.5 Output Module Error List (6000 to 6990) (Continued) Error class Output module Error Ball Rotary code Roller Cam screw table 6160 Minor error 6170 6020 Error cause Processing Corrective action • Current value was changed for the axis that had not been started. Or, the current value within 1 cam shaft revolution was changed for the servo OFF axis. Do not change • Use the following device as interlock not to change the the current current value for applicable axis.
APPENDICES (5) Output module errors at virtual servomotor axis start (10000 to 10990) Table 2.8 Output Module Error List (10000 to 10990) Error class Error code Roller Output module Ball Rotary Cam screw table Error cause • The home position return request signal (M2409+20n) is ON. Processing Related system cannot be start. 10000 Major error • The servo error detection signal (M2408+20n) is ON.
APPENDICES (7) Errors when using an absolute position system (12000 to 12990) Table 2.10 Output Module Error List (12000 to 12990) Error class Error code Roller 12010 12020 Major 12030 error 12040 Output module Ball Rotary Cam screw table Error cause • A sum check error occurred in the back-up data (reference values) at the servo amplifier power supply on in the virtual mode. • No home position return.
APPENDICES APPENDIX 2.7 Errors at Real Mode/Virtual Mode Switching Table 2.11 Real Mode/Virtual Mode Switching Error Code List Error codes stored in SD504 Decimal Hexadecimal display display 1 0001 256 0100 512 0200 513 (Note) 0201 514 (Note) 0202 515 (Note) 0203 516 (Note) 0204 768 0300 1024 0400 1280 0500 1536 0600 2048 0800 Error description Corrective action • Real mode/virtual mode switching request flag (M2043) ON in the state which all axes has not turned OFF stopped.
APPENDICES Table 2.11 Real Mode/Virtual Mode Switching Error Code List (Continued) Error codes stored in SD504 Decimal display Hexadecimal display 2304 0900 2816 0B00 3072 0C00 -4094 (Note) F002 (Note) F001 -4096 (Note) F000 -4095 Error description Corrective action • The setting value of cam stroke amount setting device is outside the range of 1 to (231-1).
APPENDICES APPENDIX 3 Setting Range for Indirect Setting Devices Positioning address, command speed or M-code, etc. (excluding the axis No.) set in the servo program can be set indirectly by the word. (1) Device range The number of device words and device range at indirect setting are shown below. Parameter block Arc Common Item Number of device words Device setting range Parameter block No.
APPENDICES POINT (1) Be sure to set even-numbered devices for 2-word setting items. Be sure to set as 32-bit integer type when the data is set in these devices using the Motion SFC programs. (Example : #0L, D0L) (2) Refer to Chapter 2 of the "Q173DCPU/Q172DCPU Motion controller Programming Manual (COMMON)" for the user setting area points of the Multiple CPU high speed transmission area. (2) Inputting device data Indirect setting device data is inputted by the Motion CPU at the servo program start.
APPENDICES APPENDIX 4 Processing Times of the Motion CPU The processing time of each signal and each instruction for positioning control in the Multiple CPU system is shown below. (1) Motion operation cycle [ms] (Default) Q173DCPU Q172DCPU Number of setting axes (SV22) 1 to 4 5 to 12 13 to 28 29 to 32 1 to 4 5 to 8 Operation cycle [ms] 0.44 0.88 1.77 3.55 0.44 0.
APPENDICES APPENDIX 5 Device List (1) Axis status list Axis No. Device No.
APPENDICES (2) Axis command signal list Axis No. Device No.
APPENDICES (3) Virtual servomotor axis status list Axis No. Device No.
APPENDICES (4) Virtual servomotor axis command signal list Axis No. Device No.
APPENDICES (5) Synchronous encoder axis status list Axis No. Device No.
APPENDICES (7) Common device list Device Signal name No. Refresh cycle M2000 PLC ready flag Fetch cycle Main cycle Signal Remark Device direction (Note-4) No.
APPENDICES Common device list (Continued) Device Signal name No. Refresh cycle Fetch cycle Signal Remark Device direction (Note-4) No.
APPENDICES Common device list (Continued) Device No. Signal name Refresh cycle Fetch cycle Signal Remark Device direction (Note-4) No.
APPENDICES (8) Common device list (Command signal) Device No.
APPENDICES (9) Axis monitor device list Axis No. Device No.
APPENDICES (10) Control change register list Axis No. Device No.
APPENDICES (11) Virtual servomotor axis monitor device list Axis No. Device No. 1 D800 to D809 2 D810 to D819 3 D820 to D829 4 D830 to D839 5 D840 to D849 6 D850 to D859 0 7 D860 to D869 1 8 D870 to D879 2 Minor error code 9 D880 to D889 3 Major error code 10 D890 to D899 4 Execute program No.
APPENDICES (12) Synchronous encoder axis monitor device list Axis No. Device No. 1 D1120 to D1129 Signal name 2 D1130 to D1139 3 D1140 to D1149 4 D1150 to D1159 0 5 D1160 to D1169 1 6 D1170 to D1179 2 Minor error code 7 D1180 to D1189 3 Major error code 8 D1190 to D1199 4 9 D1200 to D1209 5 10 D1210 to D1219 11 D1220 to D1229 6 Current value after synchronous encoder Backup 7 axis main shaft's differential gear 12 D1230 to D1239 8 Error search output axis No.
APPENDICES (13) Cam axis monitor device list Axis No. Device No. 1 D1240 to D1249 Signal name 2 D1250 to D1259 3 D1260 to D1269 4 D1270 to D1279 5 D1280 to D1289 1 Execute cam No.
APPENDICES (14) Common device list Device No. Signal name Refresh cycle Fetch cycle Signal direction Device No.
APPENDICES (15) Motion register list (#) Axis No. Device No.
APPENDICES (16) Special relay list Device No. Signal name Refresh cycle SM500 PCPU REDAY complete flag SM501 TEST mode ON flag SM502 External forced stop input flag SM503 Digital oscilloscope executing flag SM510 TEST mode request error flag SM512 Motion CPU WDT error flag SM513 Manual pulse generator axis setting error flag SM516 Servo program setting error flag Fetch cycle Main cycle Signal type Status signal (17) Special register list Device No.
WARRANTY Please confirm the following product warranty details before using this product. 1. Gratis Warranty Term and Gratis Warranty Range If any faults or defects (hereinafter "Failure") found to be the responsibility of Mitsubishi occurs during use of the product within the gratis warranty term, the product shall be repaired at no cost via the sales representative or Mitsubishi Service Company.
MOTION CONTROLLER Qseries SV22 Programming Manual(VIRTUAL MODE) (Q173DCPU/Q172DCPU) HEAD OFFICE : TOKYO BUILDING, 2-7-3 MARUNOUCHI, CHIYODA-KU, TOKYO 100-8310, JAPAN MODEL Q173D-P-SV22-KASO-E MODEL CODE 1XB931 IB(NA)-0300137-A(0801)MEE IB(NA)-0300137-A(0801)MEE When exported from Japan, this manual does not require application to the Ministry of Economy, Trade and Industry for service transaction permission. Specifications subject to change without notice.
MITSUBISHI ELECTRIC HEADQUARTERS EUROPEAN REPRESENTATIVES EUROPEAN REPRESENTATIVES MITSUBISHI ELECTRIC EUROPE B.V. EUROPE German Branch Gothaer Straße 8 D-40880 Ratingen Phone: +49 (0)2102 / 486-0 Fax: +49 (0)2102 / 486-1120 MITSUBISHI ELECTRIC EUROPE B.V. CZECH REPUBLIC Czech Branch Avenir Business Park, Radlická 714/113a CZ-158 00 Praha 5 Phone: +420 (0)251 551 470 Fax: +420 (0)251-551-471 MITSUBISHI ELECTRIC EUROPE B.V.