User`s manual
Table Of Contents
- SAFETY PRECAUTIONS
- CONDITIONS OF USE FOR THE PRODUCT
- REVISIONS
- INTRODUCTION
- CONTENTS
- ABOUT MANUALS
- HOW TO USE THIS MANUAL
- ABOUT THE GENERIC TERMS AND ABBREVIATIONS
- PACKING LIST
- 1. OVERVIEW
- 2. SYSTEM CONFIGURATION
- 3. FUNCTION LIST
- 4. INSTALLATION AND UNINSTALLATION
- 5. SCREEN MAKEUP AND BASIC OPERATIONS
- 6. PROJECT CREATION
- 7. SYSTEM CHECKING FROM PERIPHERAL DEVICE
- 8. DATA SETTING
- 9. WRITING TO/READING OF/VERIFICATION OF POSITIONING MODULE DATA
- 10. POSITIONING DEBUGGING
- 11. USEFUL FUNCTIONS
- APPENDIX
- Appendix 1 Read from Module/Write to Module Reference Processing Times
- Appendix 2 Restrictions Depending on Function Version of QD75
- Appendix 3 Functions Added to/Changed from the Previous Versions
- Appendix 4 Uninstalling the License Key FD
- Appendix 5 Parameter Names Shown in GX Configurator-QP Screens and Manuals
- INDEX

11 - 1 11 - 1
MELSOFT
11. USEFUL FUNCTIONS
11. USEFUL FUNCTIONS
Out of the functions that can be performed on GX Configurator-QP, this chapter
describes the functions and operations useful for project execution, positioning data
setting, etc. and the functions which support settings.
This chapter also explains the teaching function which imports the feed present value
to the address, the function which writes positioning data in the test mode, the function
which prints project setting data, and the trace function which displays operation
results as waveform/locus data.
11.1 Useful Functions for Projects
This section describes the functions and operations which are helpful for utilizing
project data to create projects and for changing set data.
11.1.1 Verifying the project data
PURPOS
E
Compare and verify the parameters, servo parameters, positioning data, block
start data and condition data of the project set as the active project and the saved
project.
BASIC OPERATIO
N
1. Set the verify source project as the active project. (Refer to Section 5.2.)
2. Click the [Project]
[Verify Project] menu (
).
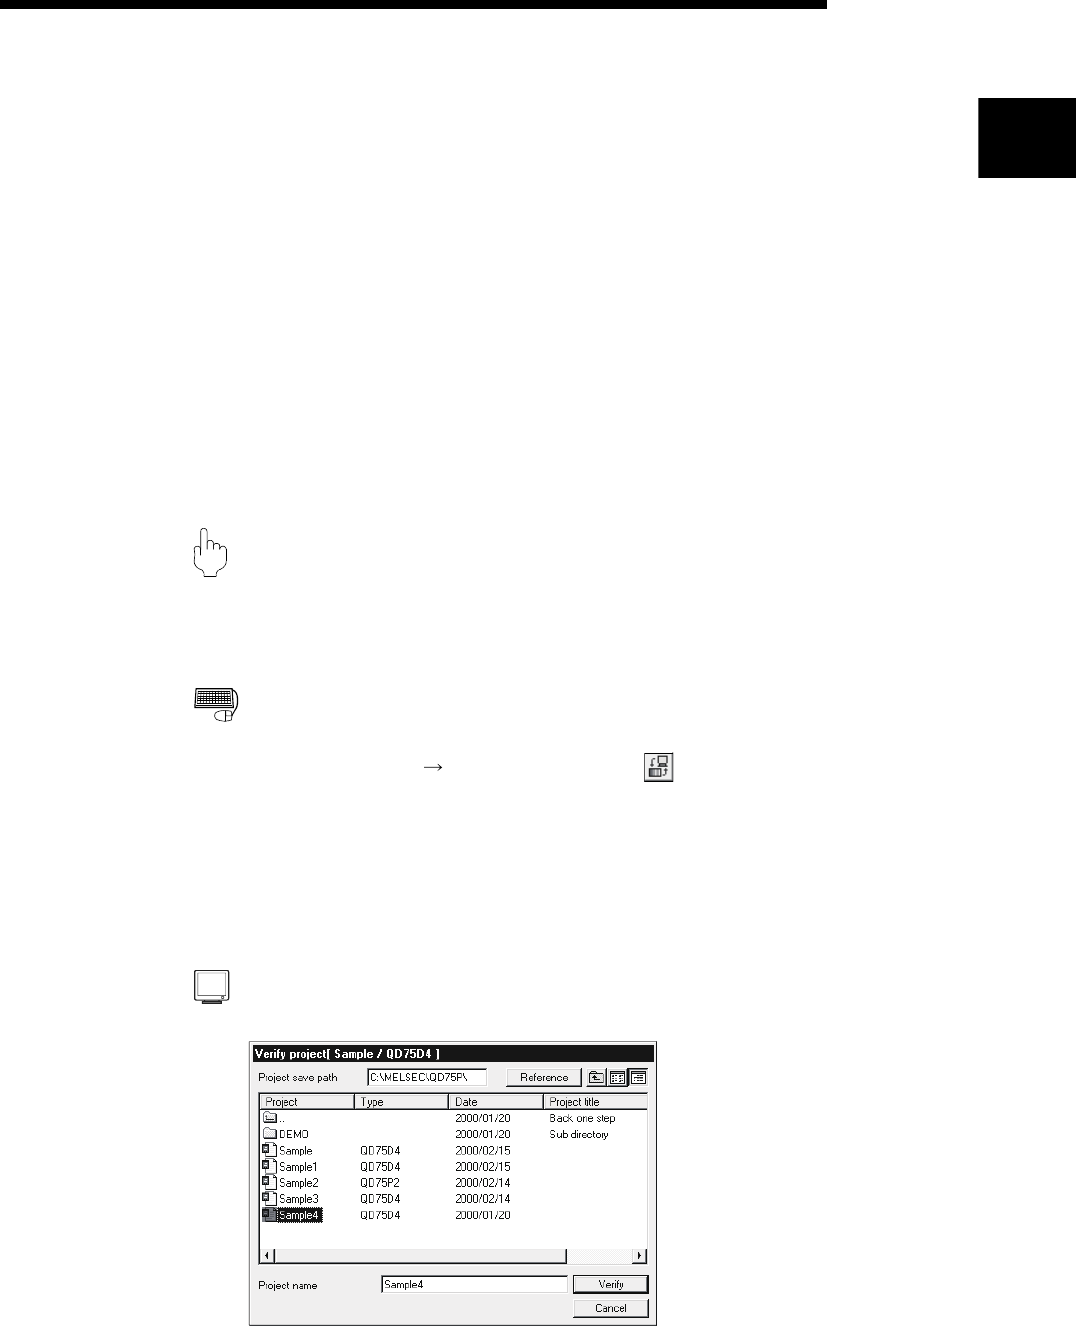
3. Choose the verify target project in the Verify project dialog box (1) and click the
"Verify" button.
4. Set the types and ranges of the data to be verified in the Verify project dialog
box (2).
5. Click the "OK" button.
6. Check the results in the Verify result dialog box.
DISPLAY/SETTING SCREE
N
[Verify project dialog box (1)]
11


