
Programming instructions


72
11.6 Monitor the Program Operation
It is possible to view what’s happening in the program, and to check the states of
program bits, in GX-Developer. This process of viewing is called Monitoring the
program.
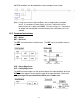
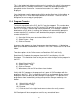
1) Click on the ‘Online’ pull down menu
2) Go to ‘Monitor’
3) Select ‘Monitor Mode’
A small box will pop up, indicating the mode (run or stop) of the PLC and the
average scan time for the program.
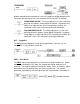
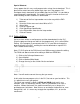
You should notice that X10 and Y0 are not highlighted, and X11 is highlighted.
This indicates whether an input device is conducting or not, or an output device is
energized. A highlighted contact is conducting, and a highlighted coil is
energized. X10 and Y0, which are checking to see their input and output
respectively are on, aren’t true. X11 on the other hand, which is checking the
input to see that it is off, is true.
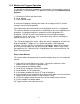
Turn X10 on by toggling the switch. When the switch is toggled on, the bit in the
program highlights. Toggle X11 off. Notice that the bit is not highlighted
anymore. Set X11 and X10 so that both are highlighted. When all the contacts
on a rung are highlighted, we say that the rung is TRUE. When a rung is true,
the output turns on. Notice that Y0 is highlighted on the screen and that the Y0
bulb is lit on the trainer.
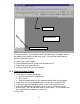
Entry Ladder Monitor
This feature allows the programmer to monitor multiple rungs in a non-sequential
manner.
1) Copy and Paste the above rung 3 times. Change the addresses of the
contacts and coils to create 4 separate rungs
2) Put the program into Monitor Mode
3) Go to Online Æ Monitor Æ Entry Data Ladder
4) Go to Window Æ Tile Horizontally
5) In the bottom window click on the 4
th
rung to highlight it
6) Click and hold on the highlighted rung, drag it to the upper screen and release
7) Repeat steps 5 and 6 for the 1st rung and the 3
rd
rung.
8) Click on the upper window to make it the active window and maximize it
9) Put the window into Monitor Mode
10) Toggle switches and watch the results