CNC C6/C64 CONNECTION AND MAINTENANCE MANUAL BNP-B2255E(ENG)
MELDAS and MELSEC are registered trademarks of Mitsubishi Electric Corporation. Other brands and product names throughout this manual are trademarks or registered trademarks of their respective holders.
Introduction This manual is called MELDAS C6/C64 CONNECTION AND MAINTENANCE MANUAL and covers the items related to installation, connection and maintenance of this NC unit. Read this manual thoroughly before using. For safe use, fully understand "Precautions for Safety" on the next page first. Details described in this manual: CAUTION For items described as "Restrictions" or "Usable State" in this manual, the instruction manual issued by the machine tool builder takes precedence over this manual.
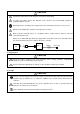
Precautions for Safety Always read this manual and enclosed documents before installation, operation, maintenance and inspection to ensure correct usage. Thoroughly understand the basics, safety information and precautions of the devices before using. This manual classifies the safety precautions into "DANGER", "WARNING" and "CAUTION". DANGER When the user could be subject to imminent fatalities or serious injuries if handling is mistaken.
For Safe Use This product is not designed or manufactured on the assumption that the product will be used for the equipment or systems that are to be subject to any fatal consequences. Please inquire our customer service department about any particular usage other than the normal usage as a machine tool. 1. Items related to prevention of electric shocks. WARNING Do not open/close the front cover while the power is ON or during operation.
2. Items related to prevention of fire CAUTION Install the controller, servo drive unit, servomotor and regenerative resistor on non-combustible material. Installation directly on or near combustible materials could result in fires. If any malfunction in the unit is observed, shut off the power at the unit’s input power side. Continuous flow of large current could result in fires.
4. General Precautions Always follow the precautions below. Incorrect handling could result in faults, injuries or electric shocks, etc. (1) Transportation and installation CAUTION Correctly transport the products according to the weights. Use servomotor’s suspension bolts to transport the servomotor itself. Do not use it to transport the servomotor after installation onto the machine. Do not stack the products exceeding the indicated limit.
CAUTION Take care not to cut hands, etc. with the heat radiating fins or metal edges. Do not block the intake/outtake ports of the servomotor with the cooling fan. Install the controller’s display unit and operation board unit on the spot where cutting oil will not reach. The controller, servo drive unit and servomotor are precision devices, so do not drop or apply thumping vibration and strong impacts on them. Hard disk unit is a precision device, so do not drop or apply strong impacts on it.
(2) Items related to wiring CAUTION Correctly wire this product. Failure to observe this could result in servomotor runaway, etc. Do not install a phase advancing capacitor, surge absorber or radio noise filter on the output side of the servo drive unit. Correctly connect the output side (terminal U, V, W). The servomotor will not run properly if incorrectly connected. Always install an AC reactor per each power supply unit. Always install an appropriate breaker per each power supply unit.
CAUTION Separate the signal wire from the drive line or power line when wiring. Use wires and cables whose wire diameter, heat resistance level and bending capacity are compatible with the system. Ground the device according to the requirements of the country where the device is to be used. Wire the heat radiating fins and wires so that they do not contact. When using the RS-232C device as a peripheral device, caution must be paid for connector connection/disconnection.
CAUTION Do not alter. Use a noise filter, etc. to reduce the effect of electromagnetic disturbances. Electromagnetic disturbances could adversely affect the electronic devices used near the servo drive unit. Use the servo drive unit, servomotor and each regenerative resistor with the designated combination. Failure to observe this could result in fires or faults. The combination of the servomotor and servo drive unit that can be used is determined.
(5) Troubleshooting CAUTION Use a servomotor with electromagnetic brakes or establish an external brake mechanism for the purpose of holding; this serves as countermeasures for possible hazardous situation caused by power failure or product fault. Shut off with motor brake control output Servomotor Use a double circuit structure for the electromagnetic brake’s operation circuit so that the brakes will activate even when the external emergency stop signal is issued.
CAUTION Do not short-circuit, charge, overheat, incinerate or disassemble the battery. The hard disk unit has a service life, and must be replaced before its expiration. As a precautionary measure, always back up the customer’s data stored in the hard disk unit. The safety of the customer’s data stored in the hard disk unit cannot be guaranteed. There may be a unit filled with substitute Freon in the heat radiating fins of the 37kW or smaller unit.
CONTENTS I. Connection Manual 1. OUTLINE .......................................................................................................................... I-1 2. CONFIGURATION ............................................................................................................. I-2 2.1 System Configuration................................................................................................ I-2 2.2 List of Configuration Units ........................................................
5. CONNECTION OF COMMUNICATION TERMINAL ....................................................... I-48 5.1 Outline of Communication Terminal........................................................................ I-48 5.2 Connection of Power Supply................................................................................... I-49 5.2.1 Connection of Power Supply to 7.2-type Monochrome LCD (FCUA-LD100/FCUA-LD10+KB20)................................................................ I-49 5.2.
APPENDIX 5 OUTLINE AND INSTALLATION DIMENSIONS FOR SYNCHRONOUS FEED ENCODER .......................................................... I-83 APPENDIX 6 OUTLINE AND INSTALLATION DIMENSIONS FOR GROUNDING PLATE AND CLAMP FITTING............................................ I-84 APPENDIX 7 CABLE MANUFACTURING DRAWINGS .................................................. I-85 Appendix 7.1 F310 Cable Manufacturing Drawing........................................................ I-86 Appendix 7.
II. Maintenance Manual 1. OUTLINE .........................................................................................................................II-1 1.1 Table of Configuration Lists ..................................................................................... II-1 1.2 Control Section Module Configuration ..................................................................... II-2 2. EXPLANATION OF MODULE FUNCTIONS ....................................................................II-3 2.
I.
1. OUTLINE 1. OUTLINE This manual explains the items required for installing and connecting the MELDAS C6/C64. Read this manual thoroughly and understand the product's functions and performance before starting to use. This manual is written on the assumption that all option functions are added, but the actually delivered device may not have all functions. Refer to the following documents for explanations on the functions. MELDAS C6/C64 Specifications Manual .................................................
2. CONFIGURATION 2.1 System Configuration 2. CONFIGURATION 2.1 System Configuration Ethernet communication device Communication terminal Operation panel, etc.
2. CONFIGURATION 2.2 List of Configuration Units 2.2 List of Configuration Units 1. Control unit Type FCU6-MU043 C6 Control unit FCU6-MU042 C64 Control unit FCU6-MU041 C64T Control unit Configuration element Details HR851 card Main card HR891 card Back panel HR899 card IC card interface 2.
2. CONFIGURATION 2.2 List of Configuration Units 3. Communication terminal (display/NC keyboard) Configuration element 7.2- type mono7.2-type monochrome LCD chrome LCD with integrated keyboard RX213 card (Integrated type/machining Key switch / system sheet) escutcheon 7.2- type mono7.2- type monochrome chrome LCD LCD with display unit (Keyboard separated Escutcheon type) RX213 card 10.4- type mono10.
2. CONFIGURATION 2.2 List of Configuration Units 5.
3. INSTALLATION 3.1 General Specification 3. INSTALLATION 3.1 General Specification General specifications Type name Unit name FCU6-MU043/MU042/MU041 Control unit Ambient temperature During operation During storage 0 to 55°C –20 to 60°C Ambient humidity During operation Long term, Up to 75% RH (with no dew condensation) Short term (Within 1 month), Up to 95% RH (with no dew condensation) Up to 75% RH (with no dew condensation) 4.9m/s2 or less (during operation) 29.
3. INSTALLATION 3.
3. INSTALLATION 3.2 General Connection Diagram 3.2 General Connection Diagram (1) When using the communication terminal for the display unit Key : User-prepared parts R S T 3-phase 200VAC to 230VAC : Connectors enclosed with remote I/O unit and communication terminal.
3. INSTALLATION 3.
3. INSTALLATION 3.
3. INSTALLATION 3.3 Countermeasures against Heat Radiation 3.3 Countermeasures against Heat Radiation Please refer to the following procedures for heat radiation countermeasures. Example of heat radiation countermeasures (1) Average temperature in cabinet (2) Cabinet peripheral temperature (3) Internal temperature rise value Procedures for heat design and verification : T ≤ 55C° : Ta ≤ 0C° to 45C° : ∆T = T - Ta(max) = 10 C° (1) Refer to section "3.
3. INSTALLATION 3.4 Noise Countermeasures 3.4 Noise Countermeasures 3.4.1 Connection of Frame Ground (FG) The frame should basically be grounded at one ground point. Connect the control unit and base I/O unit's 0V (RG) to the FG on the 24VDC stabilized power supply side. Communication terminal OPERATION BOARD Ver. FCU6-DUT32 MITSUBISHI ELECTRIC CORP.
3. INSTALLATION 3.4 Noise Countermeasures 3.4.2 Shield Clamping of Cables The shield cable connected to the control unit, servo amplifier and spindle amplifier must be connected to the grounding plate to stabilize operation while preventing malfunctioning due to noise. The shield can be connected to the grounding plate with lead wires, clamp fittings or the connector GND plate. Refer to the following drawings to treat the shield cable.
3. INSTALLATION 3.4 Noise Countermeasures The cables connected to the control unit for which the shield must be connected to the ground are shown below.
3. INSTALLATION 3.4 Noise Countermeasures 3.4.4 Countermeasures against Lightning Surge Protection Generally, lightning surge infiltrates the control power supply from the power supply line. This control power supply or the internal circuit can be damaged by lightning surge via the control power supply. If this countermeasure is not taken throughout the control panel as shown in Fig. 1, the lightning surge could flow over the signal line and damage the other devices.
3. INSTALLATION 3.4 Noise Countermeasures (2) Examples of surge absorbers Types of Okaya Electric surge absorbers Surge Surge withstand voltage resistance (Electrical-discharge level start voltage) 8/20µs [A] 1.2/50µs [V] Max.
3. INSTALLATION 3.5 Installation 3.5 Installation Each unit is installed in the sealed structure cabinet as a principle. When installing into the cabinet, refer to the following drawings to consider the control unit's heat radiation and wiring, and secure enough space for ventilation. (1) Install each unit vertically so that the front is visible. (2) Refer to the following drawings to consider the control unit's heat radiation and wiring, and secure enough space for ventilation.
3. INSTALLATION 3.6 Mounting Conditions 3.6 Mounting Conditions (1) Parts, highly susceptible to dust, are mounted with a high density inside the unit. Always use a sealed structure for the cabinet, and provide the following treatments. • • • • • • Always plug the cable inlet with packing to prevent dust and oil from entering. Take care so that outdoor air does not enter the heat radiation holes, etc. Plug all clearances. Always install door packing. If there is a back lid, always install packing.
3. INSTALLATION 3.7 Turning the Power ON Again 3.7 Turning the Power ON Again When turning the control unit power ON again after turning it OFF, wait at least five seconds or more. If the power is turned ON in less than five seconds, the system may not start up.
4. CONTROL UNIT CONNECTIONS 4.1 Names of Each Control Unit Part 4. CONTROL UNIT CONNECTIONS The methods for connecting to each unit and device from the control unit are briefly explained in this section. 4.
4. CONTROL UNIT CONNECTIONS 4.2 Connecting the Power Supply 4.2 Connecting the Power Supply A 24VDC power supply is required for the control unit. Prepare a stabilized power supply that satisfies the following conditions. The DC24VIN connector is used to connect the power supply. Use the CN220 connector set (optional, with one end) when manufacturing the R220 cable. (Refer to the CABLE MANUFACTURING DRAWINGS for details.) Output voltage Ripple Maximum output current 24VDC ±5% ±5% (p-p) 3.
4. CONTROL UNIT CONNECTIONS 4.3 Connecting the Communication Terminal 4.3 Connecting the Communication Terminal The TERMINAL connector is used to connect the communication terminal (FCUA-LD100, etc.). On the communication terminal side, connect the R000 cable to the CR02 connector, and supply the 24VDC power supply to the CR01 connector. Use the enclosed connector and contact to supply the +24VDC power supply.
4. CONTROL UNIT CONNECTIONS 4.4 Connecting the Synchronous Feed Encoder 4.4 Connecting the Synchronous Feed Encoder The ENC connector is used to connect the synchronous feed encoder. Use the CS050 or CS054 connector set (optional, with both ends) when manufacturing the R050 or R054 cable. (Refer to the cable manufacturing drawings for details.) Note that the synchronous feed encoder may be connected via the spindle drive unit.
4. CONTROL UNIT CONNECTIONS 4.5 Connecting the Sensor Signal (skip) 4.5 Connecting the Sensor Signal (skip) The SKIP connector is used to connect the sensor signal (skip). The sensor signal is used for high-speed signal processing, so take special care to prevent noise induction, etc., from occurring. If the cable is long, always use a shielded wire. Note that the input conditions, such as the input signal holding time, differ from the machine input/output signal's input conditions.
4. CONTROL UNIT CONNECTIONS 4.6 Connecting the Servo Drive Unit 4.6 Connecting the Servo Drive Unit The SERVO1 connector is used to connect the servo drive unit. Connect the R000 cable from SERVO1 connector on the control unit to CN1A connector on the servo drive unit. Depending on the specifications, the SERVO2 connector may be used.
4. CONTROL UNIT CONNECTIONS 4.7 Connecting the Manual Pulse Generator 4.7 Connecting the Manual Pulse Generator The HANDLE connector is used to connect the manual pulse generator. Up to three manual pulse generators can be connected. Use the CS000 connector set (optional, with both ends) when manufacturing the F320, F321 or F322 cable. (Refer to the cable manufacturing drawings for details.) Control unit When connecting one manual pulse generator MITSUBISHI NO.
4.8 4.8 4. CONTROL UNIT CONNECTIONS Connecting the Machine Control Signal Connecting the Machine Control Signal Machine input/output signal types and No. of points Input Output Analog output Standard control unit 16 points (Note 1) 1 point (Note 2) – Extension DIO card (option mounted) 32 points 32 points 1 point (Note 1) (Note 2) Includes one EMG (emergency stop signal) input point. Uses as the SA (servo READY) output. The DIO connector is used to connect the machine input/output signal.
4.8 4. CONTROL UNIT CONNECTIONS Connecting the Machine Control Signal DIO A2 B2 24VDC(+) DIO Input circuit sink type COM 0V 24VDC(+) COM A2 B2 Input circuit source type 2.2kΩ 2.
4.8 4. CONTROL UNIT CONNECTIONS Connecting the Machine Control Signal Note) The emergency stop signal is input into X7. The PLC interface assignments correspond to X400 to X40F. DIO B X0 X1 X2 X3 X4 X5 X6 X7 COM SA B DIO 24VDC(+) 0V A X8 X9 XA XB XC XD XE XF COM 0V A 10 9 8 7 6 5 4 3 2 1 Extension DIO unit (option mounting) DI Machine side control panel, etc.
4.8 4. CONTROL UNIT CONNECTIONS Connecting the Machine Control Signal The digital signal input circuit includes the sink type and source type. These can be selected by each connector unit. Input circuit DIO (Machine side) (Machine side) 2.2kΩ DIO 2.2kΩ 24VDC(+) 0V 2.2kΩ 0V 24VDC(+) 2.2kΩ 24VDC(+) Control circuit COM Control circuit COM 0V Sink type Source type Input conditions The input signal must be used within the following condition range.
4.8 4. CONTROL UNIT CONNECTIONS Connecting the Machine Control Signal There are a sink type (HR881/882) and source type (HR883/884) digital signal output circuits. The SA (servo READY) output circuit is a source type. Use within the following specifications range.
4. CONTROL UNIT CONNECTIONS 4.9 Connecting the Remote I/O Unit 4.9 Connecting the Remote I/O Unit The RIO-M connector is used to connect the remote I/O unit. Connect the R211 cable from the RIO-M connector on the control unit to RIO1 on the remote I/O unit. When connecting multiple remote I/O units, connect the R211 cable from the RIO2 connector to the RIO1 connector on the next remote I/O unit. Connect the terminator (R-TM) to RIO2 connector on the final remote I/O unit.
4. CONTROL UNIT CONNECTIONS 4.9 Connecting the Remote I/O Unit When using the C64 and M600 Series, etc., as the master station and C6 as the slave station, use the RIO-M/S connector. Connect the R211 cable from the master station to the RIO-M/S connector on C6. When connecting multiple C6 units, use a relay cable or terminal block, etc., as a relay. Set the terminator ON/OFF slide switch SW2-2. Set the slave station number with the rotary switch CS2.
4. CONTROL UNIT CONNECTIONS 4.10 Connecting the RS-232C Device 4.10 Connecting the RS-232C Device The SIO connector is used to connect the RS-232C device (serial I/O). The F310 and F311 relay cables are required to connect the RS-232C cable. (Refer to the CABLE MANUFACTURING DRAWINGS for details.) Control unit LED1 Maximum cable length:15m Cross cable RS-232C relay F310 cable SIO or Cross cable 11 1 SIO connector pin No.
4.11 4.11 4. CONTROL UNIT CONNECTIONS Connecting Other Peripheral Devices Connecting Other Peripheral Devices When connecting the MELSEC PLC peripheral devices using the RS-422 interface, connect to the GPP connector side of the F311 relay cable connected to the SIO connector. When connecting using the RS-232C interface, use the cables indicated below and connect to the connector terminal. In this case, the general-purpose RS-232C port can be used together.
4.11 4. CONTROL UNIT CONNECTIONS Connecting Other Peripheral Devices (b) F314 (For personal computer/communication terminal) NC side (TERMINAL) (20pin half-pitch) Signal PC side Cable connection & Signal direction Pin No. (25pin D-SUB) Pin No.
4.11 4. CONTROL UNIT CONNECTIONS Connecting Other Peripheral Devices (5) RS-232C cable (F316) MELDAS C6/C64 side (20pin half-pitch) Signal GND GOT side Cable connection & Signal direction Pin No. 1 (9pin D-SUB) Pin No.
4.12 4.12 4. CONTROL UNIT CONNECTIONS Connecting the Display Unit with Ethernet Connecting the Display Unit with Ethernet To connect the display unit with Ethernet, the Ethernet card (FCU6-EX875) must be mounted to the extension slot EXT2 on the control unit. Connect the Ethernet cable to the modular jack on the Ethernet card. As the Ethernet cable is easily affected by noise, separate the drive line and power line, and install the enclosed ferrite core on the control unit side.
4. CONTROL UNIT CONNECTIONS Connecting the Network with MELSECNET/10 4.13 4.13 Connecting the Network with MELSECNET/10 The coaxial bus type and optical loop type networks can be used between the controllers in the MELSECNET/10 data link system. When using the coaxial bus type, the FCU6-EX878 MELSECNET/10 unit must be mounted in the control unit's extension slot, and when using the optical loop type, the FCU6-EX879 MELSECNET/10 unit must be mounted.
4.13 4. CONTROL UNIT CONNECTIONS Connecting the Network with MELSECNET/10 (2) Connecting the optical loop type MELSECNET/10 Connect a dedicated optical fiber cable to the optical connector on the MELSECNET/10 unit (FCU6-EX879). Control unit Control unit LED1 LED1 (Note 1) An indoor standard cable AS-2P-5M-A, etc., is recommended for the optical fiber cable. Consult with Mitsubishi Electric System Service. (Note 2) The optical loop system's optical module follows SI specifications.
4.14 4.14 4. CONTROL UNIT CONNECTIONS Connecting the IO Device with CC-Link Connecting the IO Device with CC-Link The CC-Link unit (FCU6-HR865) must be mounted in the control unit's extension slot to connect IO devices using CC-Link. Connect a dedicated CC-Link cable to the CC-Link unit (FCU6-HR865) terminal block. Always install the enclosed terminator on the final station. This unit functions as the CC-Link system's master and local station.
4.14 4. CONTROL UNIT CONNECTIONS Connecting the IO Device with CC-Link Wiring the CC-Link terminal block (1) Peel the cable's sheath, and separate the inner wire from the shield mesh. (2) Peel the shield mesh and the inner wire's sheath, and twist the core wires. Shield mesh 3-core twisted pair cable Approx. 10mm (3) Twist together one of the wires in the cables or the shield meshes of the cable to be connected to the previous station or next station.
4.15 4.15 4. CONTROL UNIT CONNECTIONS Connecting the IO Device with DeviceNet Connecting the IO Device with DeviceNet The DeviceNet unit (FCU6-EX871-40) must be mounted in the control unit's extension slot to connect IO devices with DeviceNet. Connect the dedicated DeviceNet cable to the DeviceNet unit's terminal block (enclosed).
4.15 4. CONTROL UNIT CONNECTIONS Connecting the IO Device with DeviceNet Wiring the DeviceNet terminal block (1) Peel the cable's sheath, and separate the inner wire from the shield mesh. (2) Peel the shield mesh and the inner wire's sheath, and twist the core wires. Shield mesh DeviceNet cable Approx. 10mm (3) Insert the wire's core wire into an opening on the terminal block, and tighten with a flat-tip screwdriver so that the wire does not dislocate.
4.16 4.16 4.
4.16 4.
Remote I/O 1 4.16 4.
5. CONNECTION OF COMMUNICATION TERMINAL 5.1 Outline of Communication Terminal 5. CONNECTION OF COMMUNICATION TERMINAL The communication terminal is described in this chapter. 5.1 Outline of Communication Terminal The communication terminal is configured of the display and keyboard. The following types are available according to the display type, etc. ◊ 7.2-type monochrome LCD/integrated keyboard FCUA-LD100 7.2-type LCD ◊ 7.2-type monochrome LCD/Keyboard separated type FCUA-LD10 FCUA-KB20/KB30 7.
5. CONNECTION OF COMMUNICATION TERMINAL 5.2 Connection of Power Supply 5.2 Connection of Power Supply The 24VDC must be supplied to the communication terminal. Prepare a stabilized power supply that satisfies the following conditions. The 9-type CRT type requires 100VAC for the CRT power supply.
5. CONNECTION OF COMMUNICATION TERMINAL 5.2 Connection of Power Supply 5.2.2 Connection of Power Supply to 10.4-type Monochrome LCD (FCU6-DUT32+KB021) Supply 24VDC to the CR01 connector on the rear of the LCD. Recommended adaptive connector (Enclosed with FCU6-DUT32) Connector : 2-178288-3 Contact : 1-175218-5 (tin plated) (Tyco Electronics AMP) Stabilized power supply (Prepare separately) Y R220 cable FG 3 0V 2 24VDC(+) 1 24VDC(+) 0V FG FG [FCU6-DUT32+KB021 rear view] OPERATION BOARD Ver.
5. CONNECTION OF COMMUNICATION TERMINAL 5.2 Connection of Power Supply 5.2.3 Connection of Power Supply to 9-type CRT (FCUA-CT100/FCUA-CR10+KB10) Supply 100VAC to the connector CRT2 on the rear of the CRT, and 24VDC to the connector CR01 on the rear of the keyboard.
5. CONNECTION OF COMMUNICATION TERMINAL 5.3 Internal Connections 5.3 Internal Connections (1) Internal connection of 7.2-type monochrome LCD (FCUA-LD100/FCUA-LD10+KB20) NZ24-2 cable R220 cable CR01 7.2-inch LCD 24VDC(+) CNZ22A CR03 Menu keys PCB To control unit J2 CNZ24 R000 cable Data keys CR02 CR05 J2 CR06 J1 CR03 cable R211 cable Remote I/O unit : Enclosed cable : Enclosed connector (2) Internal connection of 10.4-type monochrome LCD (FCU6-DUT32+KB021) 10.
5. CONNECTION OF COMMUNICATION TERMINAL 5.4 Connection of Remote I/O Unit 5.4 Connection of Remote I/O Unit A maximum of two remote I/O units can be connected to the communication terminal. Manufacture the R211 cable (refer to cable manufacturing drawings for details) and connect it to the connector CR5 on the rear of the communication terminal as shown below. Use the enclosed connectors and contacts. If the accessories are insufficient, use the CN211 connector set (optional, with one end).
5. CONNECTION OF COMMUNICATION TERMINAL 5.5 Example of Connecting Multiple Control Units to the Communication Terminal 5.
6. CONNECTION OF REMOTE I/O UNIT 6.1 Outline of Remote I/O Unit 6. CONNECTION OF REMOTE I/O UNIT This chapter describes the connection between remote I/O unit and machine control signals. 6.1 Outline of Remote I/O Unit The following ten types of remote I/O units (FCUA-DX ) are available, depending on the type of input/output signal and No.of contacts. Use serial link connections (MC link B) to connect the unit with the control unit or the communication terminal.
6. CONNECTION OF REMOTE I/O UNIT 6.2 Names of Each Remote I/O Unit Section 6.
6. CONNECTION OF REMOTE I/O UNIT 6.3 Setting the Station No. When Using Multiple Remote I/O Units 6.3 Setting the Station No. When Using Multiple Remote I/O Units When the remote I/O unit is connected with serial links (MC link B), multiple units can be used as long as the total No. of occupied stations is within 8 stations. Unit name No.
6. CONNECTION OF REMOTE I/O UNIT 6.4 Connection of Remote I/O Power Supply 6.4 Connection of Remote I/O Power Supply 24VDC(+) is required to run the remote I/O unit. Prepare a stabilized power supply that satisfies the following conditions. Output voltage 24VDC±5% Ripple ±5% (P-P) Max. output current FCUA-DX10 2.4A or more FCUA-DX11 3.8A or more FCUA-DX12 3.8A or more FCUA-DX13 3.4A or more FCUA-DX14 3.
6. CONNECTION OF REMOTE I/O UNIT 6.5 Outline of Digital Signal Input Circuit 6.5 Outline of Digital Signal Input Circuit The digital signal input circuit can be selected from sink type or source type in card units. Input circuit (Machine side) DI-L/DI-R 2.2kΩ 0V 2.2kΩ 0V 2.2kΩ 0V 2.2kΩ 0V 2.2kΩ Control circuit 0V 24VDC(+) A3,B3 COM Sink type (Machine side) DI-L/DI-R 24VDC(+) 2.2kΩ 24VDC(+) 2.2kΩ 24VDC(+) 2.2kΩ 24VDC(+) 2.2kΩ 24VDC(+) 2.
6. CONNECTION OF REMOTE I/O UNIT 6.5 Outline of Digital Signal Input Circuit Input conditions The input signals must be used within the following condition ranges. Sink type Input voltage at external contact ON 6V or less Input current at external contact ON 9mA or more Input voltage at external contact OFF 20V or more, 25.
6. CONNECTION OF REMOTE I/O UNIT 6.6 Outline of Digital Signal Output Circuit 6.6 Outline of Digital Signal Output Circuit The digital signal output circuit uses a sink type (DX10) or source type (DX11). Use within the specification ranges shown below.
6. CONNECTION OF REMOTE I/O UNIT 6.7 Outline of Analog Signal Output Circuit 6.7 Outline of Analog Signal Output Circuit The analog signal output circuit can be used only for the FCUA-DX120/DX121/DX140/DX141.
6. CONNECTION OF REMOTE I/O UNIT 6.8 Outline of Analog Signal Input Circuit 6.8 Outline of Analog Signal Input Circuit The analog signal input circuit can be used only for the FCUA-DX140/DX141. Input circuit 150Ω ADC AI AI* Input conditions Max. input rating Resolution Precision ±15V 10V/2000 (5mV) Within ±25mV AD input sampling time 14.2ms (AI0)/42.
6. CONNECTION OF REMOTE I/O UNIT 6.9 Connection of FCUA-DX10/13/14 Unit and Machine Control Signal 6.9 Connection of FCUA-DX10 /13 /14 Unit and Machine Control Signal Type of machine input/output signal and No. of points Input Output 32 points 32 points R300 cable/ R301 cable FCUA-DX10 or FCUA-DX13 or FCUA-DX14 DI-L Machine signal R300 cable/ R301 cable DO-L Machine signal The remote I/O unit cable types include the R300 and R301 cables.
6. CONNECTION OF REMOTE I/O UNIT 6.9 Connection of FCUA-DX10/13/14 Unit and Machine Control Signal FCUA-DX10/13/14 Machine side control panel, etc. DI-L When using two or more remote I/O units or when connecting to the communication terminal, the signal assignment will differ. Refer to the "PLC interface manual" for details.
6. CONNECTION OF REMOTE I/O UNIT 6.10 Connection of FCUA-DX11 Unit and Machine Control Signal 6.10 Connection of FCUA-DX11 Unit and Machine Control Signal Type of machine input/output signal and No. of points Input Output 64 points 48 points FCUA-DX11 R300 cable/ R301 cable DI-L DI-R Machine signal R300 cable/ R301 cable DO-R DO-L DCIN RIO2 RIO1 Machine signal The remote I/O unit cable types include the R300 and R301 cables.
6. CONNECTION OF REMOTE I/O UNIT 6.10 Connection of FCUA-DX11 Unit and Machine Control Signal FCUA-DX11 When using two or more remote I/O units or when connecting to the communication terminal, the signal assignment will differ. Refer to the "PLC interface manual" for details. DI-L Machine side control panel, etc.
6. CONNECTION OF REMOTE I/O UNIT 6.11 Connection of FCUA-DX12 Unit and Machine Control Signal 6.11 Connection of FCUA-DX12 Unit and Machine Control Signal Type of machine input/output signal and No. of points Input Output Analog output 64 points 48 points 1 point FCUA-DX12 R300 cable/ R301 cable DI-L Machine signal R300 cable/ R301 cable Machine signal DI-R DO-R DCIN RIO2 RIO1 DO-L The remote I/O unit cable types include the R300 and R301 cables.
6. CONNECTION OF REMOTE I/O UNIT 6.11 Connection of FCUA-DX12 Unit and Machine Control Signal FCUA-DX12 When using two or more remote I/O units or when connecting to the communication terminal, the signal assignment will differ. Refer to the "PLC interface manual" for details. DI-L Machine side control panel, etc.
6. CONNECTION OF REMOTE I/O UNIT 6.12 Connection of FCUA-DX13 Unit and Manual Pulse Generator 6.12 Connection of FCUA-DX13 Unit and Manual Pulse Generator When connecting the manual pulse generator, the R041 or R042 cable is connected to HANDLE. Up to two manual pulse generators can be connected. Use the CS000 connector set (optional, with both ends) when manufacturing the R041 or R042 cable. Connecting one manual pulse generator FCUA-DX13□ Manual pulse generator FCUA-HD60 Rear view NO.
6. CONNECTION OF REMOTE I/O UNIT 6.13 Outline of FCUA-DX13 Unit Pulse Input Circuit 6.13 Outline of FCUA-DX13 Unit Pulse Input Circuit When connecting a pulse generator other than the manual pulse generator (FCUA-HD60) to the FCUA-DX13 unit, use within the specifications range given below. Commercially available pulse generators include the 25P/R type and the 100P/R type. A pulse is multiplied by four internally, so use the 25P/R type.
6. CONNECTION OF REMOTE I/O UNIT 6.14 Connection of FCUA-DX14 Unit and Analog Input/Output Signal 6.14 Connection of FCUA-DX14 Unit and Analog Input/Output Signal For the analog input/output signal, the R031 cable is connected to AI0. Up to four input points and one output point of the analog input/output signal can be connected. When manufacturing the R031 cable, use the CS000 connector set (optional, with both ends). FCUA-DX14 AIO R031 cable 20 10 11 1 Pin No.
6. CONNECTION OF REMOTE I/O UNIT 6.15 Cables 6.15 Cables The remote I/O unit cable types include the R300 and R301 cables. The R300 cable has one end cut off, and the R301 cable is used for connections with the Izumi Denki terminal block BX1F-T40A (Note 1). The R300-3M and R301-3M cables are available. If a cable longer than 3m is required, use the CN300 or CS301 connector set. The R041-3M (one-piece) and R042-3M (two-piece) manual pulse generator cables are available.
APPENDIX 1 OUTLINE AND INSTALLATION DIMENSIONS FOR CONTROL UNIT Appendix 1.1 Outline and Installation Dimensions for Control Unit APPENDIX 1 OUTLINE AND INSTALLATION DIMENSIONS FOR CONTROL UNIT 15 10 350 360 15 10 2-M5×0.8 screw Top Top 6 Heat radiation allowance Outline and Installation Dimensions for Control Unit 50 Appendix 1.
APPENDIX 1 OUTLINE AND INSTALLATION DIMENSIONS FOR CONTROL UNIT Appendix 1.2 Outline and Installation Dimensions for Control Unit with External Extension Unit Outline and Installation Dimensions for Control Unit with External Extension Unit φ6 (15) (10) Appendix 1.2 MITSUBISHI (10) (15) 350 360 380 MELDAS C64 180(C64 dimension) 6 10 15 8 181.2(HR893 dimension) 1.6 Extension unit 60 360±0.3 380 10 2-M5 screw 30 60±0.3 60 60 10 150 130±0.
APPENDIX 2 OUTLINE AND INSTALLATION DIMENSIONS FOR COMMUNICATION TERMINAL Appendix 2.1 Outline and Installation Dimensions for FCUA-CT100 APPENDIX 2 OUTLINE AND INSTALLATION DIMENSIONS FOR COMMUNICATION TERMINAL Appendix 2.1 Outline and Installation Dimensions for FCUA-CT100 9 382(Square hole) 9 55 9 9 55 180 182(Square hole) MITSUBISHI 8-φ4hole(For M3 screw) 5 130 130 140 130 260 250 382 (Square hole dimensions) 190±0.2 182 (Square hole dimensions) 8-M3screw 130±0.2 130±0.2 130±0.
APPENDIX 2 OUTLINE AND INSTALLATION DIMENSIONS FOR COMMUNICATION TERMINAL Appendix 2.2 Outline and Installation Dimensions for FCUA-CR10 Appendix 2.2 Outline and Installation Dimensions for FCUA-CR10 242 (Square hole) 9 5 9 5 9 200 9 5 180 182 (Square hole) MITSUBISHI 5 130 120 5 6-φ4 hole(for M3 screw) 5 10 180 10 260 250 242 (Square hole dimensions) 190±0.2 182 (Square hole dimensions) 6-M3 screw 130±0.2 120±0.
OUTLINE AND INSTALLATION DIMENSIONS FOR COMMUNICATION TERMINAL Appendix 2.3 Outline and Installation Dimensions for FCUA-LD100 Appendix 2.3 Outline and Installation Dimensions for FCUA-LD100 9 382 (Square hole) 9 10 9 5 APPENDIX 2 130 130 140 130 260 70 4 382 (Square hole dimensions) 4 4 190±0.2 182 (Square hole dimensions) 4 8-M3 screw 130±0.2 130±0.2 130±0.
APPENDIX 2 OUTLINE AND INSTALLATION DIMENSIONS FOR COMMUNICATION TERMINAL Appendix 2.4 Outline and Installation Dimensions for FCUA-LD10 and KB20 Outline and Installation Dimensions for FCUA-LD10 and KB20 5 10 Appendix 2.4 5 10 200 190 180 MITSUBISHI 6-φ4 hole (for M3 screw) 5 130 70 5 120 5 180 190 200 4-φ4 hole (for M3 screw) 10 260 248 (square hole dimensions) 1 120±0.2 4 130±0.2 Panel cut drawing I - 79 190±0.2 190±0.
APPENDIX 2 OUTLINE AND INSTALLATION DIMENSIONS FOR COMMUNICATION TERMINAL Appendix 2.5 Outline and Installation Dimensions for FCU6-DUT32, KB021 Appendix 2.5 Outline and Installation Dimensions for FCU6-DUT32, KB021 210 Escutcheon M3x8 screw Protective cover 270 45 Menu keys 20 (50) READY TOOL PARAM EDIT MDI N G O A B X Y U V W F D D F L ! P Q R C Z DIAGN IN/OUT FO SFG 9$ 7 8 4 5 6 1 2 3 I J K + M S T EOB ( ) [ ] 0 .
APPENDIX 3 OUTLINE AND INSTALLATION DIMENSIONS FOR REMOTE I/O UNIT APPENDIX 3 OUTLINE AND INSTALLATION DIMENSIONS FOR REMOTE I/O UNIT 135 Heat radiation allowance 100 Top 168 70 150 40 Wiring allowance Bottom Installation Hole 2-M5-0.
APPENDIX 4 OUTLINE AND INSTALLATION DIMENSIONS FOR MANUAL PULSE GENERATOR APPENDIX 4 OUTLINE AND INSTALLATION DIMENSIONS FOR MANUAL PULSE GENERATOR 3 - M4 stud bolts L10 3.6 Packing t2.0 φ77±0.5 φ80±1 12V 0V A φ60±0.5 16 24 27±0.5 φ60±0.5 8.89 7.60 3 -φ4.8 Equal (Trisection) 120° φ62 φ72 Panel cut drawing I - 82 B +2 0 ±0.
APPENDIX 5 OUTLINE AND INSTALLATION DIMENSIONS FOR SYNCHRONOUS FEED ENCODER APPENDIX 5 OUTLINE AND INSTALLATION DIMENSIONS FOR SYNCHRONOUS FEED ENCODER 68 Caution plate Detector (1024P/rev) 56 φ50 -0.009 φ68 -0.025 68 56 20 Encoder side: 97F3102E20-29P (or equivalent) Adaptive cable side: MS3106A20-29S 2 5 4-φ5.4 hole 28 3 19.5 33 102 135 φ14.3 0 -0.11 2 φ15 -0.012 50 -0.042 -0.006 -0.017 1.15 +0.14 0 φ16 φ50 -0.009 -0.025 3 0+0.
APPENDIX 6 OUTLINE AND INSTALLATION DIMENSIONS FOR GROUNDING PLATE AND CLAMP FITTING APPENDIX 6 OUTLINE AND INSTALLATION DIMENSIONS FOR GROUNDING PLATE AND CLAMP FITTING The shield wire generally only needs to be grounded to the connector's case frame. However, the effect can be improved by directly grounding to the grounding plate as shown on the right. Install the grounding plate near each unit. Peel off part of the cable sheath as shown on the right to expose the shield sheath.
APPENDIX 7 APPENDIX 7 CABLE MANUFACTURING DRAWINGS CABLE MANUFACTURING DRAWINGS As a rule, most F/R cables used with this product are not sold by Mitsubishi. Thus, manufacture the required cables using the cable manufacturing drawings on the following pages as a reference. Note that the cable-compatible connectors can be purchased from Mitsubishi.
APPENDIX 7 CABLE MANUFACTURING DRAWINGS Appendix 7.1 F310 Cable Manufacturing Drawing Appendix 7.1 F310 Cable Manufacturing Drawing Application : Control unit - serial device connection (Cable from control unit to junction plate.) Assembly drawing No.
APPENDIX 7 CABLE MANUFACTURING DRAWINGS Appendix 7.2 F311 Cable Manufacturing Drawing Appendix 7.2 F311 Cable Manufacturing Drawing Application : Control unit - serial device connection (Cable from control unit to junction plate.) No.
APPENDIX 7 CABLE MANUFACTURING DRAWINGS Appendix 7.3 F320 Cable Manufacturing Drawing Appendix 7.3 F320 Cable Manufacturing Drawing Application : Control unit - manual pulse generator connection (When connecting one manual pulse generator) Option (Compatible connector set) FCUA-CS000 (Note that only the control unit connector is compatible) List of parts used Assembly drawing Control unit side 1 No.
APPENDIX 7 CABLE MANUFACTURING DRAWINGS Appendix 7.4 F321 Cable Manufacturing Drawing Appendix 7.4 F321 Cable Manufacturing Drawing Application : Control unit - manual pulse generator connection (When connecting two manual pulse generators) Option (Compatible connector set) FCUA-CS000 (Note that only the control unit connector is compatible) List of parts used Assembly drawing Control unit side 1 No.
APPENDIX 7 CABLE MANUFACTURING DRAWINGS Appendix 7.5 F322 Cable Manufacturing Drawing Appendix 7.5 F322 Cable Manufacturing Drawing Application : Control unit - manual pulse generator connection (When connecting three manual pulse generators) Option (Compatible connector set) FCUA-CS000 (Note that only the control unit connector is compatible) List of parts used Assembly drawing Control unit side 1 No.
APPENDIX 7 CABLE MANUFACTURING DRAWINGS Appendix 7.6 F340 Cable Manufacturing Drawing Appendix 7.6 F340 Cable Manufacturing Drawing Application : External skip signal input (4 points) List of parts used Assembly drawing Skip signal input Cotrol unit side 2 3 SKIP 1 4 No. Maker Q'ty 1 Connector CDE-9PF Hirose Electric 1 2 Contact CD-PC-111 Hirose Electric 8 3 Connector case HDE-CTH Hirose Electric 1 4 Wire material B-22(19)X2SJ-1X9 Sumitomo Denko (4) 5 Crimp terminal V1.25-4 J. S.
APPENDIX 7 CABLE MANUFACTURING DRAWINGS Appendix 7.7 F350 Cable Manufacturing Drawing Appendix 7.7 F350 Cable Manufacturing Drawing Application : Control unit - machine electric cabinet List of parts used No.
APPENDIX 7 CABLE MANUFACTURING DRAWINGS Appendix 7.8 F351 Cable Manufacturing Drawing Appendix 7.8 F351 Cable Manufacturing Drawing Application : Extension DIO - machine electric cabinet List of parts used No.
APPENDIX 7 CABLE MANUFACTURING DRAWINGS Appendix 7.9 FCUA-R000 Cable Manufacturing Drawing Appendix 7.9 FCUA-R000 Cable Manufacturing Drawing Application : Control unit – servo drive unit connection Servo drive unit – servo drive unit connection Control unit - communication terminal connection, etc. Option (Compatible connector set) FCUA-CS000 List of parts used Assembly drawing No.
APPENDIX 7 CABLE MANUFACTURING DRAWINGS Appendix 7.10 FCUA-R050 Cable Manufacturing Drawing Appendix 7.10 FCUA-R050 Cable Manufacturing Drawing Application : Control unit - synchronous feed encoder connection (Straight type) Option (Compatible connector set) FCUA-CS050 List of parts used Assembly drawing No.
APPENDIX 7 CABLE MANUFACTURING DRAWINGS Appendix 7.11 FCUA-R051 Cable Manufacturing Drawing Appendix 7.11 FCUA-R051 Cable Manufacturing Drawing Application : Control unit - synchronous feed encoder connection (Straight type) Option (Compatible connector set) FCUA-CS050 List of parts used Assembly drawing No.
APPENDIX 7 CABLE MANUFACTURING DRAWINGS Appendix 7.12 FCUA-R054 Cable Manufacturing Drawing Appendix 7.12 FCUA-R054 Cable Manufacturing Drawing Application : Control unit - synchronous feed encoder connection (Right angle type) Option (Compatible connector set) FCUA-CS054 List of parts used Assembly drawing No.
APPENDIX 7 CABLE MANUFACTURING DRAWINGS Appendix 7.13 FCUA-R055 Cable Manufacturing Drawing Appendix 7.13 FCUA-R055 Cable Manufacturing Drawing Application : Control unit - synchronous feed encoder connection (Right angle type) Option (Compatible connector set) FCUA-CS054 List of parts used Assembly drawing No.
APPENDIX 7 CABLE MANUFACTURING DRAWINGS Appendix 7.14 FCUA-R211 Cable Manufacturing Drawing Appendix 7.14 FCUA-R211 Cable Manufacturing Drawing Application: Control unit – remote I/O unit connection Remote I/O unit – remote I/O unit connection Remote I/O unit – communication terminal connection Option (Compatible connector set) FCUA-CN211 (Note that when a one end connector and contact are used, there is no crimp terminal) List of parts used Assembly drawing No.
APPENDIX 7 CABLE MANUFACTURING DRAWINGS Appendix 7.15 FCUA-R220 Cable Manufacturing Drawing Appendix 7.15 FCUA-R220 Cable Manufacturing Drawing Application: Supply of 24V to control unit, remote I/O unit and communication terminal Option (Compatible connector set) FCUA-CN220 (Note that this corresponds only to the connector on the control unit side.) List of parts used Assembly drawing No.
APPENDIX 7 CABLE MANUFACTURING DRAWINGS Appendix 7.16 F300 Cable Manufacturing Drawing Appendix 7.16 F300 Cable Manufacturing Drawing Application : Main card in control unit – front panel internal connection List of parts used Assembly drawing 1 No.
Connector (3M) 10120-3000VE × 1 pc. I – 102 Control unit - Synchronous encoder Control unit - Synchronous encoder CS050 CS054 Connector (3M) 10120-3000VE × 1 pc. Connector (3M) 10120-3000VE × 1 pc. Control unit - RS-232-C device for relay Lock nut (Japan Aviation Electronics) D20418-J3 × 2 pcs. CS020 Connector (3M) 10120-3000VE × 1 pc. Connector (3M) 10120-3000VE × 2 pcs. Connector (3M) 10320-52F0-008 × 1 pc. Connector (3M) 10320-52F0-008 × 1 pc.
Remote I/O unit Remote I/O unit - terminal block CN301 24VDC power supply connector CN220 AMP D-3 Connector (Tyco Electronics AMP) 2-178288-3 × 1 pc. AMP Connector (3M) 7940-6500SC × 4 pcs. Connector (3M) 7940-6500SC × 2 pcs. Y CN300 IO communication connector CN211 Connector (Tyco Electronics AMP) 1-178288-3 × 1 pc. X Y Application Y D-3 Connector type The procurement type is FCUA-CS/CN□□□. Strain relief (3M) 3448-7940 × 2 pcs. Tin contact (Tyco Electronics AMP) 1-175218-5 × 3 pcs.
APPENDIX 9 EMC INSTALLATION GUIDELINES Appendix 9.1 Introduction APPENDIX 9 EMC INSTALLATION GUIDELINES The pages related to the C6/C64 excerpted from the "EMC Installation Guidelines BNP-B2230" are provided in this section. Refer to the "EMC Installation Guidelines [BNP-B8582-45]" for details on the drive section (servo drive unit/spindle drive unit). Appendix 9.1 Introduction EMC Directives became mandatory as of January 1, 1996.
APPENDIX 9 EMC INSTALLATION GUIDELINES Appendix 9.2 EMC Directives Appendix 9.2 EMC Directives The EMC Directives largely regulate the following two items. • Emission ..... Capacity to prevent output of obstructive noise that adversely affects external devices. • Immunity ..... Capacity not to malfunction due to obstructive noise from external source. The details of each level are classified below in Table 1.
APPENDIX 9 EMC INSTALLATION GUIDELINES Appendix 9.3 EMC Countermeasures Appendix 9.3 EMC Countermeasures The main items relating to EMC countermeasures include the following. (1) Store the device in a sealed metal panel. (2) Ground all conductors that are floating electrically. Decrease the impedance. (3) Increase the distance between the drive line and signal wire. (4) Shield the cables wired outside of the panel. (5) Install a noise filter.
APPENDIX 9 EMC INSTALLATION GUIDELINES Appendix 9.4 Panel Structure Appendix 9.4 Panel Structure The design of the panel is a very important factor for the EMC countermeasures, so take the following countermeasures into consideration. Appendix 9.4.1 Countermeasures for control panel body (1) Use metal for all members configuring the panel. (2) When joining the top plate and side plates, etc., treat the welded or contacting sections so that the impedance is reduced, and then fix with screws.
APPENDIX 9 EMC INSTALLATION GUIDELINES Appendix 9.4 Panel Structure Appendix 9.4.2 Countermeasures for door (1) Use metal for all members configuring the door. (2) When joining the door, use a gasket to lower the impedance of the contacting sections, or use a structure with a large contact area as shown below.
APPENDIX 9 EMC INSTALLATION GUIDELINES Appendix 9.4 Panel Structure Appendix 9.4.3 Countermeasures for power supply (1) Shield the power supply section and insert a filter to prevent the noise from flowing in or out. Selection of the noise filter capacity will differ according to the drive amplifier and devices being used. Refer to the "EMC Installation Guidelines" NC Servo Amplifier Section [BNP-B8582-45].
APPENDIX 9 EMC INSTALLATION GUIDELINES Appendix 9.5 Countermeasures for Wiring in Panel Appendix 9.5 Countermeasures for Wiring in Panel Cables act as antennas to propagate unnecessary noise, and thus must be appropriately shielded and treated. The following countermeasures must be sufficiently considered for the cables (FCUA-R000 /FCUA-R211) that carry out high-speed communication. Appendix 9.5.
APPENDIX 9 EMC INSTALLATION GUIDELINES Appendix 9.5 Countermeasures for Wiring in Panel Appendix 9.5.
APPENDIX 9 EMC INSTALLATION GUIDELINES Appendix 9.5 Countermeasures for Wiring in Panel Appendix 9.5.3 Shield treatment of cables Use shielded cables for the cables wired outside the panel in the C6/C64 Series. Use a shield clamp (refer to 9.6.1) within 10cm of the lead-out port from the panel. (1) DC power supply cable [FCUA-R220 cable] • Use a shield clamp within 10cm from the panel's inlet/outlet. • Install a ferrite core on both ends of the connected units.
APPENDIX 9 EMC INSTALLATION GUIDELINES Appendix 9.5 Countermeasures for Wiring in Panel (3) Servo communication cable [FCUA-R000 cable] • Use a shield clamp within 10cm from the panel's inlet/outlet. • Install a ferrite core on both ends of the connected units. • The shield clamp and ferrite core are not required if the control unit and drive section unit are wired in the same panel.
APPENDIX 9 EMC INSTALLATION GUIDELINES Appendix 9.6 Parts for EMC Countermeasures Appendix 9.6 Parts for EMC Countermeasures Appendix 9.6.1 Shield clamp fitting The effect can be enhanced by directly connecting the outer sheath of the cable to the grounding plate as shown below. Install the grounding plate near the outlet (within 10cm) of each panel, and press against the grounding plate with the clamp fitting. If the cables are thin, several can be bundled and clamped together.
APPENDIX 9 EMC INSTALLATION GUIDELINES Appendix 9.6 Parts for EMC Countermeasures Appendix 9.6.2 Ferrite core The ferrite core is mounted integrally with the plastic case. This can be installed with one touch without cutting the interface cable or power supply cable. This ferrite core is effective against common mode noise, allowing countermeasures against noise without affecting the quality of the signal.
APPENDIX 9 EMC INSTALLATION GUIDELINES Appendix 9.6 Parts for EMC Countermeasures Appendix 9.6.3 Surge protector (1) Surge absorber Make sure that surge does not directly enter the AC line of the general-purpose stabilized power supply (prepared by user) supplied to the control unit and DIO. The following product or equivalent is recommended for the surge killer. (1) Part name : RAV-781BYZ-2 Manufacturer : Okatani Denki Sangyo Circuit voltage 50/60Hz Vrms Max.
APPENDIX 9 EMC INSTALLATION GUIDELINES Appendix 9.6 Parts for EMC Countermeasures (2) Part name : RAV-781BYZ-4 Manufacturer : Okatani Denki Sangyo Circuit voltage 50/60Hz Vrms Max. tolerable circuit voltage 250V 3ø 300V V ± 10% Surge resistance level 8/20µs Surge withstand voltage 1.2/50µs 700V 2500A 2kV Clamp voltage Outline drawing Working Static temperature capacity range 75pF –20°C to +70°C (1) Black (2) Black (3) Black Green 28.5±1 5.5±1 11±1 Circuit drawing 28±1 4.5±0.
APPENDIX 9 EMC INSTALLATION GUIDELINES Appendix 9.6 Parts for EMC Countermeasures (2) Example of surge absorber installation No-fuse breaker Transformer NC control section Other devices (panel power supply, etc.) From power supply Earth leakage breaker for panel No-fuse breaker Control panel (Relay panel, etc.) Reactor MC NC drive section Input 200V/ 230VAC A B Other devices (power supply for panel, etc.
APPENDIX 9 EMC INSTALLATION GUIDELINES Appendix 9.6 Parts for EMC Countermeasures Appendix 9.6.4 Selection of stabilized power supply Consider the following characteristics when selecting the stabilized power supply (prepared by user). Use a power supply that complies with CE Marking or that follows the Safety Standards given below. Stabilized power supply selection items Item ±5% ±5% or less of 24VDC output Ripple noise Max. 120mV ±5% or less of 24VDC output Spike noise Max.
II.
1. OUTLINE 1.1 Table of Configuration Lists 1. OUTLINE 1.1 Table of Configuration Lists The C6/C64 control unit is configured of the following modules. Module configuration table Configuration module No.
1. OUTLINE 1.2 Control Section Module Configuration 1.
2. EXPLANATION OF MODULE FUNCTIONS 2.1 HR851 Card 2. EXPLANATION OF MODULE FUNCTIONS 2.1 HR851 Card [Block diagram] RISC DRAM Cassette memory (For maintenance) CBUS ICCARD CPU peripheral control PLC operation RTC SRAM External power supply 24VDC/3A DCIN FLROM RTBUS SV2 SV1 HANDLE TERMINAL ENC SIO RIO-M SKIP Battery 3.6V BAT External I/O interface +5V Power supply circuit (DC/DC) RIO-M/S DIO [Explanation of functions] The HR851 card functions as the main CPU.
2. EXPLANATION OF MODULE FUNCTIONS 2.
2. EXPLANATION OF MODULE FUNCTIONS 2.2 HR899 Card 2.2 HR899 Card [Block diagram] SLOT ICCARD [Explanation of functions] The HR899 card functions as the IC Card interface.
2. EXPLANATION OF MODULE FUNCTIONS 2.3 HR891 Card 2.3 HR891 Card [Block diagram] RTBUS For HR851 card connection RT2 RT1 For extension card connection For extension card connection [Explanation of functions] The HR891 card functions as the control unit's back panel.
2. EXPLANATION OF MODULE FUNCTIONS 2.4 HR881/882/883/884 Card 2.4 HR881/882/883/884 Card [Block diagram] DI RTBUS DI I/F Machine input 32 points MAC303 DO I/F DO Connect to control unit’s back panel Machine output 32 points AO I/F MAC303 [Explanation of functions] The HR881/882/883/884 card functions as the control unit built-in extension DIO.
2. EXPLANATION OF MODULE FUNCTIONS 2.5 HR875/876 Card 2.5 HR875/876 Card [Block diagram] ETHERNET Connect to control unit’s back panel SSRAM RAM PLD EXTPCI2 PCIEXT RTBUS Add-on connector Ethernet Controller Physical layer Transceiver Twisted pair cable Transformer EEPROM Modular jack SRAM HR876 HR875 [Explanation of functions] The HR875/876 card functions as the 10Base-T Ethernet. □ Bus conversion section (Base PCB ...
2. EXPLANATION OF MODULE FUNCTIONS 2.6 HR877/878 Card 2.6 HR877/878 Card [Block diagram] System ROM Work RAM MPU * MDP1 RTBUS 16-bit bus Buff Add-on connector Gate array for bus I/F LED Gate array for transmission I/F ENCO/DECO PLD 2-port RAM Tr/Re Coaxial cable Medium I/F Rotary switch, setting, etc. HR878 HR877 MDP:Mitsubishi DataLink Processer [Explanation of functions] The HR877/878 card functions as the MELSECNET/10 (coaxial bus interface).
2. EXPLANATION OF MODULE FUNCTIONS 2.6 HR877/878 Card [Connector layout diagram] MODE ISP x 100 x 10 NETWORK x1 x 10 x1 GROUP STATION DIPSW [Explanation of settings] NETWORK : Network No. setting switch Set the network number between 1 and 239 with the three rotary switches. The I/F board group No. is the number used when setting the local station network number if connecting to MELSECNET/10. ×100 switch : Set the 100th place of the network number.
2. EXPLANATION OF MODULE FUNCTIONS 2.7 HR877/879 Card 2.7 HR877/879 Card [Block diagram] System ROM Work RAM MPU * MDP2 RTBUS Add-on connector Gate array for bus I/F PLD LED 16-bit bus Buff 2-port RAM Gate array for transmission I/F Medium I/F Optical fiber cable Medium I/F Rotary switch, setting, etc. HR879: SI type (500m between stations) HR879 HR877 MDP:Mitsubishi DataLink Processer [Explanation of functions] HR877/879 functions as MELSECNET/10 (optical loop interface).
2. EXPLANATION OF MODULE FUNCTIONS 2.7 HR877/879 Card [Connector layout diagram] MODE ISP T OUT R T IN R x 100 x 10 x1 NETWORK GROUP x 10 x1 STATION DIPSW [Explanation of settings] NETWORK : Network No. setting switch Set the network number between 1 and 239 with the three rotary switches. The I/F board group No. is the number used when setting the local station network number if connecting to MELSECNET/10. ×100 switch : Set the 100th place of the network number.
2. EXPLANATION OF MODULE FUNCTIONS 2.8 HR865 Card 2.8 HR865 Card [Block diagram] RTBUS PROM Gate array for bus I/F Terminal block CC-Link master gate array CPU OI EEPROM DC/DC PLD 2-port RAM SRAM Rotary switch, setting, etc. [Explanation of functions] The HR865 card functions as the CC-Link's master/local station.
2. EXPLANATION OF MODULE FUNCTIONS 2.
2. EXPLANATION OF MODULE FUNCTIONS 2.8 HR865 Card [Explanation of LEDs] L1 L2 L3 L4 L5 L6 L7 L8 R1 R2 R3 R4 R5 R6 R7 R8 LED display status LED name L1 RUN L2 ERR. Details ON : Unit is normal OFF : Watch dog timer error has occurred. Indicates the state of communication with station set in parameters.
2. EXPLANATION OF MODULE FUNCTIONS 2.9 HR871 Card 2.9 HR871 Card [Block diagram] DNM RTBUS EEPROM RS232C C2 32 SR PLD LED DPORT STA1,STA2 SIO DNET DeviceNet master module [Explanation of functions] The HR871 card functions as the DeviceNet master when the DeviceNet master module is added on.
3. TROUBLESHOOTING 3.1 List of Unit LEDs 3. TROUBLESHOOTING 3.
3. TROUBLESHOOTING 3.2 Troubleshooting 3.2 3.2.1 Troubleshooting Confirmation of trouble state Confirm "when", "when doing what", and "what kind of" trouble occurred. (1) When? What time did the trouble occur? (2) When doing what? What was the NC operation mode? • During automatic operation ......... Program No., sequence No. and program details when the trouble occurred. • During manual operation .............
3. TROUBLESHOOTING 3.2 Troubleshooting 3.2.2 When in trouble If the system does not operate as planned or if there is any trouble in the operation, confirm the following points and then contact the Mitsubishi Service Center. − Examples of trouble − • The power does not turn ON. • The power turns OFF suddenly. • Nothing appears in the screen. • The operation keys do not function. • Machining operation is not possible.
3. TROUBLESHOOTING 3.2 Troubleshooting (1) Problems related to the power supply The power does not turn ON. Cause The door interlock is applied. Remedy If the control panel door is not completely closed, close it. If the door interlock is applied even when the door is closed, the door interlock circuit is damaged. The external power supply's input Check that the input voltage is within 200 to 230VAC +10 voltage is not as specified. to –15%. The external power supply is faulty.
3. TROUBLESHOOTING 3.2 Troubleshooting The power turns OFF. Cause There is a problem in the power supply. A problem occurs when the peripheral device starts operating. Remedy Check whether the voltage fluctuates at certain time zones. Check whether an instantaneous power failure has occurred. Check whether the voltage drops instantaneously when the peripheral device operation starts. The BTAL (red) LED on the control unit lights.
3. TROUBLESHOOTING 3.2 Troubleshooting (3) Problems related to remote I/O The communication alarm LED ALM (red) lights. Cause Remedy The remote connection cable is Check the connection of the R211 cable between the NC not connected. control section and remote I/O unit. The cable is disconnected or has a connector contact fault. The remote I/O unit is faulty. Contact the Mitsubishi Service Center, and then replace the card. The power system LED POWER (green) turns OFF.
4. DAILY MAINTENANCE AND PERIODIC INSPECTION AND MAINTENANCE 4.1 Maintenance Tools 4. DAILY MAINTENANCE AND PERIODIC INSPECTION AND MAINTENANCE 4.1 Maintenance Tools (1) Measuring instruments The following measuring instruments are used to confirm that the voltage is being supplied correctly to the NC unit, to confirm that the wiring to the NC unit is correct, and to carry out simple troubleshooting. Table 2.
4. DAILY MAINTENANCE AND PERIODIC INSPECTION AND MAINTENANCE 4.2 Maintenance Items 4.2.1 Escutcheon (1) Cleaning the escutcheon 1) Keep the rear side of the escutcheon as clean as possible. 2) Wipe the escutcheon with a soft, clean, dry cloth. If cleaning is still required, put some neutral detergent on a cloth and wipe. Do not use alcohol, thinner, etc. 4.2.
4. DAILY MAINTENANCE AND PERIODIC INSPECTION AND MAINTENANCE 4.3 Replacement Methods 4.3 Replacement Methods 4.3.1 Cable If the cable is replaced without turning the power OFF, the normal unit or peripheral devices could be damaged, and risks could be imposed. Disconnect each cable with the following procedures. (1) For the following type of connector, press the tabs with a thumb and forefinger in the direction of the arrow, and pull the connector off.
4. DAILY MAINTENANCE AND PERIODIC INSPECTION AND MAINTENANCE 4.3 Replacement Methods (2) For a flat cable type connector with latches, open the latches in the directions of the arrows, and pull the connector off. (1) Open (2) Pull (3) For a flat cable type connector without latches, hold the connector with a thumb and forefinger, and pull the connector off. (1) Hold with thumb and forefinger. (2) Pull (4) For the screw fixed type connector, loosen the two fixing screws, and pull the connector off.
4. DAILY MAINTENANCE AND PERIODIC INSPECTION AND MAINTENANCE 4.3 Replacement Methods 4.3.2 Durable parts (1) Battery All data, such as the parameters and machining programs that need to be backed up when the power is turned OFF, are saved by a lithium battery installed in the control unit battery holder. Battery ................................ With ER6 connector (Toshiba with Mitsubishi specifications) Initial battery voltage .......... 3.6V Voltage at which voltage .... 2.
4. DAILY MAINTENANCE AND PERIODIC INSPECTION AND MAINTENANCE 4.3 Replacement Methods (2) Cooling fan A fan is mounted on the control unit to cool the inside of the control unit. Applicable cooling fan ........... 109P0424H702 (Sanyo Denki) or MMF-04C24DS-ROF (Melco Technolex) Cooling fan life....................... 30,000 hours Always turn the control section power OFF before replacing the control unit's cooling fan. (1) Confirm that the control unit power is OFF. (If the power is not OFF, turn it OFF.
4. DAILY MAINTENANCE AND PERIODIC INSPECTION AND MAINTENANCE 4.3 Replacement Methods 4.3.3 Control Unit (1) Control unit Always turn the machine power OFF before replacing the control unit. (1) Disconnect all cables connected to the control unit. (2) Remove all cards mounted in the control unit's extension slots. (3) Loosen screw A. (There is no need to remove the screw.) (4) While supporting the control unit with a hand, remove screw B. (5) Lift up and remove the control unit.
4. DAILY MAINTENANCE AND PERIODIC INSPECTION AND MAINTENANCE 4.3 Replacement Methods (2) Remote I/O unit Always turn the machine power OFF before replacing the remote I/O control unit. (1) Disconnect all cables connected to the remote I/O unit. (2) Loosen screw A. (There is no need to remove the screw.) (3) While supporting the unit with the left hand, remove screw B. (4) Lift up and remove the remote I/O unit. (5) Replace with a new remote I/O unit, and fix the remote I/O unit with the fixing screws.
4. DAILY MAINTENANCE AND PERIODIC INSPECTION AND MAINTENANCE 4.3 Replacement Methods 4.3.4 Control PCB (1) Main card Always turn the control unit power OFF before replacing the main card. (1) Confirm that the control unit power is OFF. (If the power is not OFF, turn it OFF.) (2) Disconnect all cables connected to the control unit's connectors. (3) Remove all cards mounted in the control unit's extension slots.
4. DAILY MAINTENANCE AND PERIODIC INSPECTION AND MAINTENANCE 4.3 Replacement Methods (2) Extension card Always turn the control unit power OFF before replacing the extension card. (1) Confirm that the control unit power is OFF. (If the power is not OFF, turn it OFF.) (2) Disconnect all cables connected to the extension card's connectors. (3) Open the card puller on the extension card outward, and pull the card out. Hold the card puller section, and take care not to touch the PCB.
Revision History Date of revision Manual No. Nov. 1999 BNP-B2255A Correction of mistakes; Addition of Appendix 9 EMC Installation Guidelines Nov. 2000 BNP-B2255B • Details related to generation of smoke added to "Safety Precautions". Revision details • Caution regarding installation of ferrite core added to "I-5.13 Connecting the Display Unit with Ethernet". • Details related to SA output to "II-3.2 Troubleshooting". • Other mistakes corrected. Nov.
Notice Every effort has been made to keep up with software and hardware revisions in the contents described in this manual. However, please understand that in some unavoidable cases simultaneous revision is not possible. Please contact your Mitsubishi Electric dealer with any questions or comments regarding the use of this product. Duplication Prohibited This instruction manual may not be reproduced in any form, in part or in whole, without written permission from Mitsubishi Electric Corporation.
MITSUBISHI ELECTRIC CORPORATION HEAD OFFICE : MITSUBISHI DENKI BLDG., 2-2-3, MARUNOUCHI, CHIYODA-KU, TOKYO 100-8310, JAPAN MODEL MC6/C64 MODEL CODE 008-107 Manual No. BNP-B2255E(ENG) Specifications subject to change without notice. (0403) MEE Printed in Japan on recycled paper.