
- Mitsubishi Digital Electronics Usr's Manual DATA PROJECTOR
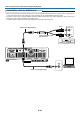
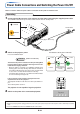

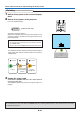
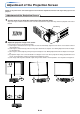
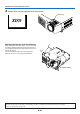
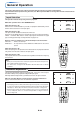
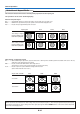
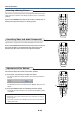
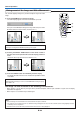
Table Of Contents
- INDEX
- User Manual
- IMPORTANT SAFETY INFORMATION
- Major Features
- Table of Contents
- Checking the Supplied Accessories
- Names of the Main Unit Parts
- Names of the Remote Control Parts/Preparing the Remote Control
- The Procedure Up to Projecting to the Screen
- Placement Guide
- Connecting Personal Computers and Video Equipment
- Power Cable Connections and Switching the Power On/Off
- Adjustment of the Projection Screen
- General Operation
- Input Selection
- Automatic Adjustment
- Selection of Aspect Ratio
- Freezing a Moving Picture
- Cancelling Video and Audio Temporarily
- Adjustment of the Volume
- Enlargement of the Image and Video Movement
- Using the Presentation Timer
- Using the Laser Pointer
- Performing Mouse Operations on the Computer with the Remote Control Unit
- Controlling the Projector from a Computer
- Protecting the Projector with the Security Lock
- Using the Quick Menu
- Menu Operation Method
- Image
- Color
- View
- Setup
- Option
- Info.
- When an Indicator is Lit or Flashing
- Troubleshooting
- Cleaning
- Replacing the Lamp Cartridge
- Specifications
- Table of Supported Frequency
- Cabinet Dimensions
E-27
General Operation
Selection of Aspect Ratio
This function selects horizontal and vertical picture proportions of the input signal.
The operations are the same. See E-49 [Aspect].
Personal Computer Signal
Auto ............ Automatically enlarges or reduces the image to project a full screen in a ratio of 4:3
Direct .......... Maintains the aspect ratio and projects a picture of the maximum displayable size
Real ............ Projects the input signal without pixel conversion
Note:
When selection has been made for the “Real” setting of the personal computer signal (i.e., when the input signal and the projector display
resolution are high) and the “Zoom” setting of the video signal, pressing the SELECT
왖왔왗왘
buttons on the remote control will permit
movement of the display position.
Input Signal Auto Direct Real
The setting is higher
than the display reso-
lution of the projector.
The setting is lower
than the display reso-
lution of the projector.
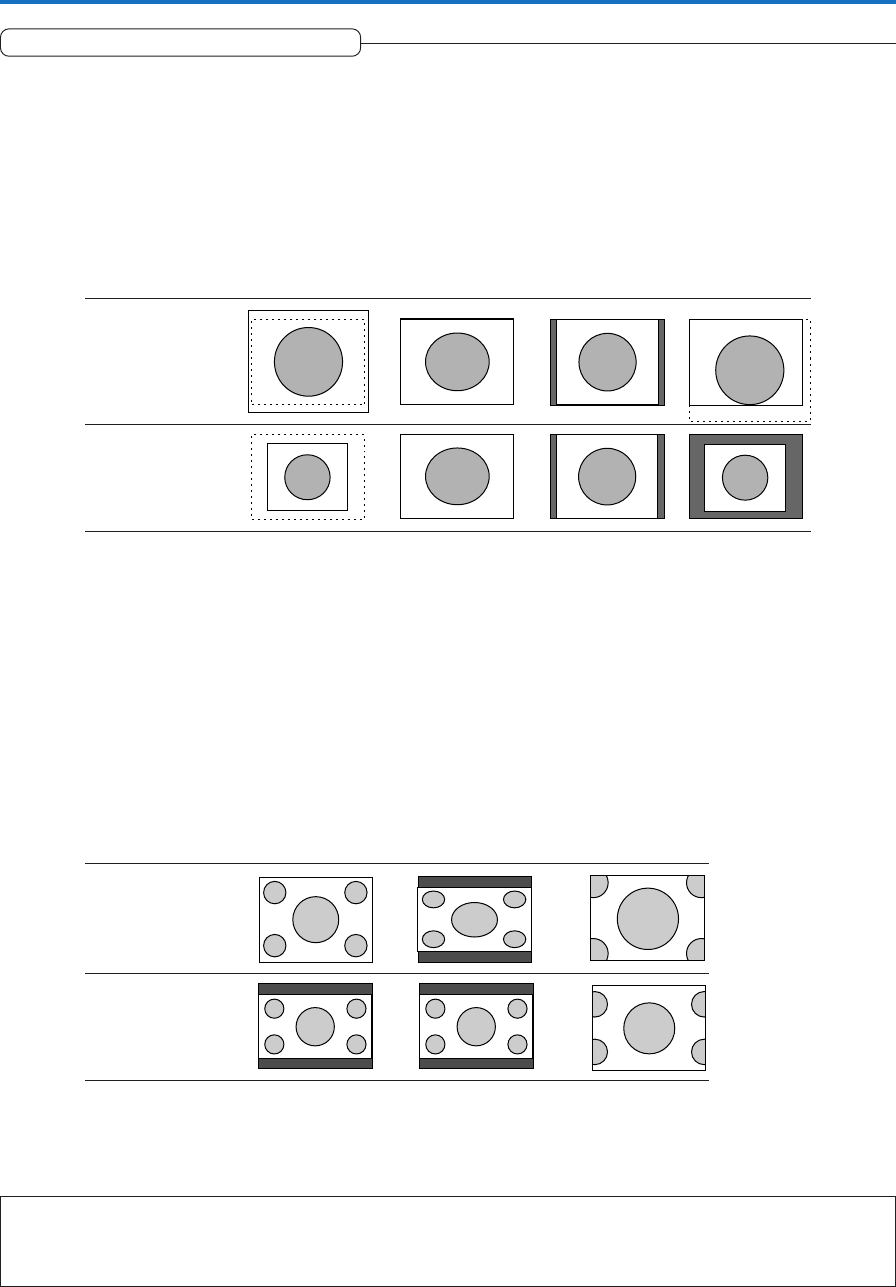
Video Signals / Component Signals
Auto ............ While maintaining the aspect ratio, projects a full screen so that no portions extend beyond the boundaries of the screen. The top
and bottom of the 16:9 image becomes black.
Wide ........... Projects to fill the full width with the entire image at 16:9.
(This feature is used to project a squeezed image in a proper aspect ratio.)
Zoom .......... Projects only the 4:3 portion within 16:9 image to fill the screen.
(Portion that extend off screen is cut.)
Aspect ratio selection Auto Wide Zoom
4:3 screen
16:9 screen