
- Mitsubishi Digital Electronics Usr's Manual DATA PROJECTOR
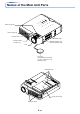
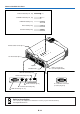
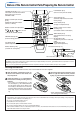
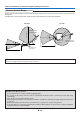
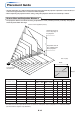
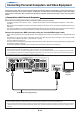
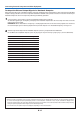
Table Of Contents
- INDEX
- User Manual
- IMPORTANT SAFETY INFORMATION
- Major Features
- Table of Contents
- Checking the Supplied Accessories
- Names of the Main Unit Parts
- Names of the Remote Control Parts/Preparing the Remote Control
- The Procedure Up to Projecting to the Screen
- Placement Guide
- Connecting Personal Computers and Video Equipment
- Power Cable Connections and Switching the Power On/Off
- Adjustment of the Projection Screen
- General Operation
- Input Selection
- Automatic Adjustment
- Selection of Aspect Ratio
- Freezing a Moving Picture
- Cancelling Video and Audio Temporarily
- Adjustment of the Volume
- Enlargement of the Image and Video Movement
- Using the Presentation Timer
- Using the Laser Pointer
- Performing Mouse Operations on the Computer with the Remote Control Unit
- Controlling the Projector from a Computer
- Protecting the Projector with the Security Lock
- Using the Quick Menu
- Menu Operation Method
- Image
- Color
- View
- Setup
- Option
- Info.
- When an Indicator is Lit or Flashing
- Troubleshooting
- Cleaning
- Replacing the Lamp Cartridge
- Specifications
- Table of Supported Frequency
- Cabinet Dimensions
E-19
CrCbY
PrPbY
COMPONENT
COMPONENT
Connecting Personal Computers and Video Equipment
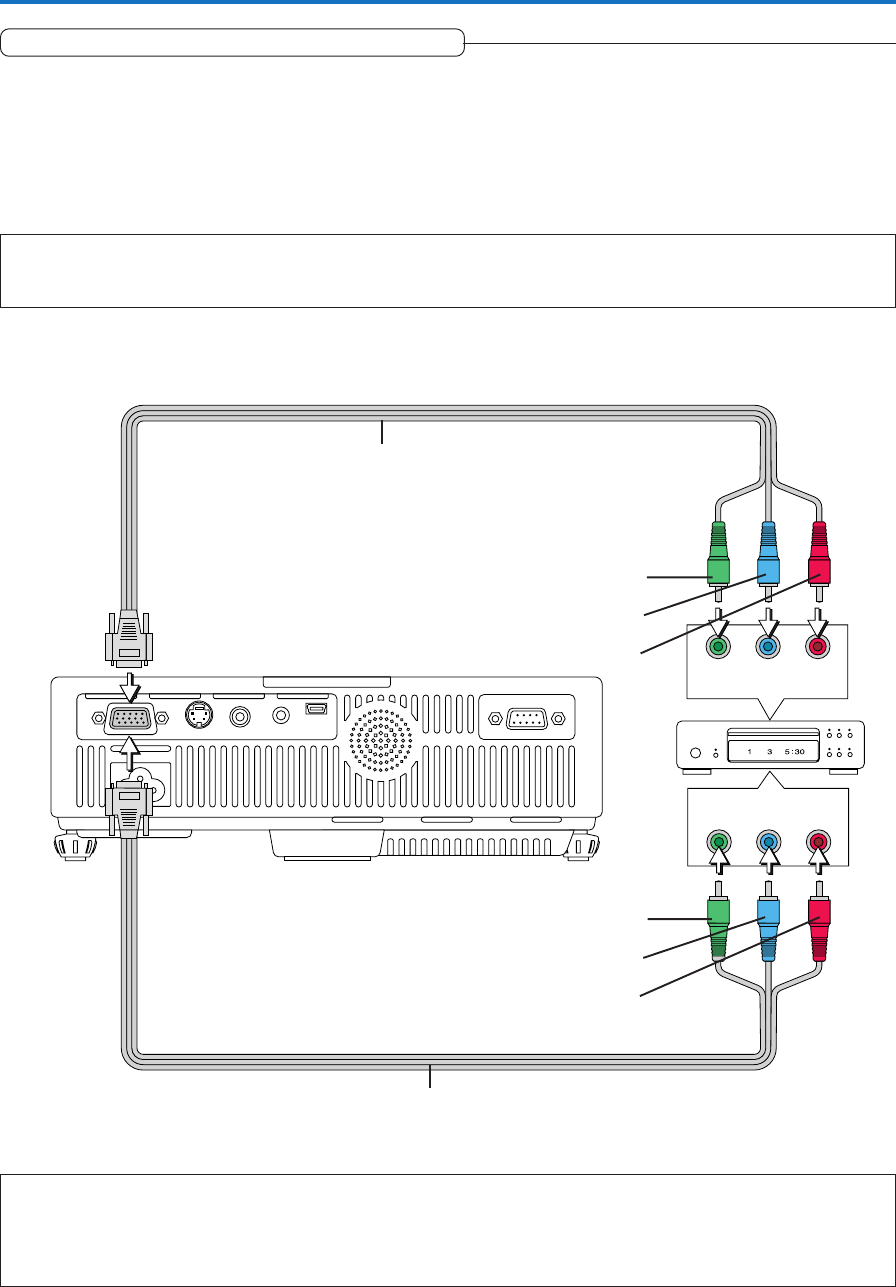
Connections with Component Signals
When the Video Equipment Has a YCbCr Connector or YPbPr Connector
• The projector has been set to “Auto” at the factory; however, if it does not project, please change the input setting to “Compo-
nent” using the menu sequence of [Setup] → [Input Format] → [RGB].
See “Input Format” on Page E-53.
• When projecting the YCbCr signal or YPbPr signal, if the color of the overall image strongly leans toward being greenish or
another color, change the setting under the menu of [Color] → [Color Space].
See “Color Space” on Page E-47.
Component cable (Not supplied)
Component cable (Not supplied)
Green
Blue
Red
Green
Blue
Red
Projecting component signals
Please note that when inputting 480i or 576i signals using a separately sold component cable and viewing video images, depending on the
connected device and the video source being projected, the picture may be disturbed or may not be projected properly.
In such cases, it is possible to achieve a picture with no disturbance that is projected properly by either switching to 480p signals or
connecting using an S-Video cable instead.
Note:
* When the input format has been switched, you may be required to reconnect the input signal.
* In some rare cases, the picture may not be displayed, depending on the connected device.