
User`s manual

10
English
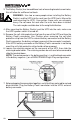
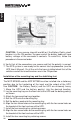
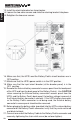
3. The Battery Pack(s) has two additional sets of mounting bracket screw holes,
this will allow for a different set back.
4. After mounting the Battery Pack(s) and the UPS into the rack, make sure
the UPS's power switch is turned off.
5. Remove the self-stick protective strip from the rear of the UPS and from the
Battery Pack's connector. Use Caution when removing the self-stick
protective strip from the UPS's external battery connector and the Battery
Pack's connector; the battery voltage is present at the connector's contacts.
If the UPS's battery connector or the Battery Pack's connector is not being
used, the self-stick protective strip should not be removed.
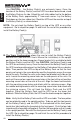
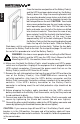
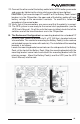
6. Loosen the retaining screws on the rear panel of the UPS, then slide the
retaining bracket down. The retaining screws do not have to be removed to
slide the bracket down.
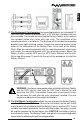
NOTE: The red connector is the battery positive (+) and the black connector
is the battery negative (-) on all MINUTEMAN Plug & Play configurations.
7. Before plugging the connectors together, verify that they mate red to red and
black to black. Plug the Battery Pack's connector into the UPS's external
battery connector.
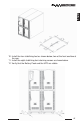
WARNING: Use two or more people when installing the Battery
Pack(s) and the UPS into the rack (see the UPS User's Manual for
rack mounting the UPS). Use caution; these units are extremely
heavy. Do not move the rack after the units have been installed.
The rack maybe unstable due to the weight distribution.
English