
User's Manual


42 4342 43
English
Note: If while zeroing your scope you have reached the
Zero Stop (for example if the shots are repeatedly too
high and the elevation knob cannot be turned “down” any
further), loosen the allen screws on the knob and turn it
several mrads upwards. Push the knob down and tighten
the screws again. You will now have more adjustment range
to achieve the desired point of impact. The same procedure
can be carried out with the windage turret.
If the screws have been inadvertently loosened too much, the
knob can be removed from the scope. To reinstall the knob,
place it onto the turret, push it down and tighten the screws.
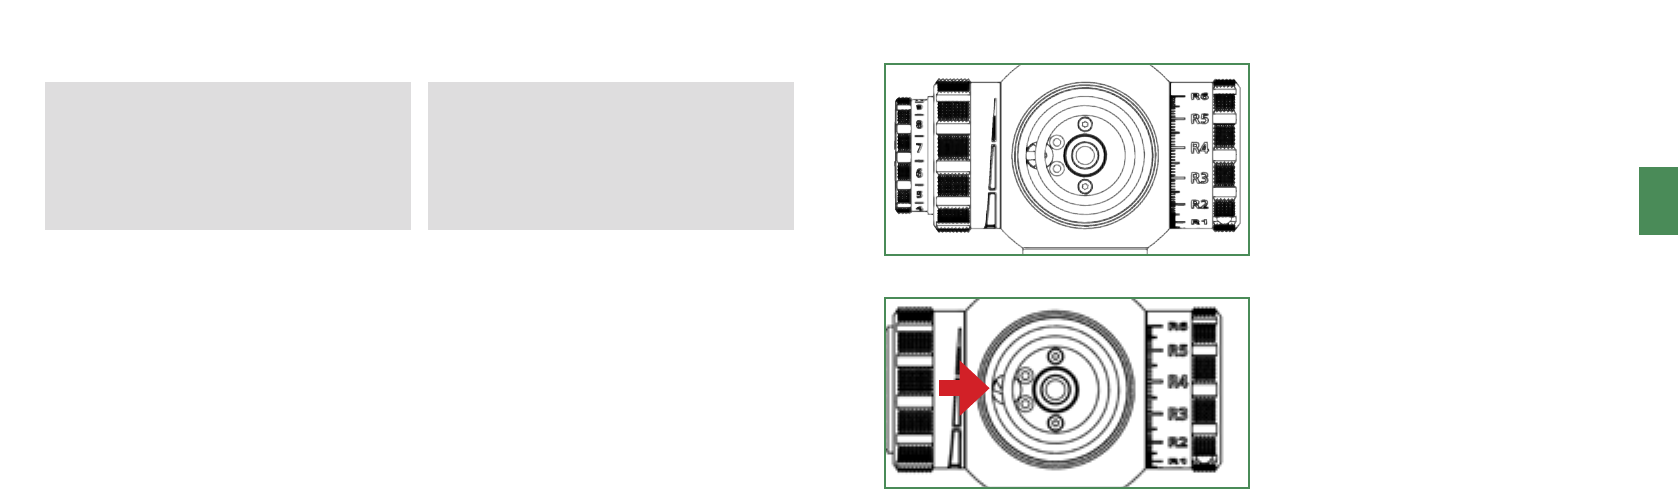
Note: If the elevation knob has been completely removed,
the mechanism to indicate the second revolution may be
brought into a position that prevents the elevation knob
from being turned more than one revolution (see fig. 1).
Before the cap is reattached, make sure that the cylinder is
in the right position,
as seen in fig. 2). The cylinder can be properly aligned using
a small screwdriver.
The adjustment mechanism is designed in such a way that the
adjustment range of the reticle is rectangular. At the limits of
the adjustment range there are internal stops and the adjust-
ment knob cannot be turned any further in that direction. This
means that when for example the elevation adjustment is at
the limit of its range, the full windage adjustment range is still
available (and vice versa). This design also prevents erratic be-
havior of the adjustment at the limit of the adjustment range
(like a “jumping” point of impact) or damage to the internal
adjustment mechanism.
The whole specified adjustment range can be utilized without
limitations.
Fig. 1
Fig. 2
Please note: correct position of the cylinder
RETICLE ILLUMINATION AND BATTERY CHANGE
The illumination adjustment ring and battery compartment
are integrated within the parallax adjustment knob on the left
side of the main tube.
The battery compartment is covered by a screw cap.
To insert or replace the battery, turn the screw cap counter-
clockwise using a coin or suitable tool. Push on the edge of the
battery with your fingernail to release it from the battery holder.
Insert the battery with the minus pole towards the riflescope
and screw the cap tightly into place.
Use only new and undamaged CR 2032 batteries from a
high-quality manufacturer. The desired illumination intensity
can be adjusted in 11 levels. There are tactile clicks for every
setting.
Between the brighness settings, there are “o”-settings so that
a pre-selected brightness level can be activated with a single
click.