
Instruction manual
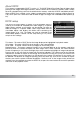


LCDbrightness –
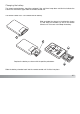
Transfer mode Data storage
Video output NTSC
Language English
Lens acc. None
Date/Time set –
130
To set the camera’s clock and calendar (p. 131).
To specify the lens accessory in use (p. 132).
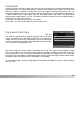
Setup menu
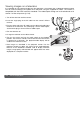
Use the left/right keys of the controller to highlight the appropriate
menu tab; the menus will change as the tabs are highlighted.
See page 129 on how to open the setup menu. The four-way key of the
controller is used to move the cursor in the menu. Pressing the central button
of the controller will enter a setting.
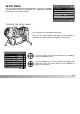
When the desired menu section is displayed, use the up/down
key to scroll through the menu options. Highlight the option
whose setting needs to be changed.
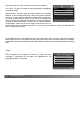
Press the right controller key to display the settings; the current setting is indicated by an
arrow. To return to the menu options, press the left key.
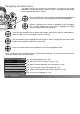
Use the up/down key to highlight the new setting. If “Enter” is displayed, press the central
button of the controller to open the next screen.
Press the central button of the controller to select the highlighted setting.
Once a setting has been selected, the new setting will be displayed. To return to the mode set with
the mode switch, press the menu button.
Navigating the setup menu
To set monitor brightness (p. 132).
To specify camera operation with a computer (p. 133).
To switch video output between NTSC and PAL (p. 132).
To set the menu language (p. 134).