
User manual
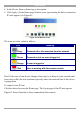
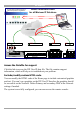


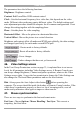
Table Of Contents
- 1. Welcome
- 2. Introduction
- 3. Features of DX User IP
- 4. DX User IP components
- 5. Cables
- 6. DX User IP front panel
- 7. DX User IP rear panel
- 8. Rack mounting the DX User IP
- 9. Pre-installation guidelines
- 10. Mouse synchronization limitations
- 11. DX User IP connections
- 12. Connecting the DX User IP to the Wan/LAN
- 13. Local User
- 14. Connecting an RS232 terminal
- 15. Order of powering on
- 16. Configuring the system
- 17. The DX User IP system interface
- 18. Logging in
- 19. Timeout
- 20. The Work area
- 21. Remote Console Settings
- 22. Telnet Console
- 23. Status via IPMI
- 24. Event Log via IPMI
- 25. File transfer – Virtual Floppy
- 26. Power Control
- 27. Keyboard & Mouse Settings
- 28. KVM Settings
- 29. KVM Port Settings
- 30. Video Settings
- 31. User/Group Management
- 32. User/Group Permissions
- 33. Network Settings
- 34. Dynamic DNS
- 35. Serial Port Settings
- 36. Security Settings
- 37. SNMP Settings
- 38. IPMI Settings
- 39. LDAP Settings
- 40. Maintenance
- 41. Accessing the remote console
- 42. Keyboard layout
- 43. The Control buttons /toolbar icons
- 44. The Chat window
- 45. The Video settings
- 46. Video Settings access
- 47. Mouse synchronization
- Frequently Asked Questions
- Glossary of terms
- Appendix A: DX User IP Video modes
- Appendix B: Key codes
- Appendix C: Pin assignments
- Appendix D: Disabling mouse acceleration
- Appendix E: Technical specifications
DX USER IP
55
The Remote Console window is a Java Applet that tries to establish its own TCP
connection to DX User IP. The protocol that is run over this connection is not HTTP
or HTTPS but a protocol called RFB (Remote Frame Buffer Protocol). Currently
RFB tries to establish a connection to port number 443. Your local network
environment must allow this connection to be made, i.e. your firewall and, in case
you have a private internal network, your NAT (Network Address Translation)
settings must be configured accordingly.
In case DX User IP is connected to your local network environment and your
connection to the Internet is available using a proxy server only without NAT being
configured, the Remote Console is very unlikely to be able to establish the according
connection. This is because today's Web proxies are not capable of relaying the RFB
protocol. In case of problems, please consult your network administrator in order to
provide an appropriate network environment.
The Remote Console window shows the remote screen at its optimal size. However,
you can always resize the Remote Console window in your host window system.
Hint: The Remote Console window on your local window system is just one
window among others. To make the keyboard and mouse work, your Remote
Console window must have the local input focus.
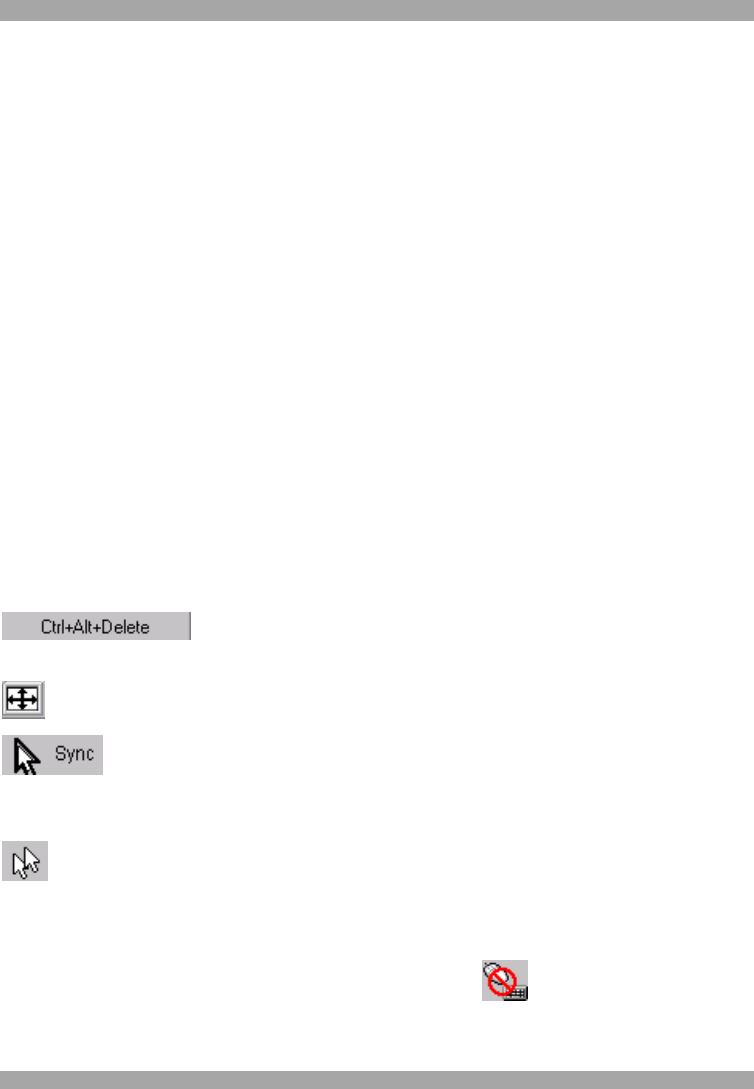
43. The Control buttons /toolbar icons
The control buttons/toolbar icons have the following functions:
- Sends the `Control Alt Delete' key combination to the remote
system.
Auto adjust - Adjusts the screen to the best visual quality
Sync mouse - Synchronizes the host and remote mice. Necessary when
using accelerated mouse settings on the host system. There is generally no need to
change mouse settings on the host.
- Discussed on page 59.
Click the Options button to get the following options:
Monitor Only - When turned on, the Remote Console does not accept keyboard /
mouse input. The top right hand icon appears like this .