
User manual
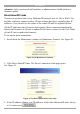
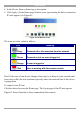
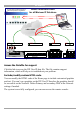


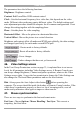
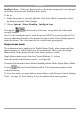
Table Of Contents
- 1. Welcome
- 2. Introduction
- 3. Features of DX User IP
- 4. DX User IP components
- 5. Cables
- 6. DX User IP front panel
- 7. DX User IP rear panel
- 8. Rack mounting the DX User IP
- 9. Pre-installation guidelines
- 10. Mouse synchronization limitations
- 11. DX User IP connections
- 12. Connecting the DX User IP to the Wan/LAN
- 13. Local User
- 14. Connecting an RS232 terminal
- 15. Order of powering on
- 16. Configuring the system
- 17. The DX User IP system interface
- 18. Logging in
- 19. Timeout
- 20. The Work area
- 21. Remote Console Settings
- 22. Telnet Console
- 23. Status via IPMI
- 24. Event Log via IPMI
- 25. File transfer – Virtual Floppy
- 26. Power Control
- 27. Keyboard & Mouse Settings
- 28. KVM Settings
- 29. KVM Port Settings
- 30. Video Settings
- 31. User/Group Management
- 32. User/Group Permissions
- 33. Network Settings
- 34. Dynamic DNS
- 35. Serial Port Settings
- 36. Security Settings
- 37. SNMP Settings
- 38. IPMI Settings
- 39. LDAP Settings
- 40. Maintenance
- 41. Accessing the remote console
- 42. Keyboard layout
- 43. The Control buttons /toolbar icons
- 44. The Chat window
- 45. The Video settings
- 46. Video Settings access
- 47. Mouse synchronization
- Frequently Asked Questions
- Glossary of terms
- Appendix A: DX User IP Video modes
- Appendix B: Key codes
- Appendix C: Pin assignments
- Appendix D: Disabling mouse acceleration
- Appendix E: Technical specifications
DX USER IP
51
Attention: Only experienced staff members or administrators should perform a
firmware update.
Direct SmartIP Links
You can set up direct links to any Minicom IP hardware over a LAN or WAN. Use
the links to directly connect to these IP units without having to remember their IP
addresses. You can also see the status of the remote IP units as explained below.
All the IP units must have firmware that supports direct connection functionality.
Ensure that firmware of all units is updated to the latest version. See the User Guide
of each IP unit to update the firmware.
To set up the direct connections:
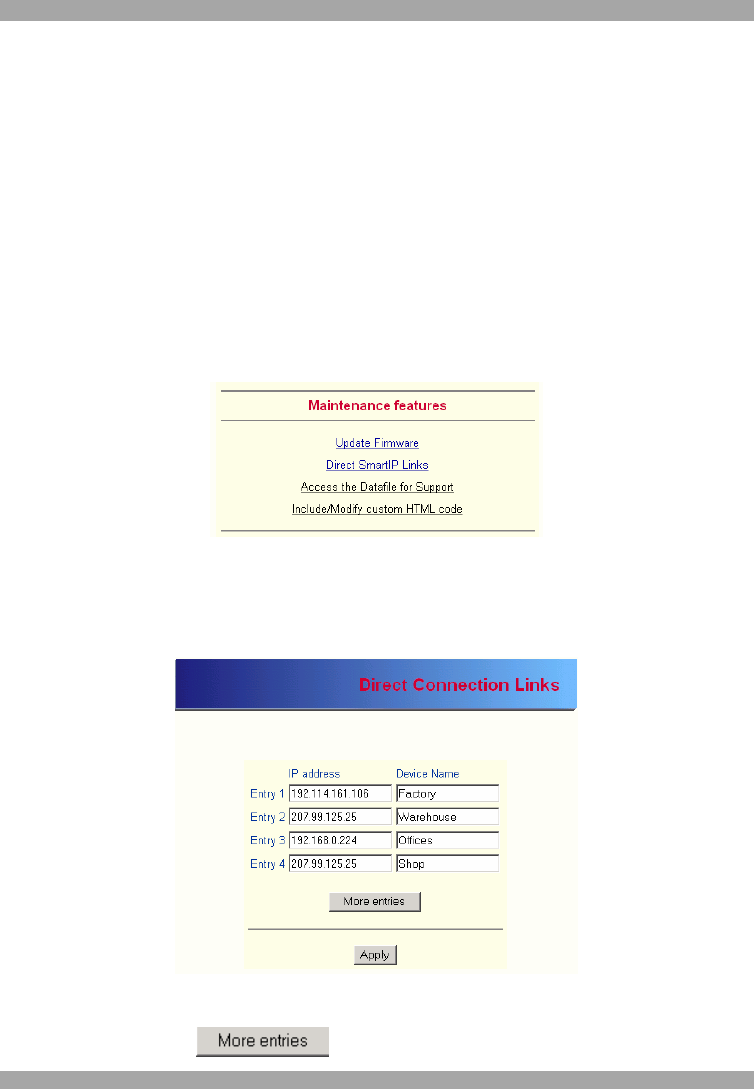
1. Scroll down the Maintenance window to Maintenance Features. See Figure 40.
Figure 40 The Maintenance Features
2. Click Direct SmartIP Links. The Direct Connection Links page opens.
See Figure 41.
Figure 41 The Direct Connections Links page
3. In the IP address column, type IP addresses of the other Minicom IP units. For up
to 16 entries press .