
User manual
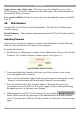
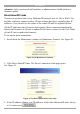
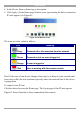


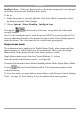
Table Of Contents
- 1. Welcome
- 2. Introduction
- 3. Features of DX User IP
- 4. DX User IP components
- 5. Cables
- 6. DX User IP front panel
- 7. DX User IP rear panel
- 8. Rack mounting the DX User IP
- 9. Pre-installation guidelines
- 10. Mouse synchronization limitations
- 11. DX User IP connections
- 12. Connecting the DX User IP to the Wan/LAN
- 13. Local User
- 14. Connecting an RS232 terminal
- 15. Order of powering on
- 16. Configuring the system
- 17. The DX User IP system interface
- 18. Logging in
- 19. Timeout
- 20. The Work area
- 21. Remote Console Settings
- 22. Telnet Console
- 23. Status via IPMI
- 24. Event Log via IPMI
- 25. File transfer – Virtual Floppy
- 26. Power Control
- 27. Keyboard & Mouse Settings
- 28. KVM Settings
- 29. KVM Port Settings
- 30. Video Settings
- 31. User/Group Management
- 32. User/Group Permissions
- 33. Network Settings
- 34. Dynamic DNS
- 35. Serial Port Settings
- 36. Security Settings
- 37. SNMP Settings
- 38. IPMI Settings
- 39. LDAP Settings
- 40. Maintenance
- 41. Accessing the remote console
- 42. Keyboard layout
- 43. The Control buttons /toolbar icons
- 44. The Chat window
- 45. The Video settings
- 46. Video Settings access
- 47. Mouse synchronization
- Frequently Asked Questions
- Glossary of terms
- Appendix A: DX User IP Video modes
- Appendix B: Key codes
- Appendix C: Pin assignments
- Appendix D: Disabling mouse acceleration
- Appendix E: Technical specifications
USER GUIDE
50
Name of user-entry object class - The object class that identifies a user in the
LDAP directory. To use the default leave this field empty. The default depends on
the selected LDAP server type.
User search subfilter - Refine the search for users that should be known to the DX
User IP.
40. Maintenance
From the DX User IP Menu choose Maintenance. The DX User IP Maintenance
window appears.
Board Summary - This contains information about the DX User IP and its current
firmware.
Updating firmware
You can receive firmware updates by email or download them from the Minicom
Web site. Save the firmware file on the client computer.
To update the firmware:
1. Scroll down the Maintenance window. Under Maintenance features click Update
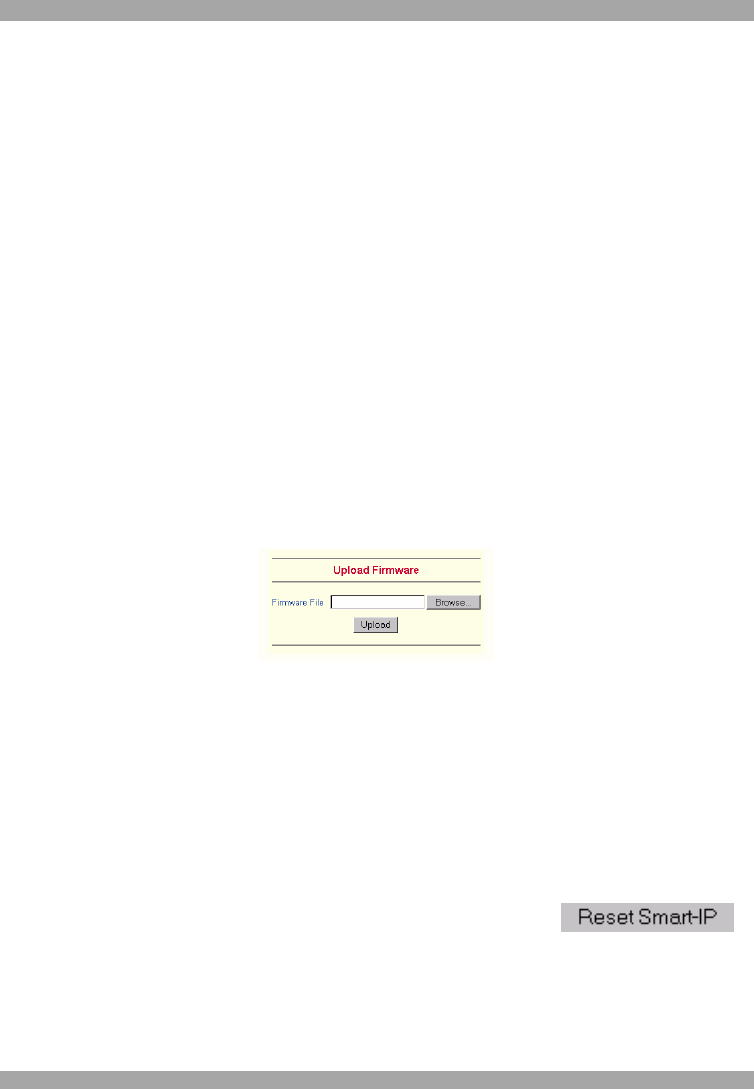
Firmware. The Update Firmware window appears. See Figure 39.
Figure 39 Update Firmware window
2. Locate and upload the firmware file from your client system. In case of any
errors the upload will be aborted.
After a smooth upload the Update Firmware panel appears showing the current
firmware version number and the uploaded firmware version number.
3. Press the Update button. The firmware updates. Warning! This process is
irreversible; ensure the DX User IP's power supply won't be interrupted during
the update process, as this may cause damage.
4. When prompted reset DX User IP manually by pressing the
button. When pressed all connections to the administration or Remote console
close. 30 seconds later, DX User IP runs with the new firmware. You must login
again.