
User manual
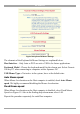
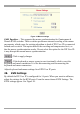
Table Of Contents
- 1. Welcome
- 2. Introduction
- 3. Features of DX User IP
- 4. DX User IP components
- 5. Cables
- 6. DX User IP front panel
- 7. DX User IP rear panel
- 8. Rack mounting the DX User IP
- 9. Pre-installation guidelines
- 10. Mouse synchronization limitations
- 11. DX User IP connections
- 12. Connecting the DX User IP to the Wan/LAN
- 13. Local User
- 14. Connecting an RS232 terminal
- 15. Order of powering on
- 16. Configuring the system
- 17. The DX User IP system interface
- 18. Logging in
- 19. Timeout
- 20. The Work area
- 21. Remote Console Settings
- 22. Telnet Console
- 23. Status via IPMI
- 24. Event Log via IPMI
- 25. File transfer – Virtual Floppy
- 26. Power Control
- 27. Keyboard & Mouse Settings
- 28. KVM Settings
- 29. KVM Port Settings
- 30. Video Settings
- 31. User/Group Management
- 32. User/Group Permissions
- 33. Network Settings
- 34. Dynamic DNS
- 35. Serial Port Settings
- 36. Security Settings
- 37. SNMP Settings
- 38. IPMI Settings
- 39. LDAP Settings
- 40. Maintenance
- 41. Accessing the remote console
- 42. Keyboard layout
- 43. The Control buttons /toolbar icons
- 44. The Chat window
- 45. The Video settings
- 46. Video Settings access
- 47. Mouse synchronization
- Frequently Asked Questions
- Glossary of terms
- Appendix A: DX User IP Video modes
- Appendix B: Key codes
- Appendix C: Pin assignments
- Appendix D: Disabling mouse acceleration
- Appendix E: Technical specifications
USER GUIDE
26
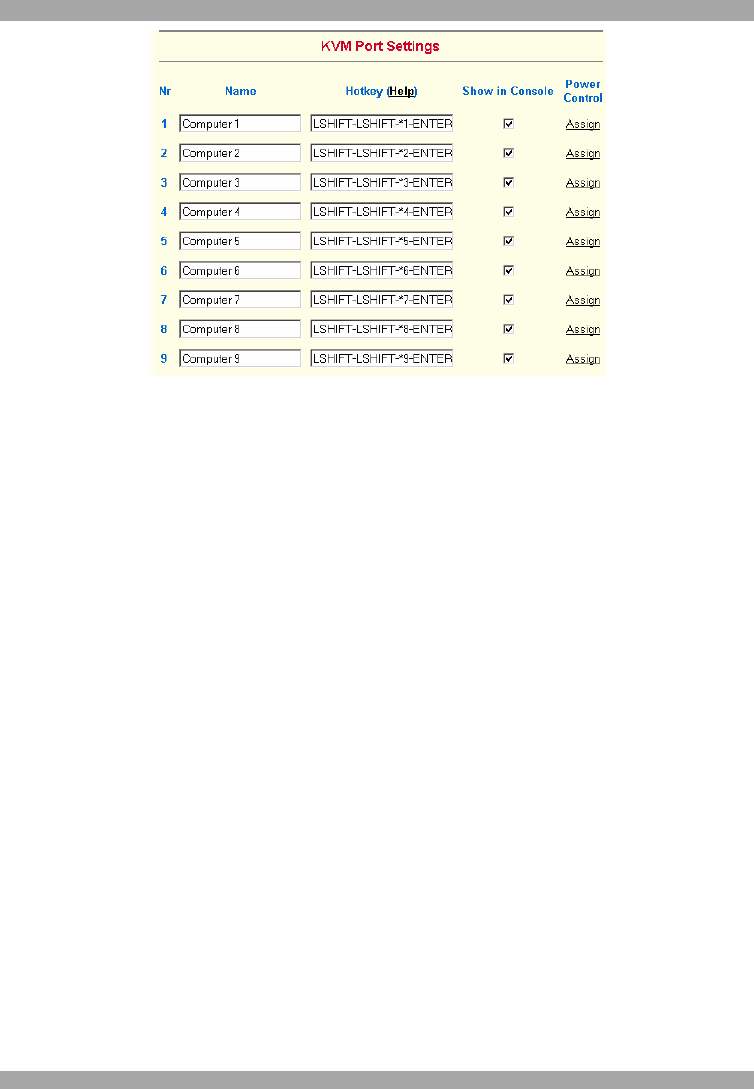
Figure 21 KVM Port Settings
29. KVM Port Settings
1. Assign names for each port.
2. Define hotkeys to switch to each port.
Choose either Minicom default hotkeys by selecting Minicom KVM-Switch in the
Default configuration box, and then click the Set Defaults button.
Or choose your own hotkeys. The syntax to define a new hotkey is as follows:
<keycode> [ + | - | * ] <keycode>.
For example LShift-LShift-*1-Enter. A + sign means that the keys are pressed
together. The – sign means the keys are pressed sequentially. Lshift means the left
Shift key.
The * sign inserts a pause with a definable duration. Add more than one pause if
necessary. See Appendix B on page 63 for a list of key codes.
3. Press Apply at the bottom of the page. The settings are saved.
DX User IP uses separate mouse synchronization settings - see page 58 - and video-
settings - see page 57 - for each port.
Note:
It is still possible to apply OSD key combinations through the Remote Console for
switching the KVM port. However, video and mouse synchronization settings will
be shared among the ports and may be unintentionally changed for one of those
ports.