
User guide


Configuring the Network
Boot-Up Process
24 | Smart 216/232 IP
3 Configuring the Network
After the system has been installed and all connections have been made, you must
configure the Smart 216/232 IP system as follows:
1. Configure Smart 216/232 IP’s network settings, which includes configuring:
Device ID settings
Smart 216/232 IP’s IP address
Centralized Management
2. Add, edit, remove, and block system Users.
3. Configure the KVM switch settings.
4. Configure the Serial port settings.
5. Configure the security settings.
6. Configure the user targets.
7. Configure the system date and time.
8. Configure power devices.
9. Configure power outlets.
You can also perform the following additional operations, as required:
1. Install an SSL certificate.
2. Upgrade firmware.
3. Upgrade RICCs/ROCs.
4. Restore factory settings.
5. Back up and restore configuration data.
3.1 Boot-Up Process
By default, Smart 216/232 IP boots with an automatically assigned IP address from a
DHCP (Dynamic Host Configuration Protocol) server on the network. The DHCP server
assigns the Smart 216/232 IP a valid IP address, gateway address, and subnet mask.
You can identify the IP address from the OSD at the local position. Also, where there
is no DHCP server, you can set the IP address locally via the OSD, as described in the
following procedure.
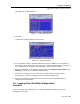
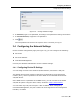
To set the IP address locally via the OSD:
1. From the local keyboard, press Shift twice.