
User guide


SMART IP ACCESS
13
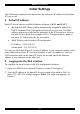
The second warning can be avoided by adding a line to your window’s ‘hosts’ file
(typically at \winnt\system32\drivers\etc\hosts – edit with Notepad)
The line format should be: any-IP any-name.kvm.net
Example:
10.0.0.200 IPaccess.kvm.net
From now on, you can browse to Smart IP Access by typing (or book-marking)
https:// IPAccess.kvm.net. Minicom dedicates the kvm.net domain to this usage.
You can use any device name except for www.kvm.net that is reserved by
Minicom.
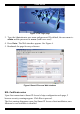
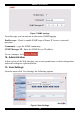
10. Network
The Smart IP Access Web interface opens at the Network configuration page. See
Figure 6 above.
11. Configuration
Consult your Network Administrator for the network settings.
Device name - Type the name you wish to designate to your Smart IP Access
machine. Default device name consists of the letter ‘D’ followed by the 6-digit
device number (D.N.) found on the silver label on the underside of the IP Access
box.
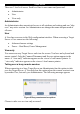
First TCP Port - Choose 3 consecutive ports, and type in the first port number of
the series.
Note
Firewall or router security access list must enable inbound communication through
the selected TCP ports for the Smart IP Access’s IP address.
For Client computer access from a secured LAN, the selected ports should be open
for outbound communication.
Enable Encryption - Enable Encryption if you wish to operate in a secure
connection (recommended).
If enabled, the Internet Explorer at the Client computer must support 128 bit
Encryption.
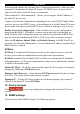
Force HTTPS - Access the Web front-end only using an HTTPS connection.
Smart IP Access won't listen on the HTTP port for incoming connections.
LAN 1
Enable DHCP – Check to enable the use of DHCP.