
User Guide switch DX System
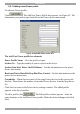

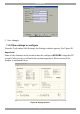
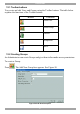
Table Of Contents
- Welcome
- 1. Introduction
- 2. Pre-installation guidelines
- 3. DX system outline
- 4. Connecting the DX system
- 4.1 Connecting an optional local computer to a DX User
- 4.2 Connecting servers to the DX Central
- 4.3 XRICC power supply
- 4.4 Connecting a RICC or XRICC PS/2
- 4.5 Connecting an XRICC SUN
- 4.6 Connecting an XRICC USB
- 4.7 Connecting an XRICC RS232
- 4.8 Connecting the CAT5 cables
- 4.9 Connecting the DX User to an RS232 Terminal
- 5. Power management
- 6. Connecting Legacy KVM switches
- 7. Cascading DX Central units
- 8. Powering on the system
- 9. Configuration wizard (non-DX cascaded system)
- 10. Logging in
- 11. Configuring the DX system
- 12. Creating/editing Users and Groups
- 13. Arranging devices
- 14. Scanning a group of servers
- 15. Adjusting the picture quality
- 16. Connect - Private
- 17. Disconnect User
- 18. Connecting to a local computer
- 19. Updating the DX Central
- 20. Updating the DX User and XRICCS/RICCs
- 21. Events log
- 22. Troubleshooting - Resetting the DX Central
- 23. USB / SUN Combo keys
- 24. Technical specifications
- 25. Terminal hotkeys
- 26. User guide feedback
DX SY
STEM
41
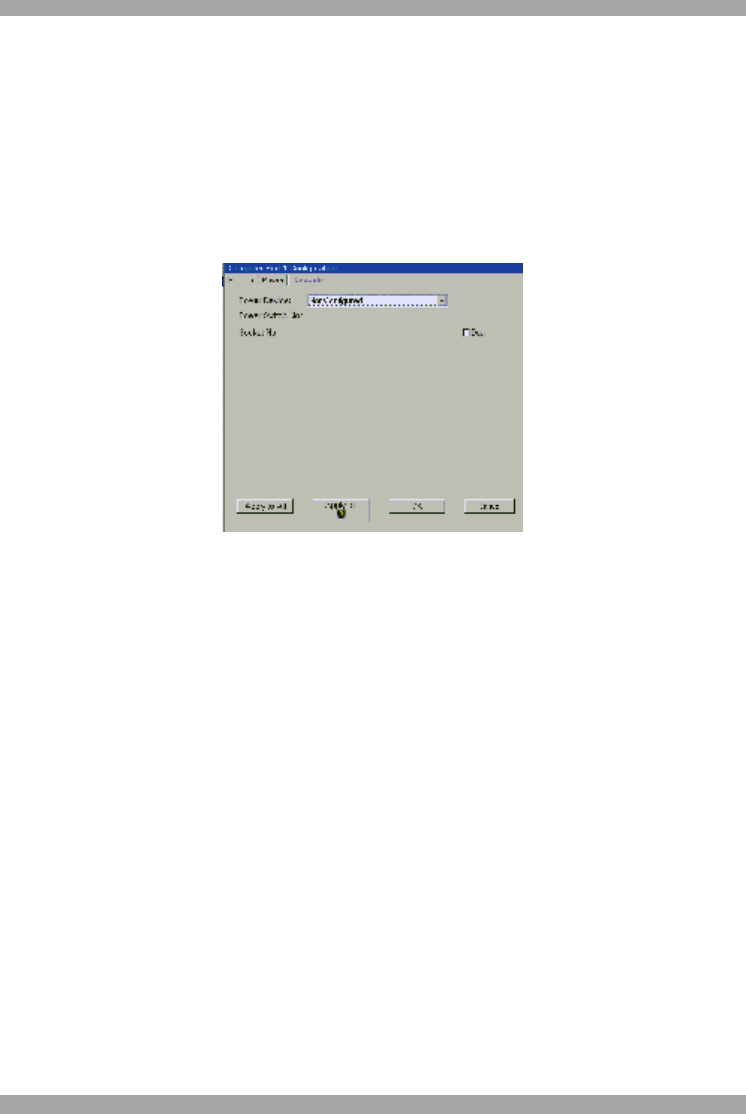
11.5.2 Configuring the connected servers
You need to configure the Computer ports to show the connection to the Power
device.
To configure the Computer ports:
1. Click a Computer port (connected to the Power device) on the picture of the
switch. The Computer Port Configuration box appears.
2. Click the Power tab, the following appears.
Figure 46 Power tab
Power Device – Select the Power device from the drop-down menu. Drop-down
menus for the Power switch No and Socket No appear.
Power switch No – When there is more than 1 cascaded Power device, type the
cascade level of the device that this output port connects to.
Socket No –Select the socket number of the Power device that the port connects to.
Dual – Where a server has a dual power and requires 2 power sockets, tick the Dual
checkbox. A second set of Power configuration Drop-down menus appears, see
Figure 47. Make the selections as described above.