
User Guide switch DX System
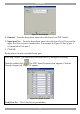
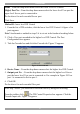
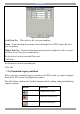
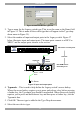
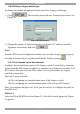
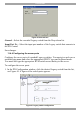
Table Of Contents
- Welcome
- 1. Introduction
- 2. Pre-installation guidelines
- 3. DX system outline
- 4. Connecting the DX system
- 4.1 Connecting an optional local computer to a DX User
- 4.2 Connecting servers to the DX Central
- 4.3 XRICC power supply
- 4.4 Connecting a RICC or XRICC PS/2
- 4.5 Connecting an XRICC SUN
- 4.6 Connecting an XRICC USB
- 4.7 Connecting an XRICC RS232
- 4.8 Connecting the CAT5 cables
- 4.9 Connecting the DX User to an RS232 Terminal
- 5. Power management
- 6. Connecting Legacy KVM switches
- 7. Cascading DX Central units
- 8. Powering on the system
- 9. Configuration wizard (non-DX cascaded system)
- 10. Logging in
- 11. Configuring the DX system
- 12. Creating/editing Users and Groups
- 13. Arranging devices
- 14. Scanning a group of servers
- 15. Adjusting the picture quality
- 16. Connect - Private
- 17. Disconnect User
- 18. Connecting to a local computer
- 19. Updating the DX Central
- 20. Updating the DX User and XRICCS/RICCs
- 21. Events log
- 22. Troubleshooting - Resetting the DX Central
- 23. USB / SUN Combo keys
- 24. Technical specifications
- 25. Terminal hotkeys
- 26. User guide feedback
DX SY
STEM
37
Figure 40 Cascade box
General – Select the cascaded Legacy switch from the Drop-down list.
Input Port No – Select the input port number of the Legacy switch that connects to
the DX Central.
Save changes.
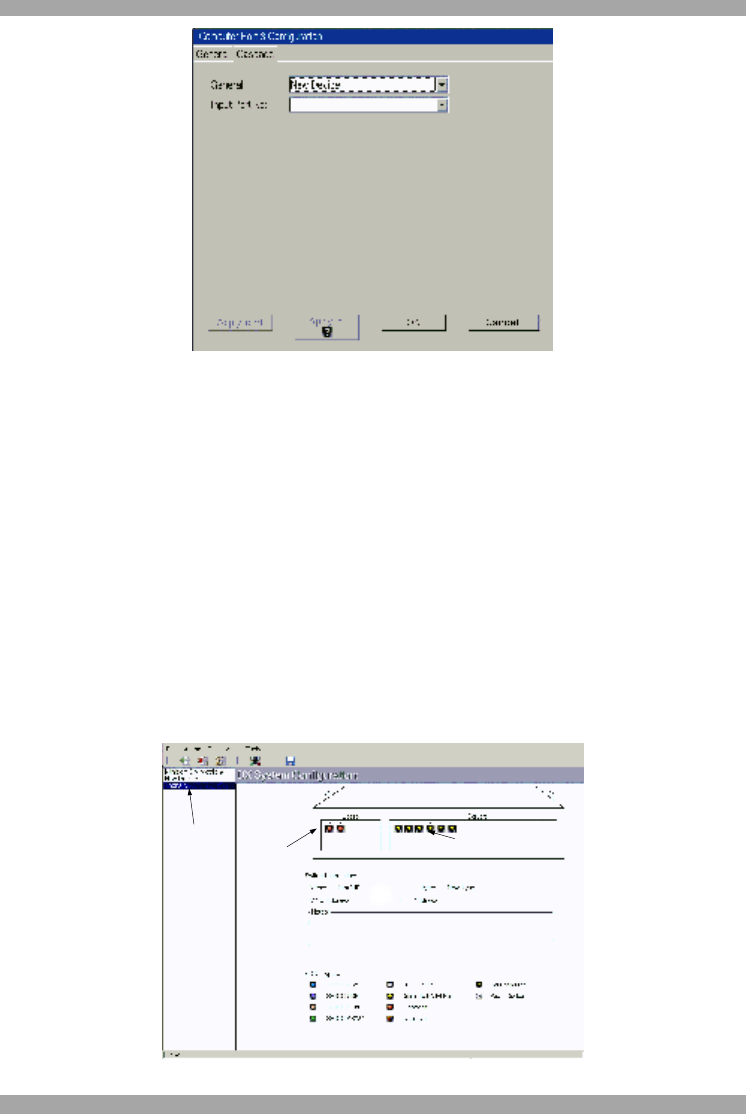
11.4.4 Configuring the server ports
Configure the server ports of cascaded Legacy switches. You must give each server
an identifying name and select the appropriate XRICC type and keyboard mode.
You must also type the appropriate KVM switch access hotkey to the server.
To configure the server ports:
1. In the DX Configuration window, click the desired Legacy switch from the list,
see Figure 41. A figure of the switch ports appears.
Cascaded
input ports
Unconfigured Server
ports
Click the
desired
switch from
the list
Figure 41 Legacy switch configuration