
User Guide switch DX System
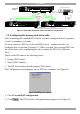

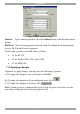
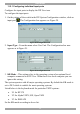
Table Of Contents
- Welcome
- 1. Introduction
- 2. Pre-installation guidelines
- 3. DX system outline
- 4. Connecting the DX system
- 4.1 Connecting an optional local computer to a DX User
- 4.2 Connecting servers to the DX Central
- 4.3 XRICC power supply
- 4.4 Connecting a RICC or XRICC PS/2
- 4.5 Connecting an XRICC SUN
- 4.6 Connecting an XRICC USB
- 4.7 Connecting an XRICC RS232
- 4.8 Connecting the CAT5 cables
- 4.9 Connecting the DX User to an RS232 Terminal
- 5. Power management
- 6. Connecting Legacy KVM switches
- 7. Cascading DX Central units
- 8. Powering on the system
- 9. Configuration wizard (non-DX cascaded system)
- 10. Logging in
- 11. Configuring the DX system
- 12. Creating/editing Users and Groups
- 13. Arranging devices
- 14. Scanning a group of servers
- 15. Adjusting the picture quality
- 16. Connect - Private
- 17. Disconnect User
- 18. Connecting to a local computer
- 19. Updating the DX Central
- 20. Updating the DX User and XRICCS/RICCs
- 21. Events log
- 22. Troubleshooting - Resetting the DX Central
- 23. USB / SUN Combo keys
- 24. Technical specifications
- 25. Terminal hotkeys
- 26. User guide feedback
DX SY
STEM
27
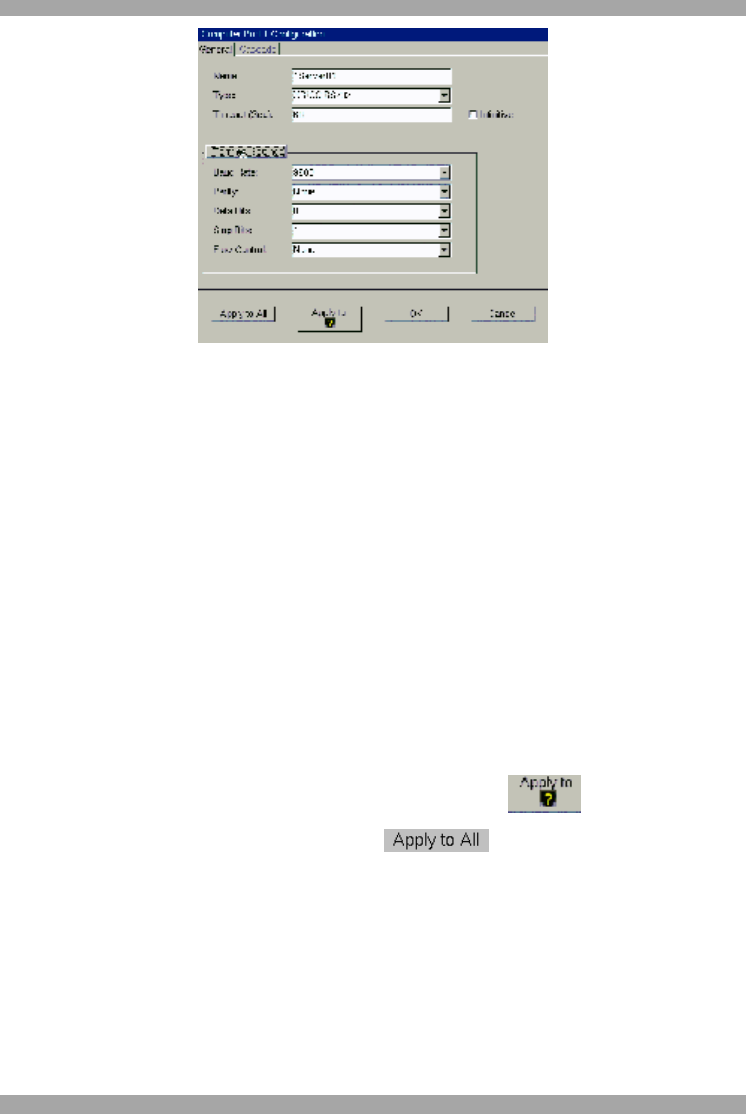
Figure 27 RS232 Terminal settings
Timeout – Type a timeout period or check the Infinitive box to disable the timeout
feature.
KB Mode – Select the appropriate keyboard mode. By default the keyboard mode
is set to PS/2 for Intel based computers.
For the other systems set the KB mode as follows:
· U1 for HP UX
· U2 for Alpha UNIX, SGI, Open VMS
· U3 for IBM AIX
11.2 Applying changes
In general, to apply changes you may have the following 3 options.
(A) To apply the changes to the selected port click OK.
(B) To apply the changes to all un-configured ports click
(C) To apply the changes to all ports, click .
Note! A name given to a connected device will only be given to the device of the
port being configured and will not be applied to all.