
User Guide switch DX System
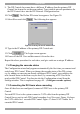

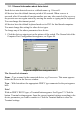
Table Of Contents
- Welcome
- 1. Introduction
- 2. Pre-installation guidelines
- 3. DX system outline
- 4. Connecting the DX system
- 4.1 Connecting an optional local computer to a DX User
- 4.2 Connecting servers to the DX Central
- 4.3 XRICC power supply
- 4.4 Connecting a RICC or XRICC PS/2
- 4.5 Connecting an XRICC SUN
- 4.6 Connecting an XRICC USB
- 4.7 Connecting an XRICC RS232
- 4.8 Connecting the CAT5 cables
- 4.9 Connecting the DX User to an RS232 Terminal
- 5. Power management
- 6. Connecting Legacy KVM switches
- 7. Cascading DX Central units
- 8. Powering on the system
- 9. Configuration wizard (non-DX cascaded system)
- 10. Logging in
- 11. Configuring the DX system
- 12. Creating/editing Users and Groups
- 13. Arranging devices
- 14. Scanning a group of servers
- 15. Adjusting the picture quality
- 16. Connect - Private
- 17. Disconnect User
- 18. Connecting to a local computer
- 19. Updating the DX Central
- 20. Updating the DX User and XRICCS/RICCs
- 21. Events log
- 22. Troubleshooting - Resetting the DX Central
- 23. USB / SUN Combo keys
- 24. Technical specifications
- 25. Terminal hotkeys
- 26. User guide feedback
USER GUIDE
22
9. The DX Central slave must have a different IP address than the primary DX
Central, but it must be on the same subnet. Type suitable network parameters for
the DX Central slave into the DX Network Configuration box.
10. Click . The Define DX status box appears. See Figure 20.
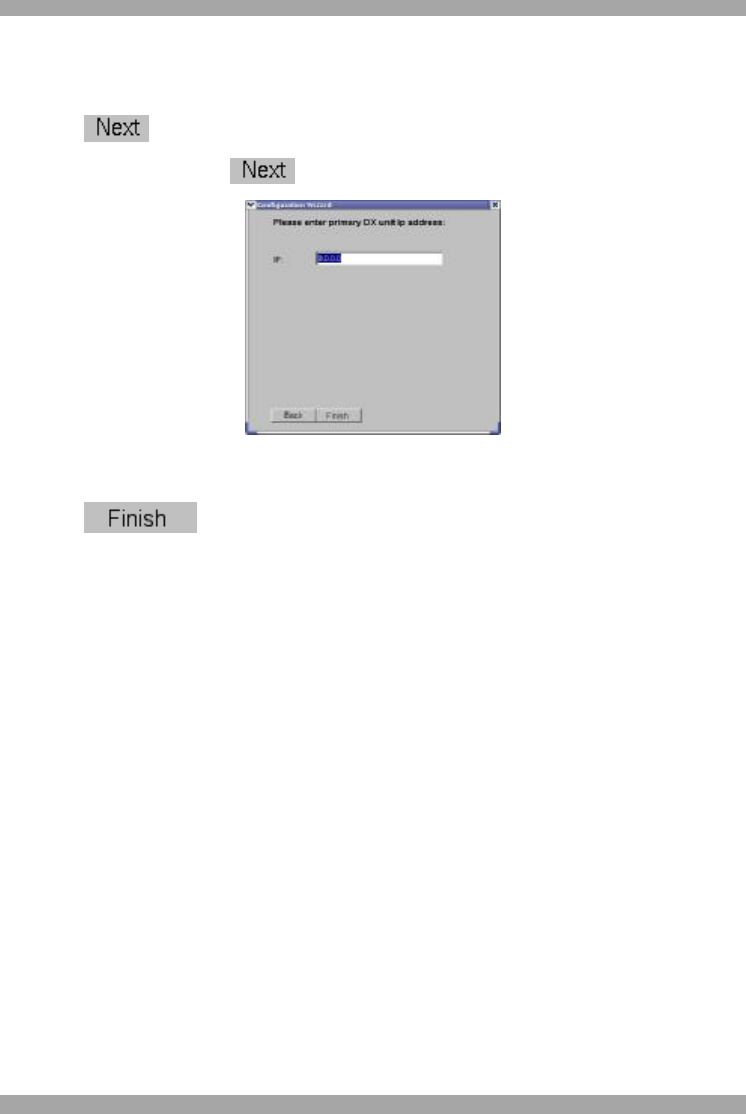
11. Select Slave and click . The following box appears.
Figure 21 Primary DX unit IP address box
12. Type in the IP address of the primary DX Central unit.
13. Click . The Login screen appears.
14. Power off the DX User and disconnect it from the slave.
Repeat the above procedure for each slave, and give each one a unique IP address.
7.4 Changing the cascade status
The Configuration wizard only appears automatically the first time you connect and
switch on a DX Central. When you change the cascade status of the DX system,
e.g. by adding or removing an already configured DX Central, you configure the
new cascade status in the same way as above, by connecting a DX User to the
newly added DX Central. You then invoke the Configuration wizard from the
Settings window. This is explained on page 44 – (Configure cascade options).
7.5 Connecting the DX Users when cascading
Once all the slaves are configured, connect all DX Users to the primary DX
Central.
For each DX User in the system connect a CAT5 cable from the primary DX
Central Server port to each DX Central secondary level User port. Figure 16 shows
the CAT5 cables for 1 cascaded DX Central. Figure 17 shows CAT5 cables for 2
cascaded DX Centrals.