
User's Manual

RouterBOARD SXT 5HnD
Quick Setup Guide and Warranty Information
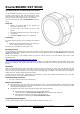
The RouterBOARD SXT 5HnD comes as a complete set, and
includes a built in 802.11n dual chain wireless device, and a
dual polarization 16dBi antenna. It has one BASE-T 10/100
ethernet connector which supports MDI-X auto detection.
The SXT 5HnD operates within 5740-5830 MHz frequency
range.
First use
1. Connect an ethernet cable to the ethernet port
behind the small plastic door
2. The SXT accepts 24V Passive PoE from a PoE
injector
3. The default IP address from LAN is 192.168.88.1 for
configuration
4. Username is admin and there is no password
Powering
The board accepts powering from the ethernet port (Passive
PoE):
● Ethernet port accepts passive Power over Ethernet 8-
30V DC. Package contains a 24V adapter.
Maximum power consumption of the device is 7W.
Booting process
This device doesn't come fitted with a Serial Port connector, so initial connection has to be done via the Ethernet cable, using
the MikroTik Winbox utility. Winbox should be used to connect to the default IP address of 192.168.88.1 with the username
admin and no password.
In case IP connection is not available, Winbox can also be used to connect to the MAC address of the device. More
information here:
http://wiki.mikrotik.com/wiki/First_time_startup
In case you wish to boot the device from network, for example to use MikroTik Netinstall, hold the RESET button of the
device when starting it until the LED LD600 light turns off (behind the small door), and SXT will start to look for Netinstall
servers.
Mounting
With the clip pointed forward, slide the mounting bracket into the rail on the bottom of the case, until the clip clicks into
place. The SXT comes bundled with a hose clamp - guide the clamp through the opening in the bracket and around the pole
where it will be mounted. Tighten the hose clamp screw when alignment is complete. Two screw holes are provided as
additional security agains accidental bracket movement.
The SXT device has a sliding door, behind which the ethernet port, and the reset jumpers are located. This door can be also
secured shut with a screw in the provided screw hole.
Extension Slots and Ports
● One built in wireless card and one ethernet port.
Buttons and Jumpers
● RouterOS reset jumper hole (access through the plastic door) – resets RouterOS software to defaults. Must short
circuit the metallic sides of the hole (with a screwdriver, for example) and boot the device. Hold screwdriver in place
until RouterOS configuration is cleared.
● RouterBOOT reset button (access through the plastic door) has two functions:
● Hold this button during boot time until LED light starts flashing,
release the button to reset RouterOS configuration (same result as with reset hole)
● Hold this button during boot time longer, until LED turns off,
then release it to make the device look for Netinstall servers.
Operating System Support
Currently tested operating system is MikroTik RouterOS (starting from version v4.11).
See www.routerboard.com for more information. Contact support@mikrotik.com for support questions. rev. A (6-jan-2011)