
Installation manual


17
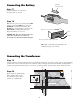
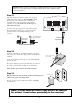
Check List
• The gate is plumb, level, and swings smoothly on its hinges.
• After measuring with the 4
1
/2" x 4
1
/2" setback template, the post bracket assembly
was bolted to the fence post.
• A plate or support was added for the gate bracket (if necessary).
• The opener is level and mounted on the centerline of the gate.
• Positive stops are installed.
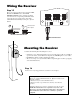
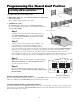
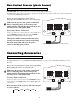
Control Board
Access Panel
Battery
Access Panel
®
E-Z GATE OPENER
250
U
L
3
2
5
S
E
R
IE
S
C
a
n C
au
se
In
jury or D
e
a
th
MOVING GATE
L
I
S
T
E
D
®
U
S
O
N
OFF
ON/OFF
Switch
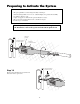
Preparing to Activate the System
In order to have easy access to the control board during the rest of
the installation, remove the opener and remount it upside down.
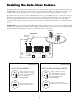
Step 14
Remove the Control Board Access Panel on
the bottom of the opener arm.
Control Board
Access Panel
O
N
O
FF
®
E
-Z G
A
TE O
P
E
N
ER
250
U
L
3
25
S
E
R
IE
S
C
a
n
C
a
u
s
e
In
ju
ry
o
r D
e
a
th
M
O
VIN
G
G
ATE
L
I
S
T
E
D
®
U
S