
Operating and Installation Instructions
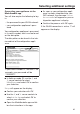
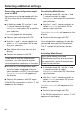

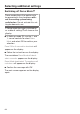

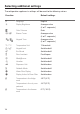
Table Of Contents
- Contents
- IMPORTANT SAFETY INSTRUCTIONS
- Caring for the environment
- Installation
- Installation location
- Installation notes
- Specifications for the plumbed water connection
- Installation dimensions
- Building in the appliance
- Before starting...
- Tools required
- Aligning the installation niche
- Checking the installation niche
- Before installation
- Preparing the installation niche
- Pushing the appliance into the niche
- Aligning the refrigeration appliance
- Securing the appliance in the niche
- Securing the toe-kick board and cover
- Aligning the appliance doors
- Limiting the opening angle of the appliance door
- Water connection
- Electrical connection
- Saving energy
- Guide to the appliance
- Accessories
- Before first use
- Switching on and off
- Selecting additional settings
- Switching / on or off
- Switching on or off
- Performing a
- Switching on the
- Switching off the
- Setting up Miele@home
- Availability of the WiFi connection
- Miele@home availability
- Miele@mobile App
- Connecting your appliance via the Miele@mobile app
- Connecting your refrigeration appliance via WPS
- Deactivating Miele@home
- Activating Miele@home
- Checking the WLAN connection status
- Setting up Miele@home again
- Resetting the network configuration
- Switching off
- Resetting the settings to their default settings
- Switching mode on or off
- Switching on or off
- Switching on, switching off, or resetting the
- Switching on, switching off, or resetting the
- The correct temperature
- Using Automatic SuperCool and SuperFreeze
- Temperature and door alarm
- Adjusting the interior fittings
- Storing food in the refrigerator section
- Storing food in the MasterFresh zone
- Freezing and storing food
- Making ice cubes
- Automatic defrosting
- Cleaning and care
- Water filter
- Frequently Asked Questions
- Causes of noises
- Customer Service
- Declaration of conformity
- Copyrights and licenses

Selecting additional settings
62
Switching on the Door Assis-
tant
You can choose between the two Door
Assistants Push2Open and Pull2Open.
The default Door Assistant is
Push2Open.
The Push2Open Door Assistant is suit-
able for cabinet fronts without handles.
The door will then open automatically
when you gently press against it.
The Pull2Open Door Assistant is suitable
for cabinet fronts with handles. The ap-
pliance door can be opened easily with
little force.
Risk of damage if the appliance
door is closed prematurely.
When the Door Assistant is switched
on, repeatedly closing the appliance
door early can lead to damage or
malfunctions.
Refrain from holding onto or closing
the appliance door while automatic
door opening is still extended. If you
have indeed closed the appliance
door, leave it closed for 5minutes.
Automatic door opening resets itself.
If necessary, you can also switch on
the Door Assistant for only the fridge
zone or the freezer zone. Use the
and sensor controls to select the re-
quired zone and confirm your selec-
tion with OK.
Please note that the Door Assistant
can only be used to control the refrig-
erator section door.
Switching on Push2Open
In Settings mode, use the and
sensor controls to select Door As-
sistant and select OK to confirm your
selection.
Use the and sensor controls to
select Mode and select OK to confirm
your selection.
Use the and sensor controls to
select Push2Open and select OK to
confirm your selection.
Touch the sensor control to return
to the previous menu level.
– Adjusting the intensity
You can also adjust the intensity of the
Push2Open function. The lower the set
intensity, the less force required when
you push against the appliance door.
In Settings mode, use the and
sensor controls to select Door As-
sistant and select OK to confirm your
selection.
In Settings mode, use the and
sensor controls to select Intensity
and select OK to confirm your selec-
tion.
Use the and sensor controls to
select the right intensity (Low, Medium,
High) and select OK to confirm your
selection.