
Operating instructions/Installation instructions
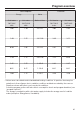
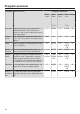
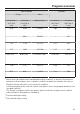
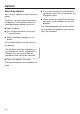
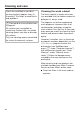
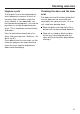
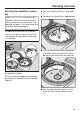
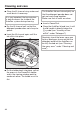
Table Of Contents
- Contents
- IMPORTANT SAFETY INSTRUCTIONS
- Guide to the appliance
- Caring for the environment
- Before using for the first time
- Settings
- Opening the settings menu
- Changing settings
- Closing the settings menu
- Language
- Time
- Water hardness
- AutoDos (AutoDos)
- Rinse aid
- Miele@home
- Remote control
- Remote Update
- SmartStart
- EcoStart
- Temperature
- Display brightness
- Volume
- Memory
- Refill indicators
- AutoOpen
- 2nd interim rinse
- Knock2open
- BrilliantLight
- SaniWash Cycle
- Software version
- Legal Information
- Copyrights and licenses for operator and control software
- Copyrights and licenses for the communication module
- Showroom
- Factory default
- Caring for the environment
- Loading the dishwasher
- Detergents
- Operation
- Options
- Program overview
- Options
- Cleaning and care
- Frequently Asked Questions
- Customer Service
- Optional accessories
- Installation
- Sound emission testing

Cleaning and care
90
Clean the fill channel using water and
a soft brush if necessary.
It is very important that no moisture
is able to access the inside of the
AutoDos system during cleaning.
Dry the fill channel well so that the
detergent powder does not clump to-
gether.
Insert the fill channel again until the
tab clicks into place.
Put the holder back into place so that
the arrows in the PowerDisk holder
and in the viewing window point to-
ward each other. The holder must lie
flat.
The AutoDos lid must close tightly so
that the detergent powder does not
get wet and clump together.
Make sure that all seals are clean.
Insert a PowerDisk.
Close the AutoDos lid and turn it until
the lid handle is directly below the
symbol (see “Inserting a Pow-
erDisk” under “Detergent”).
Regularly check the lower spray arm
for any blockages to ensure that the
detergent outlet of the AutoDos can
be fully flushed out (see “Cleaning
the spray arms” under “Cleaning and
care”).