
Installation and Operation


Table Of Contents
- Contents
- IMPORTANT SAFETY INSTRUCTIONS 5
- Guide to the coffee system 10
- Controls and display elements 12
- Accessories 13
- First steps to use 14
- Operation 17
- Filling the water tank 18
- Filling the coffee bean container 19
- Turning the coffee machine on and off 20
- Adjusting the coffee dispensers to the cup height 21
- Preparing beverages 22
- Preparing espresso, coffee or lungo (large) coffee 22
- Preparing double portions 22
- Cancel preparation 23
- Preparing multiple cups of coffee, one directly after another (coffee pot) 23
- Preparing coffee beverages from ground coffee 23
- Beverages with milk 25
- Preparing hot water 26
- Preparing beverages from a profile 26
- After use 26
- Customizing your coffee 27
- Setting the serving size 30
- Settings 36
- Accessing the "Settings" menu 36
- Change and save settings 36
- Overview of possible settings 37
- Language 39
- Time of day 39
- Date 39
- Timer 39
- Eco mode 41
- Lighting 41
- Info (displaying information) 42
- Locking the coffee system ( System lock 0 ) 42
- Water hardness 42
- Display brightness 42
- Volume 42
- Activating and deactivating the plumbed water connection 42
- Factory default settings 43
- Showroom program ( demo mode ) 43
- Descaling 58
- Frequently asked questions 60
- Cleaning clogged milk pipework 69
- After sales service 72
- Installation instructions 73
- Caring for the environment 74
- Plumbing 75
- Lead free certificate 77
- Electrical connection 78
- Installation 79
- Adresses 87
^
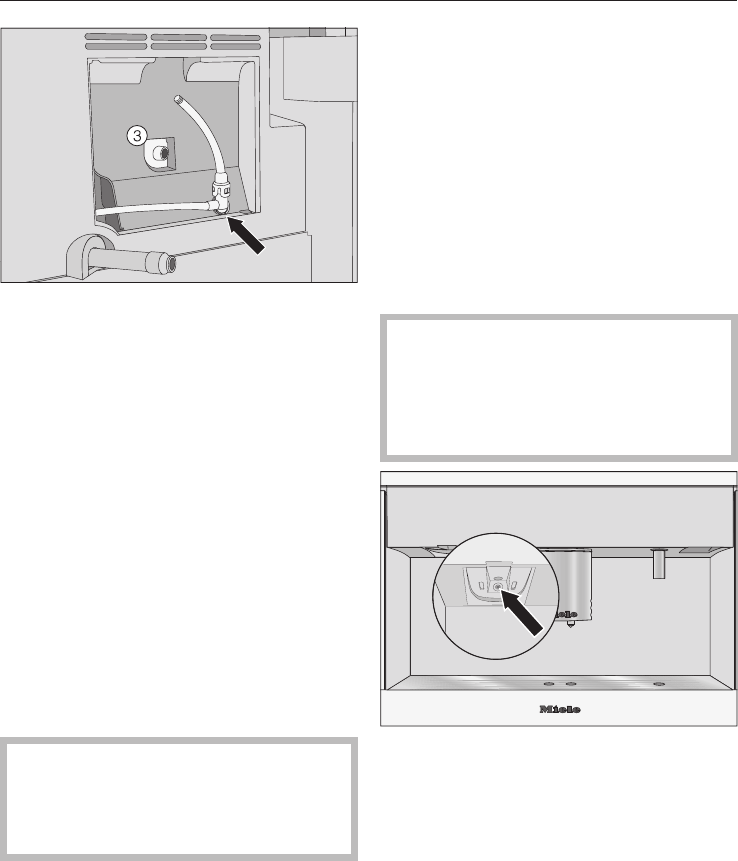
Slide the hoses back onto the angle
section and reinsert it. Make sure that
the bridge on the angled section
faces down.
^ Reinsert the air intake hose into the
opening c.
Step 3: Cleaning the milk
pipework in the main
dispenser
^ Remove and disassemble the
dispensing unit as described in
"Cleaning and care – Main
dispenser".
^
Rinse all parts carefully under
running water.
Use the cleaning brush to clean all
parts carefully. Do not use a needle
or similar object to avoid piercing
the silicone parts.
^
Reassemble the dispensing unit and
reinsert it into the main dispenser.
^
Replace the cover.
Step 4: Milk valve maintenance
^
Tap x .
^
Tap the arrow key Y until
"Maintenance" is highlighted.
Tap the OK button.
^
Tap the arrow keys until "Condition
milk valve" is highlighted. Tap the OK
button.
The milk valve will go into maintenance
position.
Important! Before you confirm
"Leave maintenance position" with
"OK", you must remove the cleaning
brush. Otherwise, the coffee
machine will be damaged.
^
Insert the brush into the milk valve.
Move the brush back and forth.
^
Tap the OK button.
The milk valve will move into the stan
-
dard position and the milk lines are
rinsed.
Cleaning clogged milk pipework
71