
Operating instructions/Installation instructions
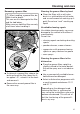
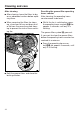
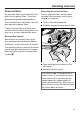
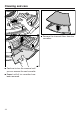
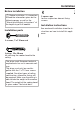
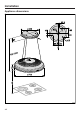
Table Of Contents
- Contents
- Warning and Safety instructions
- Caring for the environment
- Guide to the cooker hood
- Modes of operation
- Before using for the first time
- Operation (Automatic mode)
- Operation (Manual mode)
- Operation (Automatic and Manual modes)
- Energy saving tips
- Cleaning and care
- After Sales / Warranty
- Installation
- Electrical connection
- Technical data

Installation
-
I
N
-
S
T
A
L
L
-
A
-
T
I
O
N
-
39
Before installation
Before installation, it is important
to read the information given on the
following pages as well as the
“Warning and Safety instructions” at
the beginning of this booklet.
Installation parts
3 screws, 7x110mm and
3 plugs, 10x80mm
for securing the cooker hood to the
ceiling.
The plugs meet European technical
requirements for use in concrete ceil-
ings.
The plugs must only be used to-
gether with the 7x110mm screws
supplied. For other types of ceiling
construction, alternative fixings will
be required. Make sure the ceiling is
able to take the weight of the cooker
hood. The weight of the cooker hood
is given under “Technical data”.
91742
2cover caps
for the suspension element fixing
screws.
Installation instructions
See enclosed Installation sheet for in-
structions on how to install this appli-
ance.