
Installation Instructions
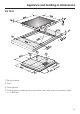
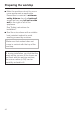
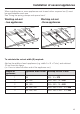
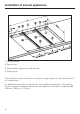
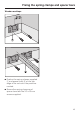

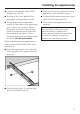
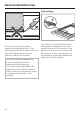
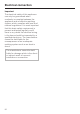
Table Of Contents
- Contents
- Guide to the appliance 4
- Warning and Safety instructions 9
- Caring for the environment 16
- Before using for the first time 17
- Induction 18
- Operation 21
- Tips on saving energy 27
- Safety features 28
- Cleaning and care 30
- Problem solving guide 32
- Optional accessories 34
- Safety instructions for installation 35
- Appliance and building-in dimensions 39
- Preparing the worktop 42
- Installation of several appliances 43
- Fixing the spring clamps and spacer bars 45
- Installing the appliance(s) 47
- General installation tips 48
- Electrical connection 49
- After sales service, data plate 52
Do not use any sealant unless
expressly instructed to do so. The
sealing strip under the edge of the top
part of the appliance provides a
sufficient seal for the worktop.
Do not use sealant between the
frame of the top part of the
appliance and the worktop.
This could cause difficulties if the
appliance ever needs to be taken
out for servicing and possibly result
in damage to the frame or the
worktop.
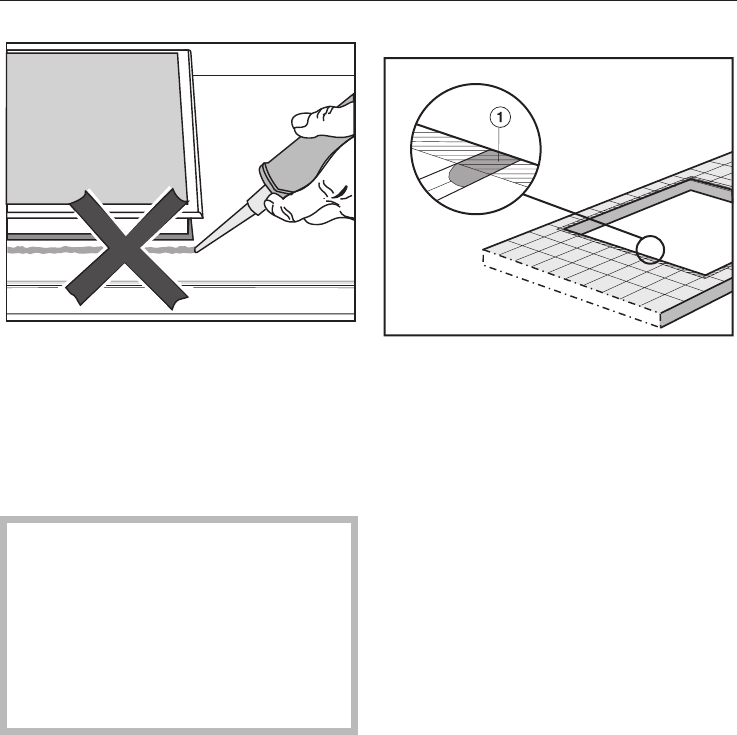
Tiled worktop
Grout lines a and the hatched area
underneath the appliance must be
smooth and even. If they are not, the
appliance frame will not sit flush with
the worktop and the sealing strip will
not provide a good seal between the
appliance and the worktop.
General installation tips
48