
Installation Instructions
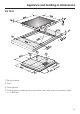
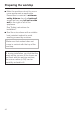
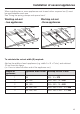
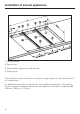
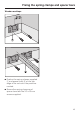

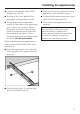
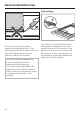
Table Of Contents
- Contents
- Guide to the appliance 4
- Warning and Safety instructions 9
- Caring for the environment 16
- Before using for the first time 17
- Induction 18
- Operation 21
- Tips on saving energy 27
- Safety features 28
- Cleaning and care 30
- Problem solving guide 32
- Optional accessories 34
- Safety instructions for installation 35
- Appliance and building-in dimensions 39
- Preparing the worktop 42
- Installation of several appliances 43
- Fixing the spring clamps and spacer bars 45
- Installing the appliance(s) 47
- General installation tips 48
- Electrical connection 49
- After sales service, data plate 52
^
Feed the connection cable down
through the cut-out.
^
Starting at the front, position the
appliance in the worktop cut-out.
^
Using both hands, press down
evenly on the sides of the appliance
until it clicks into position. When
doing this make sure that the seal
under the appliance sits flush with
the worktop on all sides. This is
important to ensure an effective seal
all round. Do not use sealant.
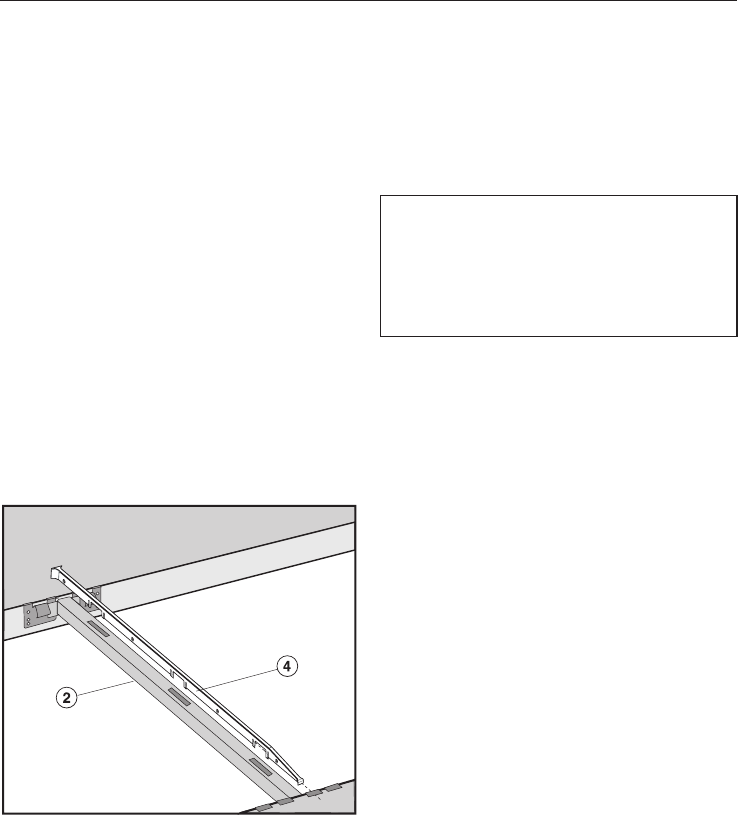
When installing several appliances, a
sealing strip must be fitted into each
spacer bar.
^ Push the appliance to the side until
the long slots in the spacer bar can
be seen.
^
Fit the sealing strip d into the long
slots in the spacer bar b.
^
Starting at the front, position the next
appliance in the worktop cut-out.
^
Connect each appliance to the mains
(see "Electrical connection").
^
Check that each appliance works
correctly.
Once installed, the hob can be
removed using a special tool.
It can also be pushed up out of the
cut-out from below. It must be
pushed up from the back first.
Installing the appliance(s)
47