
Installation Instructions
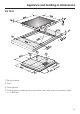
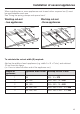
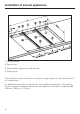
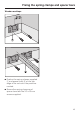

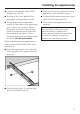
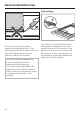
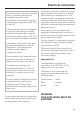
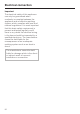
Table Of Contents
- Contents
- Guide to the appliance 4
- Warning and Safety instructions 9
- Caring for the environment 16
- Before using for the first time 17
- Induction 18
- Operation 21
- Tips on saving energy 27
- Safety features 28
- Cleaning and care 30
- Problem solving guide 32
- Optional accessories 34
- Safety instructions for installation 35
- Appliance and building-in dimensions 39
- Preparing the worktop 42
- Installation of several appliances 43
- Fixing the spring clamps and spacer bars 45
- Installing the appliance(s) 47
- General installation tips 48
- Electrical connection 49
- After sales service, data plate 52
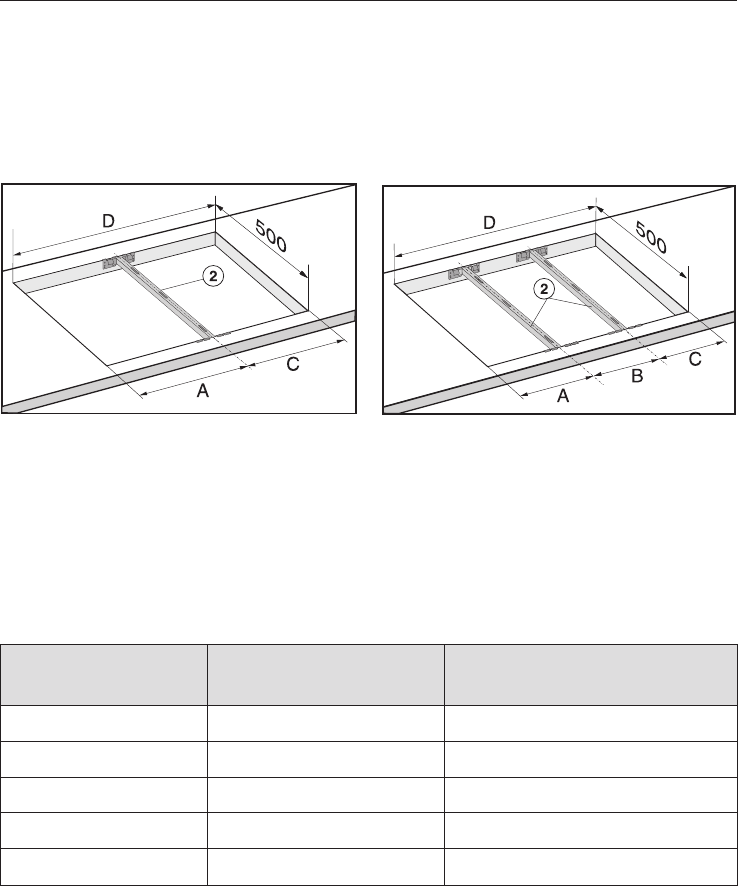
When installing two or more appliances next to each other a spacer bar b must
be used between each one.
See "Fixing the spring clamps and spacer bars".
Worktop cut-out
- two appliances
Worktop cut-out
- three appliances
To calculate the cut-out width (D) required:
Add up the widths of each appliance (e.g. widthA+B+Cetc.) and subtract
16 mm from this figure
(i.e. 8 mm is taken off either end of the appliance run).
Number of
appliances
Appliance width in mm Worktop cut-out in mm
1 288 288 - 16 = 272
2 288, 288 288 + 288 - 16 = 560
2 288, 380 288 + 380 - 16 = 652
3 288, 288, 288 288 + 288 + 288 - 16 = 848
3 288, 288, 380 288 + 288 + 380 - 16 = 940
Installation of several appliances
43