
Operating instructions/Installation instructions
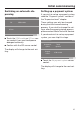
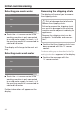
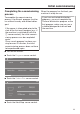
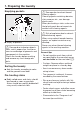
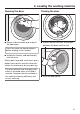
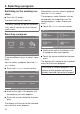

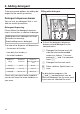
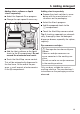

Table Of Contents
- Contents
- Caring for the environment
- IMPORTANT SAFETY INSTRUCTIONS
- Operating the washing machine
- Initial commissioning
- Emptying the drum
- Switching on the washing machine
- Setting the display language
- Reference to external appliances
- Setting the display brightness
- Setting the date
- Confirming the time request
- Setting the time
- Selecting program packages
- Switching on automatic dispensing
- Setting up a payment system
- Selecting pre-wash water
- Selecting main wash water
- Removing the shipping struts
- Completing the commissioning process
- 1. Preparing the laundry
- 2. Loading the washing machine
- 3. Selecting a program
- 4. Selecting program settings
- 5. Adding detergent
- 6. Starting a program – end of a program
- Timer
- Program chart
- Extra options
- Special features in the program sequence
- Changing the program sequence
- Cleaning and care
- Frequently asked questions
- Technical Service
- MIELE
- Installation and connection
- Technical data
- Supervisor level

Initial commissioning
22
Selecting pre-wash water
11:02
Cold
Pre-wash
OK
Hot
Touch the coldsensor control if the
washing machine is only connected
to a cold water supply, or touch hotif
the washing machine is connected to
cold and hot water.
The display will change to the next set-
ting.
Selecting main wash water
11:02
Cold
Main wash
OK
Hot
Touch the coldsensor control if the
washing machine is only connected
to a cold water supply, or touch hotif
the washing machine is connected to
cold and hot water.
Further information will appear on the
display.
Removing the shipping struts
The display will remind you to remove
the shipping struts.
Risk of damage due to failure to
remove the shipping struts.
Failure to remove the shipping struts
can result in damage to the washing
machine and to adjacent cabinetry or
appliances.
Remove the shipping struts as de-
scribed in “Installation and connec-
tion”.
Confirm that the shipping struts have
been removed with the OKsensor
control.
Continue setting up as described in the Op-
erating instructionsappears in the display.
Confirm the message with the
OKsensor control.