
Operating instructions/Installation instructions


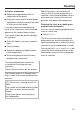
Table Of Contents
- Contents
- Warning and Safety instructions
- Caring for the environment
- Guide to the appliance
- Controls
- Using the appliance
- Description of functions
- Before using for the first time
- Settings
- Settings overview
- Opening the “ Settings ” menu
- Language
- Time
- Date
- Lighting
- Start screen
- Display
- Volume
- Units
- Keeping warm
- Steam reduction
- Recommended temperatures
- Booster
- Automatic rinsing
- Water hardness
- Movement sensor
- Safety
- Furniture front recognition
- Miele@home
- Remote control
- SuperVision
- RemoteUpdate
- Software version
- Legal information
- Showroom programme
- Factory default
- Alarm + minute minder
- Main and sub-menus
- Energy saving tips
- Operation
- General notes
- Steam cooking
- Sous-vide (vacuum) cooking
- Special applications
- Reheat
- Defrost
- Mix & Match
- Containers
- Tips for reheating plated meals
- Tips for cooking plated meals
- Assembling a plated meal using various components
- Notes on the cooking charts
- Using the special application
- Reheating food with the special application
- Cooking food with the special application
- Food suitable for the special application
- Menu cooking – automatic
- Bottling
- Bottling cakes
- Drying
- Extracting juice with steam
- Blanching
- Disinfect items
- Heat crockery
- Keeping warm
- Prove dough
- Heating damp flannels
- Dissolve gelatine
- Decrystallise honey
- Melt chocolate
- Cook bacon
- Sweat onions
- Apple storage
- Making eierstich
- Fruit preserve
- Skinning vegetables and fruit
- Make yoghurt
- Automatic programmes
- MyMiele
- User programmes
- Baking
- Roasting
- Grilling
- Cleaning and care
- Problem solving guide
- Optional accessories
- Service
- Installation
- Note for test institutes
- UK Conformity declaration
- EU Conformity declaration
- Copyrights and licences

Roasting
146
Important usage notes
To ensure the probe works correctly,
please observe the following instruc-
tions.
The metal tip of the food probe can
break.
Do not use the food probe to lift or
carry the food.
- Do not use tall, narrow metal cooking
containers as these can weaken the
signal.
- For wireless food probes, avoid pla-
cing metal objects above them, such
as a lid, aluminium foil, the wire rack
or the universal tray on the shelf
levels above. Glass lids can be used.
- Do not use another proprietary metal
food probe at the same time.
- Ensure that the handle of the food
probe is not sitting in the cooking li-
quid, on the food or on the edge of
the cooking container.
- You can place the meat in a pot or on
the rack.
- The metal tip of the food probe must
be fully inserted into the centre of the
food so that the temperature sensor
reaches more or less to the core. The
handle should point diagonally up-
wards and not horizontally towards
the corners of the oven or the door.
- When cooking poultry, insert the
metal tip into the thickest part of the
breast. Press the breast with your in-
dex finger and thumb to find the
thickest part.
- The metal tip must not touch any
bone or be inserted in areas with a lot
of fat. Heavily marbled areas and
bones can cause cooking to end pre-
maturely.
- If the meat is very heavily marbled
with fat, select the highest core tem-
perature given in the cooking charts.
- When using aluminium foil or roasting
bags, insert the food probe through
the foil/bag into the centre of the
food. You can also place meat inside
the bag or foil with the food probe
already inserted. Follow the roasting
bag manufacturer’s instructions.
- The food probe can only be inserted
almost horizontally in very flat pieces
of food such as fish. Therefore cook
flat food in glass or ceramic cooking
containers as the walls of a metal
cooking container would disrupt the
radio signals.
A message will appear in the display if
the food probe is no longer recog-
nised during a cooking process.
Change the position of the food probe
in the food.