Operating and installation instructions Freezer To avoid the risk of accidents or damage to the appliance it is essential to read these instructions before it is installed and used for the first time. en-GB M.-Nr.
Contents Warning and Safety instructions...................................................................... 4 Caring for the environment .............................................................................. 13 Saving energy .................................................................................................... 14 Guide to the appliance ...................................................................................... Accessories ................................................
Contents Cleaning and care ............................................................................................. Cleaning agents................................................................................................... Preparing the refrigeration appliance for cleaning .............................................. Cleaning the interior and accessories ................................................................. Cleaning the door seal ...................................................
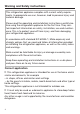
Warning and Safety instructions This refrigeration appliance complies with current safety requirements. Inappropriate use can, however, lead to personal injury and material damage. Please read the operating and installation instructions carefully before using the refrigeration appliance for the first time. They contain important information on safety, installation, use and maintenance. This is to protect yourself from injury, and from damaging your refrigeration appliance.
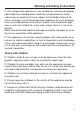
Warning and Safety instructions This refrigeration appliance is not suitable for storing and keeping cool medicines, blood plasma, laboratory preparations or similar substances or products that are subject to the Medical Device Directive. Incorrect use of the refrigeration appliance for such purposes may cause deterioration of the items stored. The refrigeration appliance is also not suitable for use in areas where there is a risk of explosion.
Warning and Safety instructions Technical safety The coolant circuit has been checked for leaks. The refrigeration appliance complies with statutory safety requirements and the appropriate EU directives. This refrigeration appliance contains the refrigerant isobutane (R600a), a natural gas which is environmentally friendly but flammable. The refrigerant does not damage the ozone layer and does not contribute to the greenhouse effect.
Warning and Safety instructions To avoid the risk of damage to the appliance, make sure that the connection data (fuse rating, frequency and voltage) on the data plate corresponds to the household supply. Check that this is the case before connecting the appliance. Consult a qualified electrician if in any doubt. The electrical safety of this appliance can only be guaranteed when correctly earthed. It is essential that this standard safety requirement is met.
Warning and Safety instructions While the appliance is under warranty, repairs should only be undertaken by a Miele authorised service technician. Otherwise the warranty is invalidated. Faulty components must only be replaced with genuine Miele original spare parts. Miele can only guarantee the safety standards of the appliance when Miele replacement parts are used.
Warning and Safety instructions Correct use This refrigeration appliance is designed for use within specific ambient temperatures (climate range). Do not use in ambient temperatures for which it is not designed. The climate range is stated on the data plate in the interior cabinet of the refrigeration appliance. A lower ambient temperature will cause the compressor to switch off for longer periods, meaning that the refrigeration appliance is unable to maintain the required temperature.
Warning and Safety instructions Danger of injury. Never handle frozen food or the metal parts of the appliance with wet hands. Your hands may freeze to the frozen food or to the metal. Danger of injury. Do not take ice cubes out with your bare hands and never place ice cubes or ice lollies in your mouth straight from the freezer zone. The very low temperature of the frozen food can cause frost burn to the lips and tongue. Do not refreeze partially or fully defrosted food.
Warning and Safety instructions Cleaning and care Do not use any oils or grease on the door seals, as these will cause the seals to deteriorate and become porous with time. Do not use a steam cleaning appliance to clean or defrost this appliance. Steam could reach electrical components and cause a short circuit. Sharp edged or pointed objects will damage the evaporator, causing irreversible damage to the appliance.
Warning and Safety instructions Disposal of your old appliance If your old refrigeration appliance has a door lock, destroy it. This will prevent the risk of children playing accidentally locking themselves in and endangering their lives. Splashes of coolant can damage the eyes. Be careful not to damage any part of the pipework whilst awaiting disposal, e.g. by - puncturing the coolant channels in the condenser, - bending any pipework, or - scratching the surface coating.
Caring for the environment Disposal of the packing material Disposing of your old appliance The packaging is designed to protect the appliance from damage during transportation. The packaging materials used are selected from materials which are environmentally friendly for disposal and should be recycled. Electronic and electrical appliances contain many valuable materials. They also contain certain materials, compounds and components which were essential for their correct functioning and safety.
Saving energy Installation / Maintenance Temperature setting 14 Normal energy consumption Increased energy consumption In a ventilated room. In an enclosed, unventilated room. Protected from direct sunlight. In direct sunlight. Not near to a heat source (radiator, oven). Near to a heat source (radiator, oven). Where the ideal ambient room temperature is approx. 20 °C. Where the ambient room temperature is above 25 °C. Ventilation gaps uncovered and dusted regularly.
Saving energy Normal energy consumption Use Increased energy consumption Drawers and shelves arranged as they were when the appliance was delivered. Only open the door when necessary and for as short a time as possible. Store food in an organised way. Frequent opening of doors for long periods will cause a loss of coldness. The appliance will try to cool down and the compressor will run for longer periods. Take an insulated cool bag when shopping, and load food in the appliance as soon as possible.
Guide to the appliance a Button for switching the refrigeration appliance on/off b Button for switching the SuperFreeze function on/off c Display with temperature indicator d For switching the refrigeration appliance on/off e SuperFreeze symbol f Lock symbol g Temperature display h Button for setting the temperature i Alarm off button j Power failure symbol k Menu symbol (Settings mode: for altering the display brightness level, for switching the safety lock on/off) 16
Guide to the appliance a Control panel with display b Freezer drawers c Ventilation grille 17
Guide to the appliance Accessories Accessories supplied Ice cube tray Optional accessories A range of useful Miele accessories and care products are available for your appliance. Accessories are available to order via the Miele Webshop, from Miele directly (see back cover for contact details) or from your Miele dealer.
Switching on and off Before using for the first time Switching off Packaging material Press the button until the display goes out. Remove all packaging material from the inside of the appliance. Cleaning Please refer to the relevant instructions in “Cleaning and care”. Clean the inside of the appliance and the accessories.
The correct temperature It is very important to set the correct temperature for storing food in the appliance. Bacteria will cause food which is not stored at the correct temperature to deteriorate rapidly. Temperature influences the growth rate of these bacteria. Reducing the temperature reduces their growth rate. Setting the temperature To freeze fresh food and to store frozen food for long periods, a temperature of -18 °C is required. At this temperature the growth of bacteria is generally halted.
The correct temperature Temperature display The temperature display on the control panel always shows the temperature in the warmest part of the appliance. The temperature display will flash if: - The temperature is not within the range that can be displayed, e.g. because the refrigeration appliance has just been switched on. - A different temperature has just been set. - The temperature in the appliance has risen by several degrees, indicating that the appliance is warming up too much.
Using Super freeze Super freeze function Switching off SuperFreeze Switch on Super freeze before putting fresh food into the freezer. The SuperFreeze function will switch itself off automatically after approx. 65 hours. The symbol will go out and the refrigeration appliance will run at normal power again. This helps food to freeze quickly and retain its nutrients, vitamins, flavours and appearance. Exceptions: - when placing food in the freezer that is already frozen.
Temperature and door alarm The appliance has been fitted with a warning system which ensures that the temperature in the freezer cannot rise unnoticed and to avoid energy being wasted if the door is left open. Temperature alarm If the temperature in the freezer becomes too warm, the temperature display and the alarm symbol will flash. An alarm tone will also sound. The temperature the refrigeration appliance is set at determines the temperature the appliance recognises as being too warm.
Selecting further settings Settings mode – To deactivate the lock The alarm can be activated or deactivated in settings mode. Press the button for approx. 5 seconds. Activating or deactivating the lock Settings mode is indicated by the menu symbol in the display. See below for instructions on how to activate and deactivate the lock. Activating or deactivating the lock The safety lock function can be activated to prevent the appliance being switched off by mistake.
Freezing and storing food Maximum freezing capacity To ensure that fresh food placed in the freezer freezes through to the core as quickly as possible, the maximum freezing capacity must not be exceeded. The maximum freezing capacity for freezing within a 24-hour period is given on the data plate: “Freezing capacity ... kg/24 hrs”. Storing frozen food Never re-freeze partially or fully defrosted food. Defrosted food may only be re-frozen after it has been cooked.
Freezing and storing food Home freezing Only freeze fresh food which is in a good condition. Hints on home freezing - The following types of food are suitable for freezing: Fresh meat, poultry, game, fish, vegetables, herbs, fresh fruit, dairy products, cakes, leftovers, egg yolks, egg whites and a range of precooked meals. - The following types of food are not suitable for freezing: Grapes, lettuce, radishes, soured cream, mayonnaise, eggs in their shells, onions, whole raw apples and pears.
Freezing and storing food Before placing food in the appliance – Freezing small amounts of food When freezing more than 2 kg of fresh food, switch on the SuperFreeze function some time before placing the food in the freezer (see “SuperFreeze”). Place the food in the lower freezer drawers. This helps create a cold reserve in food which is already stored in the freezer. Place the food flat in the bottom of the freezer drawers so that it freezes through to the core as quickly as possible.
Freezing and storing food – Freezing the maximum amount of food (see data plate) Remove the lowest freezer drawer. Place the frozen goods flat on the bottom of the appliance or in contact with the interior cabinet side walls, so that it freezes through to the core as quickly as possible. Once frozen: Place the frozen goods in the freezer drawer and push it back in. Storage time for frozen food The storage life of food is very variable, even at a constant temperature of -18 °C.
Freezing and storing food Defrosting frozen goods Never re-freeze partially or fully defrosted food. Defrosted food may only be re-frozen after it has been cooked. Frozen goods can be defrosted in different ways: Cooling drinks quickly When cooling drinks quickly in the freezer, make sure bottles are not left in for more than one hour; otherwise they could burst, causing injury and damage.
Freezing and storing food Using accessories Making ice cubes Fill the ice cube tray three quarters full with water and place it on the bottom of one of the freezer drawers. Once frozen, use a blunt instrument, for example a spoon handle, to remove the ice tray from the freezer if it is stuck. Tip: Ice cubes can be removed easily from the tray by holding it under running water for a short time.
Defrosting Freezer Risk of damage from an incor- The freezer does not defrost automatically. rect defrosting process. When defrosting the freezer, make sure that you do not damage the evaporator as this would cause irreversible damage to the refrigeration appliance. Do not scrape off ice and frost. Do not use sharp objects. Do not use any mechanical or other types of aids which are not recommended by the manufacturer to accelerate the defrosting process.
Defrosting To defrost The longer the frozen goods are left out at room temperature, the faster they deteriorate. Carry out the defrosting procedure as quickly as possible. Use a sponge or towel to soak up the defrosted water as often as necessary. After defrosting Clean the freezer, then dry it thoroughly. Risk of damage due to heat and Close the appliance doors. moisture ingress. The steam from a steam cleaner as well as electric heaters and candles can damage plastic and electrical components.
Cleaning and care Do not let water get into the electronic unit. Risk of damage due to moisture ingress. The steam from a steam cleaner can damage plastic and electrical components. Do not use a steam cleaner to clean the refrigeration appliance. The data plate located inside the interior cabinet of the refrigeration appliance must not be removed. It contains information which is required in the event of a fault.
Cleaning and care Preparing the refrigeration appliance for cleaning Switch the refrigeration appliance off. The display goes out and the cooling function is switched off. Take any food out of the refrigeration appliance and store it in a cool place. Remove the drawers. Remove the shelves: lift them up at the front slightly and then pull them forwards and out. The side trim on the shelves is not dishwasher safe. Defrost the freezer (see “Defrosting”).
Cleaning and care Cleaning the interior and accessories The refrigeration appliance should be defrosted and cleaned regularly, or at least twice a year. Remove soiling immediately to prevent it from drying on. The best time to do so is when: - There is very little or no frozen food left in the freezer. - The humidity level in the room is low and the ambient temperature in the room is also low (cooler part of the year). Clean the interior with a clean sponge, lukewarm water and a little washing-up liquid.
Cleaning and care Cleaning the door seal If the door seal is damaged or has slipped out of its groove, the appliance door may not close properly and cooling performance will be reduced. As a result, condensate will build up in the interior cabinet and this can cause a build-up of ice. Do not damage the door seal and ensure it does not slip out of its groove. Risk of damage as a result of incorrect cleaning. If you treat the door seal with oils or grease, it can become porous.
Problem solving guide Many malfunctions and faults that can occur in daily operation can be easily remedied. Time and money will be saved because a service call will not be needed. The following guide may help you to find the reason for a malfunction or a fault, and to correct it. To prevent unnecessary loss of temperature it is advisable not to open the door while waiting for the appliance to be serviced.
Problem solving guide Problem Cause and remedy The compressor is switching on more frequently and for longer periods of time. The temperature in the refrigeration appliance is too low. The ventilation gaps have been covered or become too dusty. Do not block the ventilation gaps. Dust the ventilation gaps regularly. The appliance door has been opened too frequently, or a large amount of fresh food has been placed in the appliance for freezing.
Problem solving guide Problem Cause and remedy The compressor comes on less and less often and for shorter periods of time. The temperature in the refrigeration appliance rises. This is not a fault. The temperature setting is too high. Correct the temperature setting. Check the temperature again after 24 hours. An LED indicator light is flashing at the back of the refrigeration appliance at the bottom near the compressor (depending on model).
Problem solving guide Display warnings Message Cause and remedy The symbol lights up in the display. You cannot switch the appliance off. The safety lock has been activated. Completely deactivate the safety lock (see “Selecting further settings – Activating and deactivating the safety lock”). Two bars are flashing in A temperature will not be shown in the display until the display. the temperature in the appliance drops below 0 °C.
Problem solving guide Message Cause and remedy The power failure symbol , appears in the display and the alarm tone sounds. The temperature display will show the warmest temperature recorded in the freezer during a power failure or an interruption to the power supply. Indication of an power failure: the temperature in the refrigeration appliance over the last few days or hours has risen too high because of a power failure or interruption to the power supply.
Problem solving guide Other problems Problem Cause and remedy The door to the freezer will not open because it has been opened and closed too many times in succession. This is not a fault. The suction caused by opening and closing the door is preventing the door from opening. Wait approx. 1 minute and then try again. It should now open without force. Food has frozen together. The food packaging was not dry when placed in the freezer. Use a blunt instrument, e.g.
Noises Normal noises What causes them Brrrrr ... A humming noise is made by the motor (compressor). This noise can get louder for brief periods when the motor switches on. Blubb, blubb ... A gurgling noise can be heard when coolant is circulating through the pipes. Click ... Clicking sounds are made when the thermostat switches the motor on and off. Crack ... A cracking sound can be heard when materials expand inside the appliance.
Service Contact in the event of a fault EPREL database In the event of any faults which you cannot remedy yourself, please contact your Miele dealer or the Miele Customer Service Department. From 1 March 2021, information on energy labelling and ecodesign requirements will be available in the European Product Database (EPREL). You can find the product database at the following link https://eprel.ec.europa.eu/. You will be asked to enter the model identifier.
*INSTALLATION* Installation Electrical connection The appliance is supplied with a mains cable and moulded plug ready for connection to an AC single-phase 220– 240 V 50 Hz supply. The fuse rating must be at least 10 A. This appliance must be connected to a suitable switched socket. The electrical installation must be in compliance with current local and national safety regulations, (e.g. VDE 0100 in Germany / BS 7671 in the UK). We recommend the use of a suitable RCD .
*INSTALLATION* Installation Installation Danger of damage and injury due to the refrigeration appliance tipping over. This refrigeration appliance is very heavy and can tip forwards when the appliance door is open. Keep the appliance door(s) shut until the refrigeration appliance has been built in and secured in its housing in accordance with these operating and installation instructions. Fire risk and danger of damage from appliances which give off heat.
*INSTALLATION* Installation Location Climate range This appliance should be installed in a dry, well-ventilated room. This refrigeration appliance is designed for use within specific ambient temperatures (climate range). Do not use in ambient temperatures for which it is not designed. The climate range is stated on the data plate in the interior cabinet of the refrigeration appliance.
*INSTALLATION* Installation Ventilation Furniture door panel Risk of fire and damage due to – Gap insufficient ventilation. If the refrigeration appliance is not ventilated sufficiently, the compressor will run more frequently and for longer periods. This will result in increased energy consumption and a higher operating temperature for the compressor. This may, in turn, cause damage to the compressor. Please ensure that there is adequate ventilation around the refrigeration appliance.
*INSTALLATION* Installation Appliance furniture door thickness A [mm] Weight of the furniture door Gap X [mm] for different edge radiiB R0 ≥16–19 R1.2 R2 If the furniture door panel is too R3 min. 3 20 5 4 4 3.5 21 5.5 5 4.5 4 22 6.5 6 5.5 5 heavy, this can cause damage. Fitting a furniture door panel which is heavier than the maximum permitted weight could damage the hinges. This can cause subsequent functional problems.
*INSTALLATION* Installation Before installing the appliance Take the accessory pack which includes installation parts and other accessories out of the appliance. Remove the cable clip from the back of the appliance. Open the appliance door and remove the red safety catch (depending on model).
*INSTALLATION* Installation Installation dimensions Changing the door hinging The refrigeration appliance is supplied with hinges on the right. If left-hand hinging is required, the hinges must be changed. Danger of injury and damage when changing the door hinging. There is an increased danger of injury and damage if the refrigeration appliance is installed by a single person. Always change the door hinging with the help of a second person.
*INSTALLATION* Installation Preparing to change the door hinging To change the door hinging, you will need the following tools: Place a suitable cover on the floor in front of the appliance to protect the appliance door and your floor from damage. Slightly loosen screws and on the hinges. Push the appliance door outwards and take it off its hinges. Remove the screws completely and loosely screw them in on the opposite side. Lift off the covers , and .
*INSTALLATION* Installation Refitting the door Place the appliance door with the outer side upwards on a stable surface. Danger of injury from folding door hinges. The hinges can snap closed. Leave them open. Hang the appliance door onto the pre-fitted screws and , and securely tighten the screws and . Remove the screws completely. Replace the covers: , and . Replace the hinges in their diagonally opposite corners .
*INSTALLATION* Installation Adjusting the appliance door hinges Limiting the opening angle of the appliance door If you would like the appliance door to be cushioned so that it opens more softly, the spring tension on the appliance door can be adjusted: The door hinges are set ex works to enable the appliance door to be opened wide. To do this, use an Allen key to adjust the door hinges.
*INSTALLATION* Installation Installing the appliance To install the appliance, you will need the following tools: Preparing the appliance Position the refrigeration appliance in front of the niche. Hold the plinth facing at the side and pull it forwards and off. You have a choice of two different ways of securing your appliance: 1. Secured at the top This method is suitable for securing the appliance underneath a worktop, e.g. a laminated one).
*INSTALLATION* Installation 1. Secured at the top Fit the bracket in the aperture in the appliance lid. Bend the bracket at the perforated position. 2. Secured at the side Both ends of the bracket must be bent. Fit the bracket in the aperture in the appliance lid. Bend the bracket at the perforated position. Remove the bracket from the aperture and insert the straight end of the bracket. Now bend this end of the bracket at the perforated position.
*INSTALLATION* Installation Positioning the refrigeration appliance Risk of damaging the power cable. When pushing the refrigeration appliance into its niche, the power cable can get trapped and damaged. Carefully push the refrigeration appliance into the niche. Risk of damaging the floor. Moving the refrigeration appliance can cause damage to the floor. Move the refrigeration appliance carefully on floors that are sensitive to scratching. Risk of damaging the appliance feet.
*INSTALLATION* Installation On furniture with door fittings (e.g. stubs, seals, etc.), the dimension of these must be taken into account to ensure there is a gap all round of 42 mm. Pull the refrigeration appliance forwards by the appropriate dimension. Check again to make sure there is a gap of 42 mm to the front edges of the door fittings.
*INSTALLATION* Installation The foam ensures the airflow is separated to prevent malfunctioning of the appliance. Fitting a continuous furniture plinth facing Ventilation takes place through a ventilation grille in the appliance plinth. The ventilation grille must never be obstructed. If a continuous plinth facing is to be fitted, a suitable ventilation gap will need to be made in it for the ventilation grille of the appliance: Insert the piece of foam supplied.
*INSTALLATION* Installation Securing the appliance in the niche Fitting the furniture door If fitted in a run of units make sure that the top edge of the furniture door is at the same height as neighbouring unit doors. The furniture door must be fitted correctly and not under tension. The next section gives instructions on how to fit a furniture door that is at least 16–19 mm thick. Ensure that the plinth facing is refitted correctly. 1. Secured at the top 2.
*INSTALLATION* Installation Tip: Push up the fitting aids with the furniture front until they are the same height as the doors of adjacent kitchen units. Using a pencil, lightly mark a line down the centre of the inside of the furniture door . Hang the fixing bracket with the fitting aids onto the inside of the furniture door. Align the fixing bracket centrally. Undo the nuts and take the fixing bracket off together with the fitting aids .
*INSTALLATION* Installation Open the appliance door. Fit the side cover to the fixing bracket on the opposite side of the hinge. Turn the furniture door over and attach the handle (if required). Hang the furniture door onto the adjusting bolts . Loosely attach the nuts on the adjusting bolts. Close the door and check the distance between the door and neighbouring furniture doors.
*INSTALLATION* Installation Whilst counterholding adjusting bolts with a screwdriver, tighten nuts on the appliance door with screwdriver. Attach the appliance door and the furniture door using screws through fixing brackets : - Drill holes in the furniture door (mark the position of the holes first). - Screw in the short chipboard screws (4 x 14 mm).
*INSTALLATION* Installation Fit the cover in position. To make sure the appliance is correctly fitted: - The door must close properly. - The door must not touch the housing unit. - The seal at the top edge of the handle side must fit properly. To double check place a torch in the appliance and close the door. Turn the lights out in the room. If you can see any light shining out from the sides double check the installation.
United Kingdom Miele Co. Ltd., Fairacres, Marcham Road, Abingdon, Oxon, OX14 1TW Tel: 0330 160 6600, Internet: www.miele.co.uk/service, E-mail: info@miele.co.uk Australia Miele Australia Pty. Ltd. ACN 005 635 398 ABN 96 005 635 398 1 Gilbert Park Drive Knoxfield, VIC 3180 Tel: 1300 464 353 Internet: www.miele.com.au China Mainland Miele Electrical Appliances Co., Ltd. 1-3 Floor, No. 82 Shi Men Yi Road Jing' an District 200040 Shanghai, PRC Tel: +86 21 6157 3500 Fax: +86 21 6157 3511 E-mail: info@miele.
F 31202 Ui en-GB M.-Nr.