
Specifications


C,i?pTEF!
1
OPERATlOh:
7.
Roil cabinet to its intended iocation maintainrng clearance between the cabrnet and walls, drapes
other games or obstructrons.
8.
Locate the pedestal assembly mo~trng rails and rilbber bumoer spacers. which are
shopped
along
wrth
the hardware. inside a cash box.
9
Install rubber bumpers Rubber bumpers are used
too
maintain a X16” space between the pedestal
ar’cl
cabinet assembly. and are essentral
rn
absorbing
vibratron
insert one bumper using a twisting motion
into
each of the pre-drilled holes
!oca:ed
along the bottom edge oi main cabrnet assembly
10 Install pedestal mounting rails Orlen:
!he
mounting rail so that the pre-attached rubber bumpers face
outward, then insert
rai!.
Fasten
raei
w
piace
with the hardware provrded. If necessary refer to illustra-
tron
for proper placement.
11 Roll pedestal section near main
caotnet,
alrgn
opening
rn
the pedestal with the ends of the ra s
mounted
rn
main cabinet. Skae tre pedestal forward onto extended mount,ng rails leaving enougn
space to attach the
,winng
harness
F,la!e
each cable connector and press firmly to seat the contacts
Ensure no wires are pinched during pedestal attachment
Attach pedestal assembly using
-
“L-20 tamoer resistant screws and large flat washers provided. AT27
wrench is included to tighten these screws
firmly.
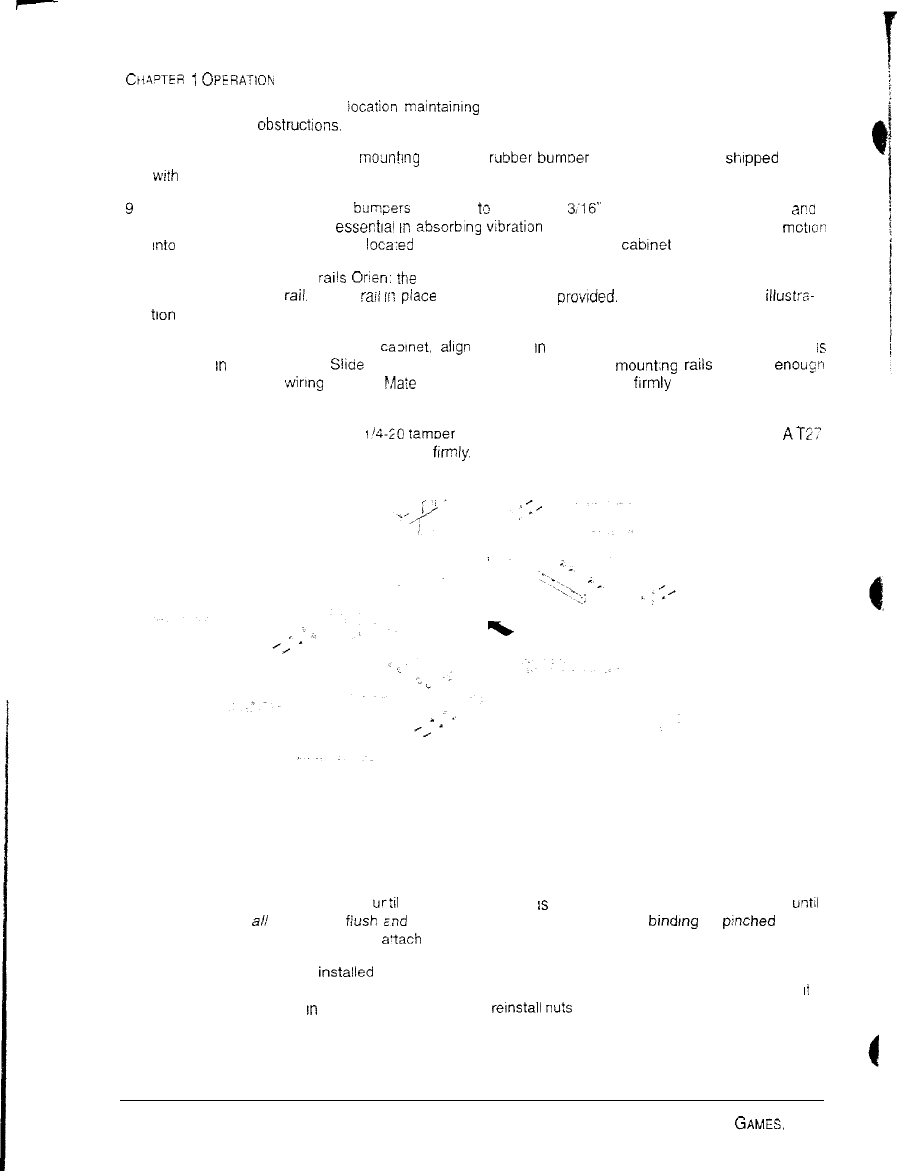
LOCATION OF PEDESTAL ASSEMBLY MOUNTING HOLES
12
Lower and adjust each leg leveler urtrl the pedestal section
IS
stable and level. Adjust the levelers
until
the bottoms of al! pieces are
fiush
snd parallel with each other. Inspect for bindlng or p:nched wires.
then firmly tighten the fasteners to
a’tach
the two pieces together as a single unit.
13. An extra padlock may be insta!led to secure rear door Locate hasp. Remove the two lock bracket nuts
from inside the cabinet, above the rear door opening. Slide the hasp bracket onto the bolts so tha:
It
protrudes from the hole
rn
back of the cabinet. then
rernstall
nu!s
6
MIDWAY AMUSEMENT
GAMES.
LLC