
User manual


Charge Battery
Note:
» For the USB wall charger (EU & other countries) connect the USB cable to the charger
and follow the steps above.
» Allow for a minimum of 4 hours charging before first time use.
» The wall charger will not charge the battery while the SHOWWX+ HDMI is powered ON.
» The supplied battery is designed specifically for the SHOWWX+ HDMI and no other battery
should be used.
Power ON or OFF
Note: Do not have the SHOWWX+ HDMI connected to any video
device before turning ON.
Turning ON: Press and hold the button.
The blue LED will come on and the image will appear
in about 5 seconds.
Turning OFF: Press the button.
Note:
» During startup the image will flash with a series of different colors. This is normal.
» A blinking Blue LED indicates the unit is starting up. A solid Blue LED indicates
the unit is ready for use.
Connect to a Video Source
The SHOWWX+™ HDMI can connect to a variety of devices with video-out such as an iPad,
iPhone, iPod, tablet computer, laptop, cell phone, camera, and more. The following describes
the connectivity options available with the SHOWWX+ HDMI.
How to Connect to an iPod, iPhone, or iPad
To see compatible devices with the SHOWWX+ HDMI: http://www.microvision.com/showwx/hdmi/compatibility
Cable
SHOWWX+ HDMI
Component Cable for iPod,
iPhone, and iPad
SHOWWX+ HDMI Micro-
Micro or Micro-Standard
HDMI Cable
SHOWWX+ HDMI VGA Dock
Connect SHOWWX+ HDMI
iPod, iPhone, or iPad with
Component TV-out
Any device with an HDMI
video out connection. Most
standard HDMI and Mini HDMI
to Micro cables can be used.
Laptop and PC devices
Included
Yes
Yes
Micro-Micro
No
Sold Separately
Yes
Yes
Yes
Note:
» While connected to an iPod, iPhone, or iPad
the Audio Jack on the Apple device can also
be used.
» To see compatible devices with the SHOWWX+
HDMI visit http://www.microvision.com/showwx/
hdmi/compatibility
12 13
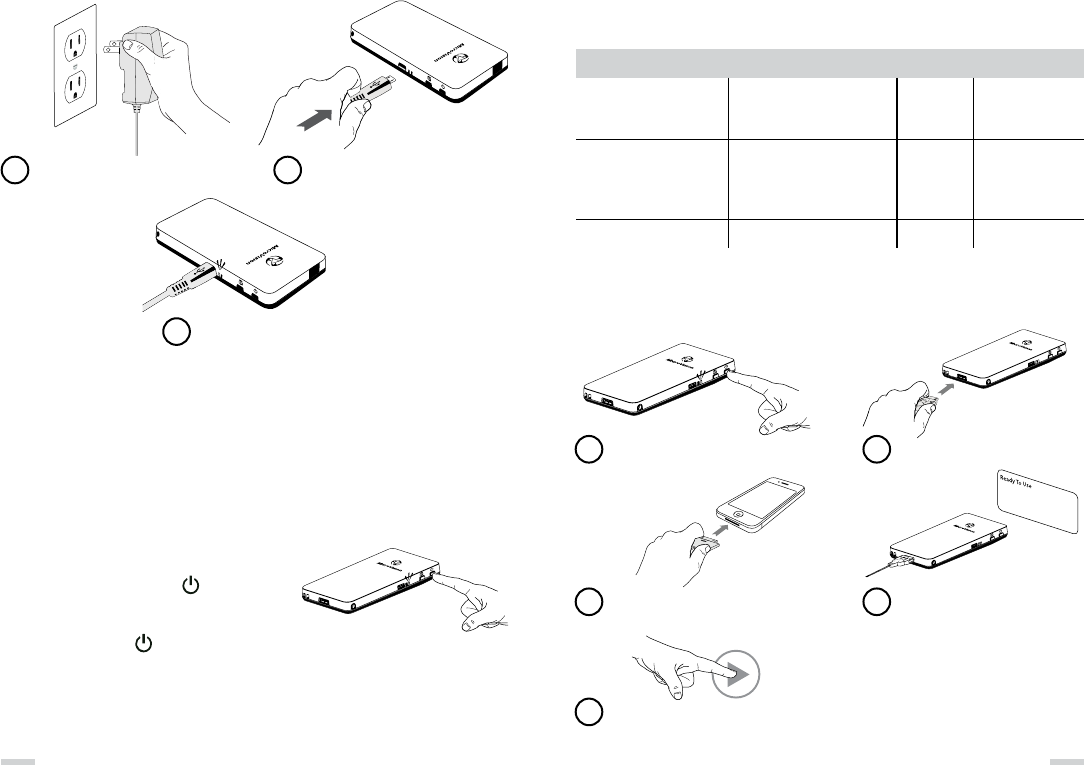
Plug Wall Charger Into Outlet Connect To
Micro-USB/Power Input
Orange LED: Battery charging
Green LED: Battery fully charged
1 2
3
Power on the projector
1
Connect the cable to the projector
2
Connect the cable to the iPod, iPhone,
or iPad (already on)
3
Wait to see “Ready To Use” alert
4
Select Picture or Video content
and Press play on iPod, iPhone,
or iPad
5