
Installation guide


18 ChassisTouch FPD Monitors Installation Guide
3M Touch Systems Proprietary Information
For more information on adjusting the desktop area (resolution), color
depth, or refresh rate, refer to the user manual that came with your video
card.
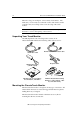
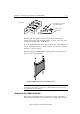
Connecting the Touch Monitor
To connect the ChassisTouch FPD monitor
1.
Turn off your computer. You should always turn off the computer before
connecting or disconnecting a device.
2.
Connect one end of the video cable to the video connector on the FPD.
Connect the other end to the video card in your computer.
3.
Connect one end of the RS-232 serial touch screen cable to the FPD.
Connect the other end to an available serial communication (COM) port on
the back of your computer.
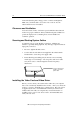
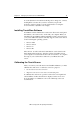
VIDEO
DC 12V
TOUCHSCREEN
4.
Plug the AC/DC power supply into the FPD. Be sure to use the power
supply included (LSE9901B1260) with the monitor or an equivalent class 2
rated (LPS) power supply.
5.
Connect the power cable.
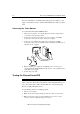
Testing the ChassisTouch FPD
Note:
The ChassisTouch FPD does not have a power status light.
After connection, the monitor will switch on automatically. Before you
test your touch monitor, make sure all cables are connected properly.
Be sure to tighten all cable screws.
To test that the monitor is working properly:
1.
Turn on your computer.
2.
Make sure the video image is displayed. If it is not, turn on your monitor.
3.
Make sure the video image is centered within the screen area. Use the
monitor controls to adjust the image, if necessary.