
User`s guide

Virtual CD v4 Documentation
Page 27 of 27
need—which would otherwise take up space unnecessarily—such as service pack
installers or demo files.
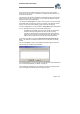
One way to start the Virtual CD Editor is by clicking on the
symbol in the Virtual
CD Management program:
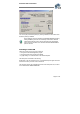
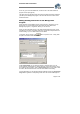
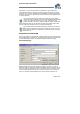
The Editor program window is divided into 4 panes. The view on the upper left shows
a tree structure with all of your system's physical drives, including all their folders. The
contents of the folder selected here are shown in the upper right-hand pane.
The view on the lower left-hand side shows the structure of the virtual CD currently
being created, and the contents of the element selected here are shown in the lower
right-hand view.
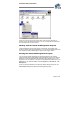
Virtual CD sets the size of the CD to be created at 650 MB, as this is the usual
capacity of blank CDs. To change this setting, click on the "CD Size" button.
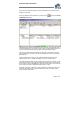
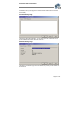
Then start selecting the data you wish to include on the virtual CD. To do this, you can
either use 'drag & drop'; that is, drag the desired data from the upper to the lower half
of the window, or click on the Add button, which opens a list where you can select the
type of element you wish to add (audio tracks, directory, or files).
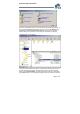
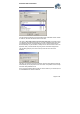
Depending on the type of element you select from this list, a dialog opens where you
can specify the data you wish to add. The dialog shown here, for example, opens
when you select "Audio tracks":