
User guide


DiscView PRO User Guide
136
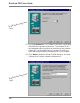
make the appropriate changes to the settings as you move
through the screens. When you have clicked on the Finish
button, the second driver will appear as a separate listing in
the Jukebox Drivers Installed list box.
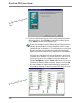
Modifying a Jukebox Driver
You can make changes to a jukebox driver, for example,
changing a SCSI ID from 0 to 1, by selecting the driver in the
list box and clicking on the Configure... button. Cycle
through the Configuration dialogs until you come to the one
that has the setting you want to change. Make the
appropriate change and continue to the end, where you will
click on the Finish button to put the change(s) into effect.
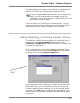
Deleting a Jukebox Driver
If you have moved the jukebox to a new server, or moved it off
the network, you will want to delete the jukebox driver from
the current server. Select the driver in the Jukebox Drivers
Installed list box. Click on the Delete button. The
appearance of the hourglass indicates that the driver files are
being deleted from the server. Click on the OK button when
you have finished.
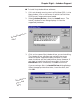
Adding Jukebox Drivers
Your options are fairly limited when it comes to adding
drivers. For example, you can have only one Pioneer DRM-
5004X jukebox per server, so adding another driver is not an
option under this circumstance.
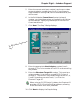
However, you can have a Pioneer DRM-1004X and an NSM
jukebox on a single server. Click on the Add... button and
select the appropriate jukebox server from the list box. The
first of the jukebox Configuration dialogs will display.
Following the steps outlined in the previous section,