
User guide


Chapter Eight – Jukebox Support
135
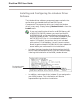
Adding, Modifying, or Deleting Jukebox Drivers
The addition, modification and deletion of jukebox drivers is
managed in the Jukebox Support tab section of the
Fileserver Configuration dialog, discussed in Chapter Two,
Fileserver Configuration.
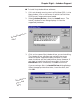
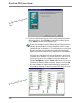
Click on the server on which the jukebox is installed. Right-
click the mouse button and select Configure... from the pop-
up menu. Click on the Jukebox Support tab.
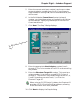
The dialog displays the status as the driver is configured and
loaded. It can take up to 20 seconds to load the driver.
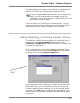
If any of the parameters are incorrect, the driver will not
load. You will be taken back to the beginning of this
installation. Go through it again, verifying that all of the
parameters are set correctly.
That’s all there is to installing the jukebox driver! You are
ready to load CDs into the jukebox and use DiscView PRO to
autoconfigure them. Refer to Chapter One for details.
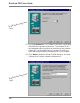
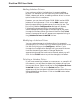
If you had elected not to enable the jukebox driver when you
were installing it, you can enable it now by clicking on the
Enable Jukebox Drivers checkbox if it is not checked. When
you click on the OK button, the driver will be enabled. Your
jukebox must be installed, configured and powered on before
you do this.
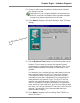
The Fileserver Configuration
dialog