
User Guide

Setting up the Projector
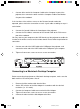
1. Place the projector on a sturdy, flat surface within 6 feet of a computer or
video source (e.g., video tape deck, camcorder, digital camera, or laser disk
player).
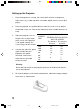
2. Place the projector at a qualified distance from the screen so as to project
the desired screen size. Refer to the following chart for suitable distances to
keep.
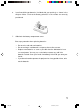
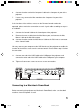
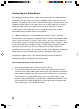
3. Adjust the projector so as to
keep the lens at right angles
to the screen. If the projector
is not angled correctly, the
screen image will be skewed.
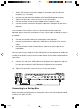
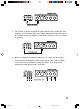
4. Connect one end of the power
cable (include with your
projector) to its power
connector. Connect the
other end to a grounded
electrical socket.
Warning:
Never look into the lens of the projector and never let children look into the
lens of the projector.
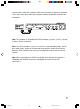
5. To insert the batteries in the remote control device, slide off the battery compart-
ment cover as shown below.
SCREEN
SIZE
300”
200”
100”
80”
60”
40”
30”
HORIZONTAL DISTANCE
BETWEEN THE PROJECTOR
AND THE SCREEN
36’
24’
13’
10’
7’
6’
The Longest
Distance
The Shortest
Distance
49’
30’
16’
12’
10’
7’
5’
VX2.p65 02-10-18, 11:0110