
User Guide

20
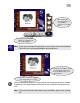
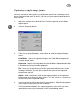
4.a In the File: Save As dialog box. locate the folder as to where you want to
save the image file and then specify a file name for it. Click Save to start
the process.
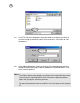
4.b In the Album dialog box, specify a name for the captured image where a
thumbnail representing the file will be added to the specified album. Click
OK to start the process.
Notes:
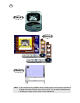
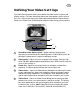
The Video Capture panel displays a preview of the captured image frame.
Check if you are satisfied with the shot. Otherwise, repeat the process
again until you get the shot that you want.
For more information on how to send files via e-mail, please refer to page
27.