
User Guide

18
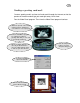
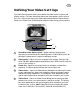
Creating Live Messages
The Video Panel program is the tool you need for creating video and audio files
that can contain your important messages.
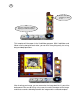
Recording a video/audio clip:
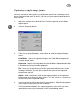
Before you start recording your message, be sure to check your video settings in
the Video Options panel. Click the Show/Hide Video Options panel button to
define your video settings. These options vary depending on the type of video
capture device that is connected to your machine.
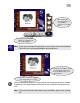
1. Click Start on the Taskbar and locate the EyeStar Mail v3.0 program folder
or click the EyeStar Mail icon over the desktop.
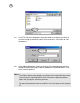
2. Check the Video and Audio channel buttons to see if they are active.
Selecting the desired channels will determine whether to record both video
and audio data or audio only.
Note: When recording audio data, adjust the microphone level on the Capture
Options panel to set the pickup sensitivity of our audio source device.
3. Adjust the video source device’s (e.g. video camera) focus to ensure that
everything you want to record appears on the Video capture panel.
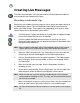
4. Click the Record button to start the capturing process. The Video capture
panel will display what’s being recorded, as well as the timecode and file
size information.
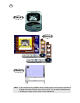
5. When finished with your message, click the Stop button to end the
recording session.
6. To preview the recorded clip, click the Play button. You can also adjust the
audio playback volume by adjusting the Speaker volume control.
Note: Make sure that you save the recently recorded clip to a file first before
starting another recording session. This way, you will not overwrite the one
you have just recorded.
7. When satisfied with the preview, you can then either save the recorded clip
to a file or send it online right away. Otherwise, start recording again.
Note: For more information on how to send files via e-mail, please refer to page
28.