Microtek ArtixScan 2020 User's Manual
English Copyright 2000 by Microtek International, Inc. All rights reserved. Trademarks Microtek, ScanMaker, and ScanWizard Pro are trademarks of Microtek International, Inc. IBM PC is the trademark of International Business Machines Corporation. Windows and MS-DOS are trademarks of Microsoft Corporation. Other product or company names are trademarks or registered trademarks of their respective holders. Important Documents that you scan may be protected under copyright law.
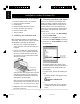
Introduction ........................................................................................................... 1 Before You Begin .................................................................................................... 1 1. Unpacking your scanner and checking components .......................................................... 1 2. Unlocking the scanner .......................................................................................................
English 1) Using the glass film holder ................................................................................ 2) Using the 35mm batch slide holder ................................................................... 3) Using the 35mm filmstrip holder ....................................................................... 4) Using the 6 x 9 cm batch film holder ................................................................. 5) Using the 4" x 5" batch film holder ..................................
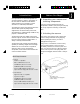
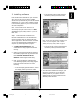
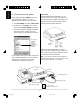
Introduction Before You Begin An image scanner is a device that captures and converts illustrations, graphics, photographs, or text into electronic files that can be edited or enhanced and then incorporated in printed documents or multimedia presentations. 1. Unpacking your scanner and checking components Open your scanner package and check the components as stated in your packing list (see page 29). If any component is missing, call Microtek Sales.
Installation under Windows 95 To install under Windows 95, take the steps below: 2. Checking interface card status 1. 2. 3. 4. 5. 6. 7. When you run Windows 95, the Adaptec AVA2903E SCSI adapter is detected and the driver is automatically installed. Make your Windows 95 CD-ROM ready for use. Some computers may prompt you to load Windows 95 software during your installing AVA-2903E driver. Follow steps below to check.
3. Installing software • From the RGB Output profiles selection, choose the profiles you need to install. Insert the Microtek CD-ROM into your CD-ROM drive. The Microtek Scanner Software installer should come up automatically, and list the software available for you. Click on each software program in the order they appear on your screen to install all of the components.
Step 2 Install software application For example, from the Default Display profiles selection, choose a default display profile you want. The bundled image editing, OCR, and other applications you receive depend on the scanner model you purchase. Click each option on the installer screen to install the software. Step 3 Install documentation reader Click Adobe Acrobat Reader, then follow screen instructions until installation is complete. Acrobat Reader is necessary for reading the manuals on your CD-ROM.
4. Resetting the scanner’s SCSI ID if necessary 5. Connecting the scanner Before connecting the scanner to your computer, make sure the scanner driver (ScanWizard Pro) is installed. Take the following steps to connect. This procedure is provided as a reference. You may or may not need to change the SCSI ID on your scanner. 1. Shut down your computer. A SCSI ID is a number assigned to each SCSI device in your daisy chain to differentiate one from another.
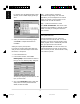
Terminator 6. Checking scanner status You will definitely need a terminator if you are hooking up your PC on a daisy chain with two or more SCSI devices through the SCSI interface card. When running Windows, ALWAYS turn on the scanner before the computer. If you don't, Windows will not be able to “see” your scanner. ArtixScan 2020 has a internal terminator switch located at the back panel of the scanner. 1. Click Start, Settings, and select Control Panel. 2.
7. Testing your scanner 4. Place a reflective document face down on the scanner glass. Center the top of the document along the horizontal ruler on the scanner. 1. Restart Windows 95. Before you restart the computer, make sure your scanner is on and ready. Horizontal ruler 2. Click Start, Programs, Microtek ScanWizard Pro for Windows, and then select Scanner Test. 5. Click the Flatbed or the TMA button on the Microtek Scanner Test program screen.
Troubleshooting for Windows 95 After installing the interface card in your computer and connecting the scanner, you may find yourself unable to use the scanner. This is usually due to any of the situations described below: Situation A Situation B Situation C Situation D See details situations. 4. Click on the Adaptec AIC-7850 PCI SCSI Controller option, and then click Properties . 5. Select Resources from the top.
8. When the settings are all correct, click OK to save the modifications. The dialog box should now show the correct Interrupt Request and Input/Output address settings. If you’re asked to shut down your computer, select No, then click Close. You will be asked whether you wish to restart your computer. Click Yes and restart your computer. 6. In the next menu, make a note of the Input/ Output (I/O) range setting, as well as Interrupt Request (IRQ) number that Windows recommends you.
Installation under Windows 98 Windows 95 and 98 installation is very similar...Windows 98 just makes it easier to install your interface card and software. 3. Install your software (Refer to Step 3 on page 3) 4. Reset the scanner’s SCSI ID if necessary (Refer to Step 4 on page 5) 1. Install the AVA-2903E interface card (Refer to Step 1 on page 2) 5.
5. Select Resources from the top. The dialog box gives you information about the 3 resources: Interrupt Request (IRQ), Memory Range, and Input/Output range. Any conflict in the 3 resources is detected and displayed in the “Conflicting device list”. 7. When you get a “No conflicts” message is in the Conflicting device list, the Memory Range conflict is resolved. Take the similar procedures on the Interrupt Request (IRQ) and Input/ Output Range resources.
Resolving situation C 6. When the “Add New Hardware Wizard” dialog box appears, click Finish. 1. Click Start, Settings, and select Control Panel. 2. Double-click Add New Hardware. 3. Click Next and select No for “Do you want Windows to search for your new hardware?”. 4. From the next menu, select SCSI controllers and click Next. 7. When installation is complete. Windows 98 will then ask if you want to shut down your computer. Select No. 8. Click Start, Settings, and select Control Panel. 9.
Installation under Windows NT 4.0 If you are using Windows NT 3.51, refer to the document For Windows NT 3.51 in the folder Microtek ScanWizard Pro for Windows in the Programs menu. To install under Windows NT 4.0, take the steps below: 1. 2. 3. 4. 5. 6. 1. In Windows NT, click on the Start menu, go to Programs, Administrative Tools (Common), and select Windows NT Diagnostics.
Step 2 Install software application From the two screens, you have seen the available IRQ and I/O address for use with the AVA-2903E interface card. The bundled image editing, OCR, and other applications you receive depend on the scanner model you purchased. Click each option on the installer screen to install the software. If the message “aic78xx” is not listed on the screen, indicating the SCSI driver is not installed; refer to the Troubleshooting section.
6. Testing your scanner 5. Click theFlatbed or TMA button on the Microtek Scanner Test program screen. A preview of your image will be displayed in the Microtek ScanTest window. This indicates the Scanner Test was successful and the scanner is now ready to be used. 1. Restart Windows NT. Before you restart the computer, make sure your scanner is on and ready. 2. Click Start, Programs, Microtek ScanWizard Pro for Windows NT, and then select Scanner Test. 6. Close and exit Microtek ScanTest program.
Troubleshooting for Windows NT 4.0 After installing the interface card in your computer and connecting the scanner, you may find yourself unable to use the scanner. This is usually due to any of the situations described below: Situation A Your interface card is not properly seated in the PCI card slot on your computer. Situation B The AVA-2903E SCSI driver is not properly installed in your computer.
Installation under Macintosh To install under Macintosh, take the steps below: 1. 2. 3. 4. 2. Connecting the scanner Reset the scanner’s SCSI ID if necessary Connect the scanner and computer Install software Scan images 1. Shut down your computer. 2. Connect the scanner to your computer, using the SCSI cable that provided in the scanner package. Make sure your scanner and computer are turned off when you perform the connection. 1.
3. Installing software ArtixScan 2020 provides two options for scanning. Choose either the 666 dpi option for low-resolution scanning, or the 2000 dpi option for high-resolution scanning. Refer to the section Operating the Scanner for placing your scan material. Insert the Microtek CD-ROM into your CD-ROM drive, and double-click the CD-ROM when it appears on your Macintosh desktop. Follow the program in the order to install all of the components. 4.
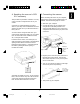
Operating the Scanner Positioning a Document In this section, you will learn the following topics. • Performing the power-on self-test • Positioning a document A. Placing Reflective Materials A: Placing reflective materials 1. Lift the document cover. B: Scanning thick documents 2. Place your document faced down on the scanner glass. Center the top of the document along the horizontal ruler on the scanner.
For reflective material with registration pins scanning: 3. Face down the document, align it with the registration pins on the rail. 1. Push to fit the rail underneath the edge with registration pins of the glass surface. Registration pins Rail 2. Make sure the rail is firmly seated on the glass surface. 20 e_2815body.
B. Scanning Thick Documents C. Placing Transparent Films 1. Lift the scanner cover high enough so that there is enough room to place the document faced down on the scanner glass. Center the top of the document along the horizontal ruler on the scanner. To scan transparent film, you have 2 ways: • By using the transparency tray together with the glass film holder for scanning nonstandard-sized transparent film.
1) Using the glass film holder 2. Place the vinyl strip on the edges of your transparency. 1. To scan non-standard-sized transparent film, place the film faced down on top of the glass surface of the glass film holder. 3. Pull the transparency tray out a little, then place the glass film holder into the transparency tray. For high-resolution scanning: Place the film faced down on the glass surface in the area that labeled “HIGH RESOLUTION” on the holder.
2) Using the 35mm batch slide holder 2. Pull the transparency tray out a little, then place the 35mm batch slide holder into the transparency tray. 1. Insert the individual 35mm slides to be scanned into the 35mm batch slide holder. Note: Push the holder back to place, make sure it is firmly seated in the transparency tray. 3. Gently push the transparency tray back in. For high-resolution scanning: Insert the slides into the holder in the area that labeled “HIGH RESOLUTION” on the holder.
3) Using the 35mm filmstrip holder For high-resolution scanning: Insert the 35mm filmstrip into the holder in the area that labeled “HIGH RESOLUTION” on the holder. 1. Insert the 35mm filmstrip to be scanned into the 35mm filmstrip holder. 2. Pull the transparency tray out a little, then place the 35mm filmstrip holder into the transparency tray. a) Push to open the 5-piece 35mm filmstrip holder. b) Place the 35mm filmstrip in the holder.
4) Using the 6 x 9 cm batch film holder For high-resolution scanning: Insert the films into the holder in the area that labeled “HIGH RESOLUTION” on the holder. 1. Insert the film to be scanned into the 6 x 9 cm batch film holder. 2. Pull the transparency out a little, then place the 6 x 9 cm batch film holder into the transparency tray. a) Push to open the holder. b) Place the films in the holder. Note: Push the holder back to place, make sure it is firmly seated in the transparency tray. 3.
5) Using the 4" x 5" batch film holder For high-resolution scanning: Insert the films into the holder in the area that labeled “HIGH RESOLUTION” on the holder. 1. Insert the films to be scanned into the 4" x 5" batch film holder. a) Push to open the holder. 2. Pull the transparency tray out a little, then place the 4" x 5" batch film holder into the transparency tray. b) Place the films in the holder. Note: Push the holder back to place, make sure it is firmly seated in the transparency tray. 3.
Miscellaneous Returning your scanner for repair Locking the carriage Your scanner has been built to exacting standards. Just like any piece of electrical equipment, however, your scanner or the delicate parts in it are subject to wear and tear and may malfunction for any number of reasons. If your scanner needs to be serviced or repaired, do the following: You need to lock the scanner carriage if you wish to ship back your scanner for any reason.
Lamp Replacement The lamp inside your scanner is not user serviceable and should be replaced if it does not come on or begins to flicker/dim after some time. If the lamp requires replacement, call Microtek Technical Support to get a Repair Merchandise Authorization (RMA) number, and send the scanner in for lamp replacement. Outside the U.S. and Canadian, call your authorized Microtek dealer for lamp replacement. 28 e_2815body.
Components 1 9 10 6 2 11 7 12 3 8 4 13 5 1. ArtixScan 2020 scanner 6. User’s Manual 2. SCSI cable (25-50 pin) 7. Warranty card 10. 35mm batch slide holder 3. Power cord* 8. Microtek CD-ROM 11. 35mm filmstrip holder 9. Glass film holder 4. AVA-2903E SCSI interface card 12. 4" x 5" batch film holder 5. Rail (optional) 13. 6 x 9 cm batch film holder * Depending on the voltage condition for individual marketing areas, your power cord may have a different look. 29 e_2815body.
Scanner cover Horizontal ruler Vertical ruler Glass surface Power switch Busy indicator Ready indicator Power indicator Transparency tray Power connector SCSI 25-pin connector SCSI 50-pin connector Terminator switch ID switch 30 e_2815body.
Specifications Product Name: ArtixScan 2020 Scanning Area: Minimum: Model number: MRS-2000DL Type: Desktop, Flatbed Resolution: 666 dpi(H) x 2000 dpi(V) ±1 dpi on A3 area; 2000 dpi x 2000 dpi on high-resolution area Sample depth: 12 bits per color Calibration time: 12 S/3 color Scanning speed: Low-Resolution mode: Tx* gray: 12 ms/line Rx* gray: 14 ms/line Tx* color: 15 ms/line Rx* color: 17 ms/line Speed mode line/gray color: 15 ms/line Preview: ≤30s whole area Warm up time: 35 sec. 3 min.