
User Guide


11
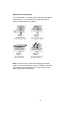
Operating the Monitor
The LCD monitor has been preset at the factory with the Timing
shown in the section “Appendix B” to achieve optimal display.
You can adjust the display to the desired brightness and
sharpness by following the instructions.
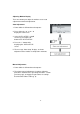
How to Use the OSD (On-Screen
Display)
The OSD (On-Screen Display) lets you easily adjust the various
settings for your LCD Monitor to desired levels of performance.
The OSD includes a main menu and various submenus.
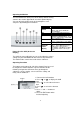
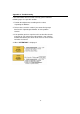
Operating Procedure
The buttons on the upper left side of the Control Panel are used
to navigate the OSD. Follow the sequence below to do the
following: navigate the OSD menu item, go through the
submenus, select a setting, save or cancel the setting, and
finally exit the OSD item.
1. Power on the LCD monitor.
2. Press “
T ” or “X “ to display the OSD
menu.
3. Press “
T ” to select the main menu
item.
4. Press “
X “ to select the submenu
item.
5. Press “+” and “—“ buttons to
adjust.
6. Press the EXIT button when
finished adjusting.
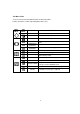
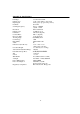
Button
s
Functions
1 AUTO
Automatically adjusts image Clock,
Phase, H-Position, V-Position
settings, and exit the OSD (On
Screen Display)
2 T Press to select main menu items
3 X Press to select submenu items
4 -
Adjust setting bars (i.e.,
CONTRAST, BRIGHTNESS, etc.) to
decrease setting values of the OSD
5 +
Adjust setting bars (i.e.,
CONTRAST, BRIGHTNESS, etc.) to
increase setting values of the OSD
6Power For turning ON/OFF the monitor
7LED light
status
display
Green – Normal operation
Amber – Power Management (i.e.,
DPMS mode: reduces power
consumption < 5W when receiving
no horizontal and/or vertical sync
signal)