
User Guide


2
Microtech Designs
enquiries@microtechdesigns.com.au
microtechdesigns.com.au
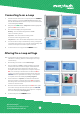
Connecting to an e-Loop
1. Hold the remote close to the e-Loop and press the CONNECT
button. If pairing is successful, Pair Success will display and
the red LED will illuminate on the e-Loop. If not successful, the
screen will display Timeout.
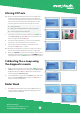
2. Now press the
MENU button. Diagnostics will be highlighted,
press the
SET button to select.
3. The screen will display the magnetic field:
Reading – This should be sitting between 0-200
when no vehicle is present.
Trip Value – This is the level the reading needs
to reach in order to trigger the e-Loop.
Temperature – this is the ambient temperature of the e-Loop.
4. You can test the e-Loop on the bench by moving a magnetic
screwdriver close to the e-Loop. You will see the reading value
increase until it trips and sends an open command.
5. To disconnect the e-Loop press the CONNECT button.
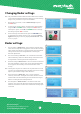
Altering the e-Loop settings
NOTE: You will need to be connected to the e-Loop to make any
alterations to settings. (Refer to Connecting to an e-Loop
section above).
1. After making connection scroll to Alter Settings.
2. The first selection is Mode – EL00C and EL0IC are preset
to EXIT mode and cannot be changed. EL00C-RAD and
EL0IC-RAD are preset to Presence mode and can be
changed to EXIT mode if required. To change mode press
SET, now use the Up or Down buttons to alter and SET to
confirm. If no further changes need to be made, press the
UPLOAD button to upload the new settings. Once upload
is complete, the screen will display Settings Applied.
3. Second selection is Trip Value; the default is 800 which is
the most sensitive. To change value press
SET to highlight
the setting value and use the Up or Down arrow buttons to
increase or decrease value.
4. After the value has been altered press the
SET button again.
If no further changes need to be made, press the
UPLOAD
button to upload the new settings. Once upload is complete,
the screen will display Settings Applied.
5. To disconnect press the
CONNECT button.
1 2
3 4
1
5
2
4
3