©Halter Technical LLC Page 1
©Halter Technical LLC Page 2
Contents Welcome 4 What’s included 5 Get to know your Microsone Discreet Audio Monitoring System 6 Microsone & Charging Case 7 Control Pack 9 Control Pack Menu 11 Frequency Tuning 12 Troubleshooting 13 Specifications 14 Important Information 15 Service and Warranty 18 Safety Instructions 19 Information and explanation of symbols 22 ©Halter Technical LLC Page 3
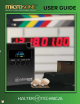
Welcome Congratulations on choosing the Microsone Discreet Audio Monitoring System from Halter Technical! Microsone D.A.M.S. is a revolution in incognito listening for on-screen and onstage talent. Your system features the smallest rechargeable bluetooth earpiece in the world, coupled with the most versatile and powerful transceiver ever built.
What’s Included 2 Microsones 1 Control Pack 1 Charging Case 1 Wall Charger 1 USB Cable 1 Manual QR Code ©Halter Technical LLC Page 5
Get to know your Microsone Discreet Audio Monitoring System Microsone At the heart of the Discreet Audio Monitoring System is the Microsone, the world’s smallest rechargeable bluetooth earbud, designed to fit comfortably in ears of all sizes. When hidden in the wearer’s ear canal, even those closest won’t know it’s there. The Microsone is built durable and solid, with no buttons, dials, or spinning doors.
Microsones & Charging Case Powering On & Off To power your Microsone on, remove it from the Charging Case. A chime will sound to inform you that the Microsone is indeed powered on. To power your Microsone off, simply place it back into the Charging Case Pairing Microsone with Control Pack Upon powering on, Microsone will search for its most recent pairing. If it is within Bluetooth range of its most recent pairing, it will connect and begin receiving audio.
How to insert Microsone into the ear After choosing which ear you want to wear the Microsone, take it between thumb and forefinger so that indent in Microsone is facing out from your ear and downward. Carefully guide the earpiece into your ear canal. Ensure that the earpiece sits as far as possible inside the ear canal, as well as in the best and most comfortable position. Twist the Microsone gently into place to ensure the best fit, with the indent of Microsone now pointing upwards.
Control Pack Get to know Control Pack Control Pack is equipped with a top-seated headphone output connector and volume knob. The headphone output allows Control Pack to be used as a wired IFB receiver, or for general troubleshooting to ensure quality audio is being received at the Control Pack before being transmitted to the Microsone. On the face of Control Pack, you’ll find the OLED Display, with four buttons labeled MENU, UP, DOWN, and SELECT.
Powering Control Pack Control Pack can be powered by either AA batteries, or by 5V power through the USB port. To power on Control Pack, rotate the volume knob clockwise to the on position. To power off, rotate the volume knob counter-clockwise until Control Pack clicks into the off position To open the battery door, press the recessed button on the bottom of Control Pack. The battery door opens to the right side.
Control Pack Menu Pressing the MENU button opens the main menu. Pressing MENU again will exit out to the home screen. Use the UP and DOWN keys to scroll through the menu. Press SELECT to choose a menu option. 1. BT PWR ON Activates the Bluetooth transmitter. The Bluetooth transmitter is necessary to send audio to the Microsones. 2. BT PWR OFF Deactivates the Bluetooth transmitter. If using a wired headphone or headset, deactivating the Bluetooth transmitter may save battery life. 3.
Frequency Tuning Control Pack has 4 banks of programmable frequencies. Banks 1 and 2 are for frequencies 174-217MHz, while banks 3 and 4 are for frequencies 470-608MHz. Select Frequency Bank and Channel To switch between frequency banks, press the SELECT button. The bank number will begin to flash. Scroll through the banks by pressing UP or DOWN. Press SELECT again to begin changing the channel number within that bank. Scroll through channels by pressing UP or DOWN.
Troubleshooting Microsone doesn’t power on Solutions The battery is empty Replace Microsone in the Charging Case to charge the battery The battery has a charge Replace the Microsone in the Charging Case. Leave it in until the Charging Case indicates that it is charging. Remove Microsone again.
Specifications Microsone Bluetooth Chipset Bluetooth 5.2 Bluetooth Codec AptX Battery Power Internal rechargeable Lithium-Ion Battery Charging Wireless contact charging Frequency Response 100Hz - 9kHz Size 0.70” (18mm) Control Pack Operating Frequencies 174.000MHz - 217.000MHz and 470.000MHz - 608.000MHz Frequency Steps 0.
Important information Please read the information on the following pages before using your device. It is important for the user to pay attention to all relevant warning notices in this user guide. Hazard warnings • Keep this device out of reach of children aged under 3 years. • Opening the device might damage it. If problems occur that cannot be resolved by following the guidelines in the Troubleshooting section of the User Guide, consult your local Halter Technical representative.
Declaration of Conformity In body worn operation, the devices have been found in compliance with the requirements of EN 62209-2, FCC rule paragraph 2.1093, the ANSI/IEEE C95.1:1999, the NCRP Report Number 86 for uncontrolled environment, according to the Health Canada’s Safety Code 6 and the Industry Canada Radio Standards Specification RSS-102 for General Population/Uncontrolled exposure.
FCC Caution: Any changes or modifications not expressly approved by the party responsible for compliance could void the user’s authority to operate the device. To comply with FCC RF exposure limits for general population/uncontrolled exposure, the antenna(s) used for this transmitter must be installed to provide a separation distance of at least 20 cm from all persons and must not be collocated or operating in conjunction with any other antenna or transmitter.
Service and Warranty If your Microsone Discreet Audio Monitoring System malfunctions, you should attempt to correct or isolate the trouble before concluding that the equipment needs repair. Make sure you have followed all troubleshooting procedures and operating instructions. Check your connecting RF equipment as well. We strongly recommend that you do not try to repair the equipment yourself and do not have the local repair shop attempt anything other than the simplest repair.
Safety Instuctions • Read these safety instructions and the instruction manual of the product. • Keep these safety instructions and the instruction manual of the product. Always include all instructions when passing the product on to third parties. • Heed all warnings. • Follow all instructions. • Do not use this apparatus in or near water. • Only clean the product when it is not connected to the power supply system. • Do not block any ventilation openings.
Inform all users of these risks and ask them to set the volume to a moderate level if necessary. Risk of fire due to overloading Do not overload wall outlets and extension cables as this may result in fire and electric shock. Intended use The product may be used for commercial purposes. It is considered improper use when the product is used for any application not named in the corresponding instruction manual.
Serial number: Purchase date: Local Halter Technical representative: ©Halter Technical LLC Page 21
Information and explanation of symbols The FCC logo or the FCC mark is a voluntary mark employed on electronic products manufactured or sold in the United States which indicates that the electromagnetic radiation from the device is below the limits specified by the Federal Communications Commission and the manufacturer has followed the requirements of the Supplier's Declaration of Conformity authorization procedures.
Manufacturer: Halter Technical A Los Angeles Company www.haltertechnical.
©Halter Technical LLC Page 24