
User Manual
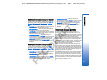


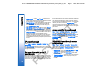
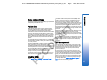


Table Of Contents
- Nokia E62 User Guide
- Contents
- For your safety
- Get started
- Your device
- Keys and parts
- Keyguard (Keypad lock)
- Common actions in several applications
- Write text
- Help and tutorial
- Volume control
- Connectors
- Type label
- Antennas
- Electronic components
- About the display
- Standby modes
- Display indicators
- Memory
- Transfer content between devices
- Settings
- Menu
- Scroll and make selections
- Nokia PC Suite
- Total product offering
- Make calls
- Clock
- Contacts
- Tools
- Organizer
- Messages
- Web
- Office applications
- Connectivity
- Media applications
- Personalization
- Settings
- Security
- Shortcuts
- Nokia original enhancements
- Battery information
- Care and maintenance
- Additional safety information
- Index

FCC DRAFT
Set up an Internet access point for
data calls
1. Select Menu > Tools > Settings > Connection > Access
points.
2. Select Options > New access point. To use an existing
access point as a basis for the new one, select Use
existing settings. To start with an empty access point,
select Use default settings.
3. Define the following settings:
• Connection name — Enter a descriptive name for
the connection.
• Data bearer — Select Data call or High speed data
(GSM only).
• Dial-up number — Enter the modem telephone
number of the access point. Press + before
international numbers.
• User name — Enter your user name if required by
the service provider. User names are often case-
sensitive and provided by your service provider.
• Prompt password — Select Yes to enter your
password each time you log into a server or No to
save the password in your device memory and
automate the login.
• Password — Enter your password if required by the
service provider. The password is often case-
sensitive provided by the service provider.
• Authentication — Select Secure to always send
your password encrypted or Normal to send your
password encrypted when possible.
• Homepage — Enter the Web address of the page
you want to display as a home page when you use
this access point.
• Data call type — Select Analog or ISDN.
• Max. data speed — Select the limit to apply to the
transfer speed. If you select Automatic, the data
transfer rate is determined by the network and
may be affected by network traffic. Some service
providers may charge more for higher data rates.
4. After defining the basic settings, select Options >
Advanced settings to define the advanced settings or
Back to save the settings and exit.
For information on the advanced settings, see the
extended user guide on the Web.
Advanced Internet access point
settings for data calls
After setting up a basic Internet access point for Data
call or High speed data (GSM only), select Options >
Advanced settings, and define the following advanced
settings.
• IPv4 settings — Enter the device IP and name server
addresses for IPv4 Internet protocol.
• IPv6 settings — Enter the device IP and name server
addresses for IPv6 Internet protocol.
• Proxy serv. address — Enter the proxy server address.
• Proxy port number — Enter the proxy server port
number. Proxy servers are intermediate servers
between a browsing service and its users, which are
used by some service providers. These servers may
provide additional security and speed up access to the
service.
• Use callback — Select Yes if you have a service that dials
back to your device when you establish an Internet
connection.
92
Connectivity
file:///C:/USERS/MODEServer/mehowell/12100235/rm-88_texas/en/issue_1/rm-88_texas_en_1.xml Page 92 Mar 9, 2006 5:37:29 PMfile:///C:/USERS/MODEServer/mehowell/12100235/rm-88_texas/en/issue_1/rm-88_texas_en_1.xml Page 92 Mar 9, 2006 5:37:29 PM