Nokia 3711 Fold User Guide 9216976 version 1.
© 2009 Nokia. All rights reserved. Nokia, Nokia Connecting People, and Navi are trademarks or registered trademarks of Nokia Corporation. Nokia tune is a sound mark of Nokia Corporation. Other product and company names mentioned herein may be trademarks or tradenames of their respective owners. Reproduction, transfer, distribution, or storage of part or all of the contents in this document in any form without the prior written permission of Nokia is prohibited.
PARTICULAR PURPOSE, ARE MADE IN RELATION TO THE ACCURACY, RELIABILITY OR CONTENTS OF THIS DOCUMENT. NOKIA RESERVES THE RIGHT TO REVISE THIS DOCUMENT OR WITHDRAW IT AT ANY TIME WITHOUT PRIOR NOTICE. The availability of particular products and applications and services for these products may vary by region. Please check with your Nokia dealer for details, and availability of language options.
subject to the following two conditions: (1) This device may not cause harmful interference, and (2) this device must accept any interference received, including interference that may cause undesired operation. Any changes or modifications not expressly approved by Nokia could void the user's authority to operate this equipment.
Contents Contents 1. Get started............................................................................................................. 9 2. Your device ......................................................................................................... 14 3. Call functions..................................................................................................... 17 4. Navigate the menus......................................................................................... 17 5.
SAFETY SAFETY Read these simple guidelines. Not following them may be dangerous or illegal. Read the complete user guide for further information. SWITCH ON SAFELY Do not switch the device on when wireless device use is prohibited or when it may cause interference or danger. ROAD SAFETY COMES FIRST Obey all local laws. Always keep your hands free to operate the vehicle while driving. Your first consideration while driving should be road safety.
SAFETY ■ About your device The wireless device with the type designator RM-511 described in this guide is approved for use on the GSM 850, 900, 1800, and 1900 and WCDMA 900, 1700/ 2100, and 2100 networks. When using this device, obey all laws and respect local customs, privacy and legitimate rights of others, including copyrights. Copyright protection may prevent some images, music, and other content from being copied, modified, or transferred.
SAFETY services involve transmission of data. Check with your service provider for details about fees in your home network and when roaming in other networks. Your service provider can explain what charges will apply. Some networks may have limitations that affect how you can use some features of this device requiring network support such as support for specific technologies like WAP 2.0 protocols (HTTP and SSL) that run on TCP/IP protocols and language-dependent characters.
Get started you are asked for the PUK or PUK2 code. If you do not have them, contact your service provider. The module PIN is required to access the information in the security module of your SIM card. The signing PIN may be required for the digital signature. The restrictions password is required when using the call restriction service. To define how your device uses the access codes and security settings, select Menu > Settings > Security.
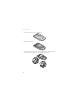
Get started 1. To remove the back cover, press and slide (1). 2. Remove the battery (2). 3. Open the SIM card holder (3), and insert the SIM card into the holder with the contact surface facing down (4). Close the SIM card holder (5).
Get started 4. Insert the battery (6). 5. Replace the back cover. ■ Insert a microSD card 4 Note that the memory card may be supplied with the device, and may already be inserted. 3 1. Remove the back cover and the battery. 2. Slide the microSD card holder (1) and lift to open (2). 2 1 3. Insert the microSD card with the contact surface facing the inside of the device (3).
Get started 4. Close the microSD card holder (4), and slide to lock. 5. Insert the battery, and back cover. Important: The microSD card must be inserted in the slot with the contact area facing the inside of the device. ■ Charge the battery Your battery has been partially charged at the factory. If the device indicates a low charge, do the following: 1. Connect the charger to a wall socket. 2. Connect the charger to the device. 3.
Get started ■ Wrist strap Remove the back cover of the device. Insert a thread through the eyelet. Place the thread around the post. Tighten the thread. Replace the back cover. ■ Antenna Your device may have internal and external antennas. Avoid touching the antenna area unnecessarily while the antenna is transmitting or receiving. Contact with antennas affects the communication quality and may cause the device to operate at a higher power level than otherwise needed and may reduce the battery life.
Your device 2. Your device ■ Keys and parts 1. Earpiece 2. Main display 3. web2go key 4. Call key 5. Microphone 6. Keypad 7. Selection keys 8. Capture key 9. End/Power key 10.
Your device 11. Camera lens 12. Headset connection 13. Volume key 14. Loudspeaker 15. Cover display 16. Charger connection 17. Micro USB connection 18. Wriststrap connection Switch the device on and off Warning: Do not switch the device on when wireless device use is prohibited or when it may cause interference or danger. To switch the device on or off, press and hold the power key. If the device asks for a PIN or a UPIN code, enter the code (displayed as ****), and select OK.
Your device ■ Keypad lock (keyguard) Select Menu or Unlock, and press * within 1.5 seconds to lock or unlock the keypad. To activate the automatic keyguard, select Menu > Settings > Phone > Automatic keyguard. To answer a call when the keyguard is activated, press the call key. When you end or reject the call, the keypad automatically locks. When the device or keypad is locked, calls may be possible to the official emergency number programmed into your device.
Call functions 3. Call functions ■ Make a voice call 1. Enter the phone number, including the area code. For international calls, press * twice for the international prefix (the + character replaces the international access code), enter the country code, the area code without the leading 0, if necessary, and the phone number. 2. To call the number, press the call key. To adjust the volume, press the scroll key 3. To end the call or to cancel the call attempt, press the end key.
Write text To change the menu view, select Options > Main menu view and from the available options. To rearrange the menu, scroll to the menu you want to move, and select Options > Organize > Move. Scroll to where you want to move the menu, and select OK. To save the change, select Done > Yes. 2. Scroll through the menu, and select an option (for example, Settings). 3. If the selected menu contains further submenus, select the desired submenu (for example, Call). 4.
People Tip: To quickly activate or deactivate predictive text, or switch to number mode when writing text, press # twice. To select the prediction input type, select Options > Prediction options > Type > Normal or Word sugg.. 1. Start writing a word using the 2-9 keys. Press each key once for each letter. The entered letters are underlined. If you selected Word sugg. as the prediction type, the device starts to predict the word you are writing.
People device, the SIM card memory, or in a combination of the two. Names and numbers saved in the SIM card memory, are indicated with . ■ Save names and phone numbers Select Menu > People > Phonebook > Options > Add new contact. Names and numbers are saved in the used memory. ■ Add contact details Select Menu > People > Settings, and ensure that the Memory in use is Phone or Phone and SIM.
People ■ Edit contacts Select Menu > People > Phonebook. Scroll to the contact, and select Options > Edit , and scroll to the details you want to change. ■ Business cards You can send and receive a person’s contact information as a business card from a compatible device that supports the vCard standard. To send a business card, find the contact whose information you want to send, and select Details > Options > Send bus. card.
Messaging 7. Messaging You can read, write, send, and save messages. The messaging services can only be used if supported by your service provider. For more details about messaging services, contact your service provider. Note: The message sent icon or text on your device screen does not indicate that the message is received at the intended destination. ■ Text and multimedia messages You can create a message, and optionally attach, for example, an image.
Messaging ■ Multimedia messages A multimedia message can contain text, images, and sound or video clips. Only devices that have compatible features can receive and display multimedia messages. The appearance of a message may vary depending on the receiving device. The wireless network may limit the size of MMS messages. If the inserted image exceeds this limit the device may make it smaller so that it can be sent by MMS. Important: Exercise caution when opening messages.
Messaging Read a message and reply Important: Exercise caution when opening messages. Messages may contain malicious software or otherwise be harmful to your device or PC. You receive a notification when you receive a message. To display the message, select View. If more than one message was received, to display a message, select the message from the Inbox folder and select Open. To create an answer message, select Reply. Send messages To send the message, select Send.
Messaging ■ Voice mail If you subscribe to voice mail (network service), you can access the service through a voice mail number supplied by your service provider. The number may appear in your contact list during the activation process. If not, you need to save this number to your device to use voice mail. When you receive a voice message, a tone sounds, a notification is displayed, or both. If you receive more than one message, your device displays the number of messages received.
Messaging Picture messages — Allow delivery reports, set up the appearance of multimedia messages, allow the reception of multimedia messages and advertisements, and set up other preferences related to multimedia. Service messages — Activate service messages and set up preferences related to service messages. ■ E-mail Mobile email provides access to popular email services. Depending on your email service provider, you can receive notifications when new email arrives.
Media While you are logged in and connected to the IM service, you can exit the IM application and use the other functions of the device, and the IM session and conversations remain active in the background. Register with an IM service You can register over the internet with the IM service provider you have selected to use. During the registration process, you create a unique ID and password.
Media protected files, such as sound, video, themes, or ringing tones to your device, the files are free, but locked. You pay for the key to activate the file, and the activation key is automatically sent to your device when you download the file. To view the permissions for a protected file, scroll to the file, and select Options > Activation keys. For example, you can see how many times you can view a video or how many days you have left for listening to a song.
Media If your device has WMDRM protected content, both the activation keys and the content will be lost if the device memory is formatted. You may also lose the activation keys and the content if the files on your device get corrupted. Losing the activation keys or the content may limit your ability to use the same content on your device again. For more information, contact your service provider. ■ Games & Apps Open a game Select Menu > Media > Games. Scroll to the desired game, and select Open.
Media The camera produces images in the JPEG format and video clips in the 3GPP format. The camera lens is on the front of the device. The color display works as a viewfinder. Camera and video settings Select Menu > Media > Camera or Video recorder > Options > Settings and edit the available settings. Camera and video effects Select Menu > Media > Camera or Video recorder > Options > Effects and the desired option. Music player Warning: Listen to music at a moderate level.
Media To turn on random play, select Options > Shuffle > On. To repeat a song or all songs, select Options > Repeat and from the available options. To return to the home screen and leave the player in the background, press the end key. In the home screen, the currently playing song is displayed. To return to the music player, select the currently playing song. Recorder You can record pieces of speech, sound, or a call, and save them in Gallery.
Settings 9. Settings ■ Profiles Your device has various settings groups called profiles, for which you can customize the device tones for different events and environments. Select Menu > Settings > Profiles, the desired profile, and from the following: Activate — Activate the selected profile. Customize — Customize the profile. Select the setting you want to change, and make the changes. Timed — Set the profile to be active until a certain time, up to 24 hours, and set the end time.
Settings Select Options > Save to save the settings. If you select the highest ringing tone level, the ringing tone reaches its highest level after a few seconds. ■ Display Select Menu > Settings > Display and from the following: Wallpaper — Add a background image to the home screen. Home screen — Activate the home screen and personalize the view. Home scr. font col. — Select the color for the text in the home screen.
Settings Personal Area Network User (PANU), Hands-Free Profile (HFP), Headset Profile (HSP), Object Push Profile (OPP), Phonebook Access Profile (PBAP), SIM Access Profile (SAP), Serial Port Profile (SPP), Generic Object Exchange Profile (GOEP), Generic Audio/Video Distribution Profile (GAVDP), Service Discovery Profile (SDAP), Audio/Video Distribution Protocol (AVDTP), Audio/Video Control Transport Protocol (AVCTP), Bluetooth Network Encapsulation (BNEP), Object Exchange (OBEX), RFCOMM (RFCOMM), File Tran
Settings Paired devices — Search for any Bluetooth device in range. Select New to list any Bluetooth device in range. Select a device, and Pair. Enter an agreed Bluetooth passcode of the device (up to 16 characters) to associate (pair) the device to your device. You must only give this passcode when you connect to the device for the first time. Your device connects to the device, and you can start data transfer.
Settings When needed — Set the packet data connection to be established when an application needs it. The connection is closed when the application is terminated. Always online — Set the device to automatically connect to a packet data network when you switch the device on USB data cable You can use the CA-101 USB data cable (not included) to transfer data between the device and a compatible PC. You can also use the USB data cable with Nokia PC Suite.
Settings ■ Date and time To change the time, time zone, and date settings, select Menu > Settings > Date and time > Date and time settings, Date and time format, or Auto-update (network service). When traveling to a different time zone, select Menu > Settings >Date and time > Date and time settings > Time zone and the time zone of your location in terms of the time difference with respect to Greenwich Mean Time (GMT) or Universal Time Coordinated (UTC).
Settings Home screen key To activate the home screen key to scroll up, down, or both, select Menu > Settings > My shortcuts > Home screen key. ■ Call settings Select Menu > Settings > Call and from the following: Call forwarding — Forward your incoming calls (network service). You may not be able to forward your calls if some call restriction functions are active. See Call restrictions in ”Security” on page 41.
Settings ■ Phone settings Select Menu > Settings > Phone and from the following: Language settings — Set the display language of your device, select Phone language. Automatic selects the language according to the information on the SIM card. Memory status — View the available device memory. Automatic keyguard — Set the keypad of your device to lock automatically after a preset time delay when the device is in the home screen and no function of the device has been used. Select On, and set the time.
Settings ■ Accessories This menu or the following options are displayed only if the device is or has been connected to a compatible accessory. Select Menu > Settings > Accessories, an accessory, and from the following: Headphones — Select the activated profile when a headset in connected. Charger — Select Default profile to set the profile that you want to be automatically activated when you connect to the selected accessory. Select Lights to set the lights permanently on.
Settings not added any, select Add new; otherwise, select Options > Add new. Select the service type, and select and enter each of the required parameters. The parameters differ according to the selected service type. To delete or activate a personal account, scroll to it, and select Options > Delete or Activate.
Organizer Security module settings — View Security module details, select Module PIN request, or change the module PIN and signing PIN. ■ Reset device To reset some of the menu settings to their original values, select Menu > Settings > Rest. factory sett. Select Restore settings only to prevent personal data from being deleted or Restore all. Enter the security code. By default, this is 1234 or 12345. If you have not created a code, you are prompted to do so.
Organizer To set the date, time, time zone, default view, first day of the week, or calendar tone, select Options > Settings. To set the device to delete old notes automatically after a specified time, select Auto-delete notes. To synchronize from a PC, see ”Connectivity” on page 33. Make a calendar note Select Menu > Organizer > Calendar. Scroll to the date, and select Options > Make a note and one of the following note types: Reminder, Meeting, Call, Birthday, or Memo. Fill in the fields.
Organizer To use the Maps application, select Menu > Organizer > Maps. Download maps Your device may contain pre-installed maps on the memory card. You can download a new set of maps through the internet using the Nokia Map Loader PC software. Nokia Map Loader To download the Nokia Map Loader on your PC and for further instructions, see www.maps.nokia.com. Before you download new maps for the first time, ensure that you have a memory card inserted in the device.
Organizer Maps and GPS You can use the Global Positioning System (GPS) to support the Maps application. Find out your location, or measure distances and plot coordinates. Before you can use the GPS function with your device, you may need to pair your device with a compatible external GPS receiver using Bluetooth wireless technology. For more information, see the user guide for your GPS device.
Organizer ■ Alarm clock Select Menu > Organizer > Alarm clock. To set the alarm, select Alarm time, and enter the alarm time. To change the alarm time when the alarm time is set, select On. To set your device to alert you on selected days of the week, select Repeat > On, then select Repeat days and mark the day or days of the week that you want to be alerted. To select the alarm tone or set the radio as the alarm tone, select Alarm tone.
Organizer To make a note if no note is added, select Add note; otherwise, select Options > Make a note. Write the note, and select Save. To synchronize from a PC, see ”Connectivity” on page 51. ■ Calculator The calculator in your device provides basic arithmetic and trigonometric functions; calculates the square, the square root, and the inverse of a number; and calculates loan amounts, payments, and interest rates. Note: This calculator has limited accuracy and is designed for simple calculations.
Organizer ■ Stopwatch Select Menu > Organizer > Stopwatch to measure time, take intermediate times, or take lap times using the stopwatch. During timing, the other functions of the device can be used. To set the stopwatch timing in the background, press the end key. Using the stopwatch or allowing it to run in the background when using other features increases the demand on battery power and reduces the battery life. ■ World clock Select Menu > Organizer > World clock.
Call History 11. Call History Select Menu > Call History > Missed calls, Received calls, or Dialed numbers. To view your recent missed and received calls and the dialed numbers chronologically, select All calls. Select Clear log lists to remove the history of recent calls and messages. Select Call duration to view the lenth of recent calls and lifetime use.
Help 2. Select Configuration. Only the configurations that support browsing service are displayed. Select a service provider, Default, or web2go for browsing. You may receive the configuration settings required for browsing as a configuration message from the service provider that offers the service that you want to use. 3. Select Account and a browsing service account contained in the active configuration settings.
Connectivity 15. Connectivity You can access the internet when your device is connected to a compatible PC through a Bluetooth connection. You can use your device with a variety of PC connectivity and data communications applications. ■ Nokia PC Suite With Nokia PC Suite you can synchronize contacts, calendar, notes, and to-do notes between your device and the compatible PC or a remote internet server (network service). For more information, and to download Nokia PC Suite, see www.nokia.com/support.
Green tips 16. Green tips Here are tips on how you can contribute to protecting the environment. ■ Save energy When you have fully charged the battery and disconnected the charger from the device, unplug the charger from the wall outlet. You do not need to charge your battery so often if you do the following: • Close and disable applications, services, and connections when not in use. • Decrease the brightness of the screen.
Battery and charger information 17. Battery and charger information ■ Charging and discharging Your device is powered by a rechargeable battery. The battery intended for use with this device is BL-4S. Nokia may make additional battery models available for this device. This device is intended for use when supplied with power from the following charger: AC-8. The exact charger model number may vary depending on the type of plug.
Battery and charger information the battery. A device with a hot or cold battery may not work temporarily. Battery performance is particularly limited in temperatures well below freezing. Do not short-circuit. Accidental short-circuiting can occur when a metallic object such as a coin, clip, or pen causes direct connection of the positive (+) and negative (-) terminals of the battery. (These look like metal strips on the battery.
Taking care of your device Authenticate hologram 1. When you look at the hologram on the label, you should see the Nokia connecting hands symbol from one angle and the Nokia Original Enhancements logo when looking from another angle. 2. When you angle the hologram left, right, down and up, you should see 1, 2, 3 and 4 dots on each side respectively. Successful completion of the steps is not a total assurance of the authenticity of the battery.
Taking care of your device get wet, remove the battery, and allow the device to dry completely before replacing it. • Do not use or store the device in dusty, dirty areas. Its moving parts and electronic components can be damaged. • Do not store the device in hot areas. High temperatures can shorten the life of electronic devices, damage batteries, and warp or melt certain plastics. • Do not store the device in high or cold temperatures.
Additional safety information Recycle The crossed-out wheeled-bin symbol on your product, battery, literature, or packaging reminds you that all electrical and electronic products, batteries, and accumulators must be taken to separate collection at the end of their working life. This requirement applies in the European Union. Do not dispose of these products as unsorted municipal waste. For more environmental information, see the product Eco-Declarations at www.nokia.com/environment.
Additional safety information regulations posted instruct you to do so. Hospitals or health care facilities may use equipment sensitive to external RF energy. Implanted medical devices Manufacturers of medical devices recommend a minimum separation of 15.3 centimeters (6 inches) between a wireless device and an implanted medical device, such as a pacemaker or implanted cardioverter defibrillator, to avoid potential interference with the medical device.
Additional safety information ■ Vehicles RF signals may affect improperly installed or inadequately shielded electronic systems in motor vehicles such as electronic fuel injection, electronic antilock braking, electronic speed control, and air bag systems. For more information, check with the manufacturer of your vehicle or its equipment. Only qualified personnel should service the device or install the device in a vehicle. Faulty installation or service may be dangerous and may invalidate your warranty.
Additional safety information ■ Emergency calls Important: This device operates using radio signals, wireless networks, landline networks, and user-programmed functions. If your device supports voice calls over the internet (internet calls), activate both the internet calls and the cellular device. The device may attempt to make emergency calls over both the cellular networks and through your internet call provider if both are activated. Connections in all conditions cannot be guaranteed.
Additional safety information shown on the device box, refers to lower radio frequency (RF) emissions. A higher M-value generally indicates that a device model has a lower RF emissions level, which may improve the likelihood that the device will operate with certain hearing aids. Some hearing aids are more immune than others are to interference. Please consult your hearing health professional to determine the M-rating of your hearing aid and whether your hearing aid will work with this device.
Additional safety information Your mobile device is also designed to meet the requirements for exposure to radio waves established by the Federal Communications Commission (USA) and Industry Canada. These requirements set a SAR limit of 1.6 W/kg averaged over one gram of tissue. The highest SAR value reported under this standard during product certification for use at the ear is 1.28 W/kg and when properly worn on the body is 0.57 W/kg.
Index Index A alarm clock 46 antenna 13 B battery charging 12 charging, discharging 53 installation 9 Bluetooth connectivity 33 browser, device 49 business cards 21 C calculator 47 calendar 42 call functions 17 register. See call log.
Index H hearing aid compatibility 60 help 50 home screen 37 I installation battery 9 SIM card 9 internet 49 text 22 multimedia messages 23 music.See music player.
Index commands 25 services 49 set profiles 32 settings call 38 camera 30 clock 37 configuration 40 connectivity 33 date 37 GPRS 35 main display 33 messages 25 my shortcuts 37 phone 39 phonebook 21 profiles 32 restore factory settings 42 security 41 themes 32 time 37 tones 32 USB data cable 36 SIM card installation 9 speed dialing 17 stopwatch 48 strap 13 switch on and off 15 T TeleNav Navigator 43 text 18 themes 32 time settings 37 timer 47 to-do list 46 tones 32 U unlock keypad 16 UPIN 15 V voice mail
Index 66