FC C D ra ft 6650 User Guide 9206316 Draft 1 Model: 6650d-1bH 21 February 2008
DECLARATION OF CONFORMITY 0434 Hereby, NOKIA CORPORATION declares that this RM324 product is in compliance with the essential requirements and other relevant provisions of Directive 1999/5/EC. A copy of the Declaration of Conformity can be found at http://www.nokia.com/ phones/declaration_of_conformity/. © 2008 Nokia. All rights reserved. ft Nokia, Nokia Connecting People, Nokia Care, and Navi are trademarks or registered trademarks of Nokia Corporation. Nokia tune is a sound mark of Nokia Corporation.
CONTENTS OF THIS DOCUMENT. NOKIA RESERVES THE RIGHT TO REVISE THIS DOCUMENT OR WITHDRAW IT AT ANY TIME WITHOUT PRIOR NOTICE. The availability of particular products and applications and services for these products may vary by region. Please check with your Nokia dealer for details, and availability of language options. This device complies with Directive 2002/95/EC on the restriction of the use of certain hazardous substances in electrical and electronic equipment.
Contents Support ............................................. 8 Help ...................................................................... 8 Service settings ................................................. 8 Troubleshooting your phone.......................... 9 Gameplay ......................................................... 10 1. Get started.................................. 10 10 12 13 14 14 14 2. Your phone ................................. 16 Switch PTT on and off..............................
13.Personalisation.......................... 53 Themes.............................................................. 53 Profiles.............................................................. 53 14.Time management .................... 54 Clock.................................................................. 54 Calendar ........................................................... 55 15.Office applications ................... 55 Notes .................................................................
SAFETY SAFETY Read these simple guidelines. Not following them may be dangerous or illegal. Read the complete user guide for further information. SWITCH ON SAFELY Do not switch the device on when wireless phone use is prohibited or when it may cause interference or danger. ROAD SAFETY COMES FIRST ft Obey all local laws. Always keep your hands free to operate the vehicle while driving. Your first consideration while driving should be road safety.
SAFETY accept connectivity requests, download content, and accept installations only from trustworthy sources. To increase the security of your device, consider installing antivirus software with a regular update service and using a firewall application. Your device may have preinstalled bookmarks and links for third-party internet sites. You may also access other third-party sites through your device. Thirdparty sites are not affiliated with Nokia, and Nokia does not endorse or assume liability for them.
Support ■ Enhancements, batteries, and chargers Check the model number of any charger before use with this device. This device is intended for use when supplied with power from the AC-4 or AC-5 chargers. Warning: Use only batteries, chargers, and enhancements approved by Nokia for use with this particular model. The use of any other types may invalidate any approval or warranty, and may be dangerous. For availability of approved enhancements, please check with your dealer.
Support use Sett. wizard application to configure the settings, or you may receive the settings directly as a configuration message, which you save to your phone. For more information on availability, contact your service provider or nearest authorized Nokia dealer. When you receive a configuration message, and the settings are not automatically saved and activated, 1 new message is displayed. To save the settings, select Show > Options > Save.
Get started software, you need the Nokia Software Updater application and a compatible PC with Microsoft Windows 2000 or XP operating system, broadband internet access, and a compatible data cable to connect your device to the PC. To get more information and to download the Nokia Software Updater application, visit www.nokia.com/softwareupdate or your local Nokia web site. If software updates over the air are supported by your network, you may also be able to request updates through the device.
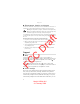
Get started ft 1. To open the back cover, press teh black button on the lower part of the back cover (1), slide the cover forward (2), and lift (3). To remove the battery, lift it as shown (4). ra 2. To release the SIM card holder, slide it backwards (4), and lift it (5). D Insert the (U)SIM card in the SIM card holder (6). Make sure that the gold colored contact area on the card is facing downwards, and the beveled corner faces upwards.
Get started ■ ft 3. Replace the battery (9). Replace the back cover (10, 11). MicroSD card slot D ra Use only compatible microSD cards approved by Nokia for use with this device. Nokia uses approved industry standards for memory cards, but some brands may not be fully compatible with this device. Incompatible cards may damage the card and the device and corrupt data stored on the card. Keep microSD cards out of the reach of small children.
Get started ft Open the side door (1). Place the microSD card in the slot with the gold colored area facing down (2). Push the card gently to lock it into place. Close tight the side door (3). Remove a microSD card D ■ Charge the battery 1. Connect the charger to the wall socket. ra Open the side door. Push the card gently to release it. Remove memory card and press 'OK' is displayed. Pull the card out, and select OK. Close tight the side door. C 2.
Get started ■ Switch the phone on and Press and hold the power/call end key. off If the phone asks for a PIN code, enter the PIN code, and select OK. If the phone asks for the lock code, enter the lock code, and select OK. The factory setting for the lock code is 12345. ft Set time and date ra To set the correct time zone, time, and date, select the country you are presently in, then enter the local time and date.
Get started PIN codes The personal identification number (PIN) code or the universal personal identification number (UPIN) code (4 to 8 digits) help to protect your SIM card. The (U)PIN code is usually supplied with the SIM card. Set the phone to request the code each time the phone is switched on. The PIN2 code may be supplied with the SIM card and is required for some functions. ra ft The module PIN is required to access the information in the security module.
Your phone 2. Your phone ■ Keys and Power key (1) parts Loudspeaker (2) Earpiece (3) Volume keys (4) ft Left and right selection keys (5) ra Menu key (6), hereafter described as "select " Clear key (7) Call key (8) D End key (9) Navi™ scroll key (10), hereafter referred to as scroll key Number keys (11) C Microphone (12) Nokia AV Connector (2.
Your phone Media keys: Rewind, zoom out (19) Play/Pause/Stop and autofocus/capture key (20) Fast forward, zoom in (21) Camera lens (22) ft Camera flash (23) ra ■ Standby mode When you have switched on the phone, and it is registered to a network, the phone is in the standby mode and ready for use. To open the list of last dialed numbers, press the call key. D To use the voice commands or voice dialing, press and hold the right selection key.
Your phone aircraft or in hospitals. You can listen to music using the music player when the offline profile is active. To leave the Offline profile, press the power key, and select another profile. ■ ft Important: In the offline profile you cannot make or receive any calls, or use other features that require cellular network coverage. Calls may still be possible to the official emergency number programmed into your device. To make calls, you must first activate the phone function by changing profiles.
Your phone or or — A packet data connection is active in a part of the network that supports EGPRS, or the connection is on hold, a connection is available. Your phone may not use EGPRS in the data transfer. or or — A UMTS packet data connection is active, the connection is on hold, or a connection is available. or — Bluetooth is switched on, or data is being transmitted using Bluetooth. Other indicators may also be shown. ft — A USB connection is active.
Your phone ■ Keypad lock (keyguard) To lock the keypad in the phone mode, press the left selection key and * within 1.5 seconds. To set the phone to automatically lock the keypad after a certain time, select > Settings > General > Security > Phone and SIM card > Keypad autolock period > User defined and the desired time. To unlock the keypad in the phone mode, select Unlock, and press * within 1.5 seconds. ra ft To lock the keypad in the music mode, press the power key quickly, and select Lock keypad.
Call functions ■ Connect a compatible headset Do not connect products that create an output signal as this may cause damage to the device. Do not connect any voltage source to the Nokia AV Connector. ft When connecting any external device or any headset, other than those approved by Nokia for use with this device, to the Nokia AV Connector, pay special attention to volume levels.
Call functions To make a call from Addr. Book, select > Contacts. Scroll to the desired name; or enter the first letters of the name, and scroll to the desired name. To call the number, press the call key. To call a recently dialed number, press the call key in the standby mode. Speed dialing ft Speed dialing is a quick way to call frequently used numbers in the standby mode.
Call functions Note: Using voice tags may be difficult in a noisy environment or during an emergency, so you should not rely solely upon voice dialing in all circumstances. 1. In the standby mode, press and hold the right selection key. If you are using a compatible headset with the headset key, press and hold the headset key. ft 2. When Speak now is displayed, speak the voice command clearly. The phone plays the voice command of the best match. After 1.
Call functions Call waiting During a call, to answer the waiting call, press the call key. The first call is put on hold. To switch between the two calls, select Swap. To end the active call, press the end key. To activate the Call waiting function (network service), select Settings > Phone > Call > Call waiting > Activate. > Options during a call ft Many of the options that you can use during a call are network services. For availability, contact your service provider.
Call functions 1. Enter the phone number in the standby mode; or select Book, and scroll to the desired contact. > Addr. 2. Select Options > Call > Video call. To change between showing video or only hearing sound, select Options > Enable or Disable > Sending video, Sending audio, or Sending aud. & video. Answer a video call When a video call arrives, ra 3. To end the video call, press the end key. ft If you have denied video sending during a video call, the call is still charged as a video call.
Call functions Show call duration and Summary after call—to set the phone to display the call duration during a call and the approximate duration of the last call Speed dialing—See "Speed dialing," p. 22. Anykey answer—to answer an incoming call by briefly pressing any key, except the left and right selection keys, volume keys, power key, and end key. ft Line in use (network service)—to select the phone lines for making calls and sending short messages.
Call functions Network mode—to select which network to use (shown only if supported by the service provider). If you select Dual mode, the phone uses the GSM or UMTS network automatically. Operator selection—To set the phone to search for and automatically select one of the available networks, select Automatic. To select the desired network manually from a list of networks, select Manual. The selected network must have a roaming agreement with your home network.
Call functions service provider for the SIP profile settings, and save them in your phone. If you know a recipient’s SIP address, you can enter it on your contact card for that person. Select > Addr. Book, the contact, and Options > Edit > Options > Add detail > SIP or Share view. Enter the SIP address in the format sip:username@domainname (you can use an IP address instead of a domain name). ra ft To set your SIP profile settings manually, select > Settings > Connection > Video sharing > SIP profile.
Write text When you receive an invitation, select Yes to begin the sharing session. To decline the invitation and to return to the voice call, select No. ■ Log To view missed, received, or dialed calls; text messages; packet data connections; and fax and data calls registered by the phone, select > Log. In the standby mode, you can use the call key as a shortcut to the Recent calls log (a network service).
Write text If the next letter you want is on the same key as the present one, wait until the cursor appears (or scroll forward to end the time-out period), and enter the letter. Write with predictive text input 1. Press a number key, 2–9, only once for one letter. The word changes after every keypress. For the most common punctuation marks, press 1. ft 2. When you have finished the word and it is correct, to confirm it, scroll forward or insert a space.
Messaging 5. Messaging Before you can receive or send messages or e-mail, you must have the necessary settings and access points defined. Contact your service provider for the settings. ■ Write and send messages ra ft Your device supports the sending of text messages beyond the character limit for a single message. Longer messages are sent as a series of two or more messages. Your service provider may charge accordingly.
Messaging To record a new sound clip for an audio message, select Record. To use a previously recorded sound clip, select Options > Insert sound clip > From Gallery. 5. To send the message, select Options > Send. ■ Inbox Inbox contains received messages except e-mail and cell broadcast messages. To read received messages, select > Messaging > Inbox and the message. ft To view the list of media objects that are included in the multimedia message, open the message, and select Options > Objects.
Messaging IMAP4 and POP3 mailboxes Select > Messaging and the mailbox. Connect to mailbox? is displayed. Select Yes to connect to your mailbox (network service) or No to view previously retrieved e-mail messages offline. To connect to the mailbox afterwards, select Options > Connect. When you are online, to end the data connection to the remote mailbox, select Options > Disconnect. Retrieve and read e-mail messages ra ft Important: Exercise caution when opening messages.
Messaging ■ Outbox The outbox folder is a temporary storage place for messages that are waiting to be sent. To access the outbox folder, select > Messaging > Outbox. To retry sending a message, scroll to the message and select Options > Send. To postpone sending a message, scroll to a message, and select Options > Defer sending. ra ft ■ View messages on the SIM card Before you can view SIM messages, you need to copy them to a folder in your phone.
Push to Talk Multimedia messaging settings To define multimedia message settings, such as which access point is used and whether multimedia messages are retrieved automatically, select > Messaging > Options > Settings > Multimedia message.
Push to Talk Push to Talk (PTT) is a two-way radio service available over a GSM cellular network (network service). You can use PTT to have a conversation with one person or with a group of people having compatible devices and service. While you are connected to the PTT service, you can use the other functions of the phone. ft To check availability and costs, and to subscribe to the service, contact your network operator. Service availability may differ from that for normal calls. Visit wireless.att.
Push to Talk Add a one-to-one contact To add a contact to the PTT contacts list, select Menu > PTT > Add Contact. Enter the name and telephone number of the new contact. An invitation is sent to the person. Add a contact group You can save a group of contacts so you can call them collectively. ft To add a PTT contact group, select Menu > PTT > Add Group and name the group. ra To add an existing contact to the group, select From PTT contacts and mark the contacts you want added to the new group.
Push to Talk Make a one-to-one call To start a one-to-one call from the list of contacts to which you have added the PTT telephone number, select Menu > PTT > PTT Contacts. Scroll to a contact, and press and hold the PTT key while talking. Remember that you must release the PTT key to receive their reply. To start a one-to-one call from the list of PTT groups, select PTT Contacts, scroll to the desired group, and select View. Scroll to the desired contact, and press and hold the PTT key while talking.
Push to Talk ■ Change from PTT to mobile call You can convert a one-to-one or group PTT call to a standard mobile call if you initiated the PTT call. Anytime during the PTT call select Options > Convert to Cellular . The call recipient(s) can then join your mobile call by pressing the PTT key. ft ■ Call Me Alerts If you make a one-to-one call and do not get a response, you can send a request for the person to call you back.
Address Book Set My Name — to set how your PTT name appears to your contacts and groups Auto Accept Invites — to set the phone to automatically accept invitations from other PTT users PTT Service — to switch the PTT service on or off 7. Address Book ra ft ■ Save and manage contact information To save and manage contact information, such as names, phone numbers, and addresses, select > Addr. Book. To add a new contact, select Options > New contact. Fill in the fields you want, and select Done.
Media ■ Add a ringing tone To set a ringing tone (also a video ringing tone) for each contact and group, select > Addr. Book. To add a ringing tone to a contact, select the contact and Options > Ringing tone, and the desired ringing tone. To add a ringing tone to a group, scroll right to the groups list, and scroll to a contact group. Select Options > Ringing tone and the ringing tone for the group. 8.
Media To fast forward or to skip forward, press the fast forward key. To control the player, you can also use the scroll key. To adjust the volume, use the volume key. To switch random play ( ) on, select Options > Shuffle > On. To repeat a song ( ) or all songs ( Repeat song or Repeat all. ), select Options > Repeat > To modify the tone of the music playback, select Options > Equalizer. ft To modify the balance loudness or stereo widening, select Options > Audio settings.
Media 3. To add songs now, select Yes. To show the song list under an artist title, scroll to the artist, and scroll right. To hide the song list, scroll left. Select the songs to be added, and to add the songs, select Add. 4. When you have made your selections, select Done. If a compatible memory card is inserted, the playlist is saved to the memory card. To add more songs later, when viewing the playlist, select Options > Add songs.
Media • Compatible version of Nokia PC Suite Transfer music from PC You can use three different methods to transfer music: • To use Nokia Music Manager in Nokia PC Suite, connect the compatible USB cable or activate Bluetooth connection, and select PC Suite as the connection mode. ra ft • To synchronize music with Windows Media Player, connect the compatible USB cable and select Media player as the connection mode. A compatible memory card needs to be inserted in the phone.
Gallery To play, select a media file or a streaming link in Video clips, Streaming links, or Recently played. To stream live content, you must first configure your default access point. Select > Applications > RealPlayer > Options > Settings > Streaming > Network. Contact your service provider for more information. ■ Flash Player Select > Applications > Flash Player. ft Warning: Do not hold the device near your ear when the loudspeaker is in use, because the volume may be extremely loud.
Gallery wallpaper or Set as call image. To assign the image to a contact, select Assign to contact. To set a video as a video ringing tone, select Video clips, and scroll to the video. Select Options > Use video > Set as ringing tone. To assign the video for a contact, select Assign to contact. ft To create image or video folders and move files to them, select Images or Videos, and scroll to a file. Select Options > Organize > New folder and the memory, and enter a name for the folder.
Camera • To view an image in the full screen, and to return to the normal view, press *. • To rotate an image clockwise or counterclockwise, press 3 or 1. • To zoom in or out, press 5 or 0. • To move on a zoomed image, scroll up, down, left, or right. ft ■ Print images You can use the phone with a PictBridge-compatible printer using USB cable. ra To print images in Gallery, scroll to the image, and select Options > Print.
Camera functions as a viewfinder. To take a self portrait, turn the lower part of the phone 90 degrees to the right so that the camera lens is pointing toward you. on the upper left of the display indicates the still image mode. ft ■ Capture an image and record a video To lock the focus on an object, press the capture key halfway down. To capture an image, press the capture key. The image is saved to Images in Gallery. To return to the viewfinder, select Back. To delete the image, press the clear key.
Positioning To change camera settings for still images or videos when in the camera mode, select Options > Settings > Image or Video and the desired setting. 11. Positioning In GPS data and Landmarks, coordinates are expressed in degrees and decimal degrees format using the WGS-84 coordinate system. > Applications > GPS data. D Select ra ft ■ GPS data GPS data is a GPS application that enables you to view your current location, find your way to a desired location, and track distance.
Internet Check the availability of services, pricing, and tariffs with your service provider. Important: Use only services that you trust and that offer adequate security and protection against harmful software. To access web pages, do one of the following: • Select a bookmark from the bookmarks view. • In the bookmarks view, enter the address of the web page, and select Go to. ft Bookmarks ra Your device may have preinstalled bookmarks and links for third-party internet sites.
Internet Keys and commands for browsing To open a link, make selections, or check boxes, press the scroll key. To go to the previous page while browsing, select Back. If Back is not available, select Options > Navigation options > History to view a chronological list of the pages visited during a browsing session. To choose the desired page, scroll left or right, and select it. The history list is cleared each time a session is closed. To save a bookmark while browsing, select Options > Save as bookmark.
Internet Page overview With Page overview, you can move more quickly to the desired part of a web page. Page overview may not be available on all pages. To show the page overview of the current page, press 8. To find the desired spot on the page, scroll up or down. Press 8 again to zoom in and view the desired section of the page. Web feeds ft Web feeds are widely used to share the latest headlines or recent news. ra The browser automatically detects if a web page contains web feeds.
Personalisation 13. Personalisation ■ Themes To change the look of your phone display, activate a theme. Select > Settings > Personalis. > Themes. To see a list of the available themes, select General. The active theme is indicated by a check mark. To apply or edit an audio theme, select Themes > Audio themes. ft To preview a theme, scroll to the theme, and select Options > Preview. To activate the previewed theme, select Set. > Settings > Personalis.
Time management Important: In the offline profile you cannot make or receive any calls, or use other features that require cellular network coverage. Calls may still be possible to the official emergency number programmed into your device. To make calls, you must first activate the phone function by changing profiles. If the device has been locked, enter the lock code. 14. Time management ra ft ■ Clock Select > Office > Clock.
Office applications ■ Calendar Select > Office > Calendar. Press # in month, week, or day views to automatically highlight the current date. 15. Office applications ft To add a new calendar entry, select Options > New entry and an entry type. Anniversary entries are repeated every year. To-do entries help you to keep a list of tasks that you need to do. Fill in the fields, and select Done. ra ■ Notes Select > Office > Notes. To write a new note, start writing. To save the note, select Done.
Settings After you insert all the required exchange rates, you can convert currency. In the first Amount field, enter the value to be converted. The other Amount field changes automatically. Note: When you change base currency, you must enter new exchange rates because all previously set exchange rates are cleared. 16.
Settings ■ Phone settings General Select > Settings > General and from the following: Personalisation—to adjust the display, standby mode, tones (such as ringing tone), language, themes, and voice command settings. Date and time—to set the time and date and the display format ft Enhancement—to change the settings for an enhancement. Select an enhancement and the desired setting.
Settings • Select Packet data connection > When available to set the phone to register to the packet data network when you are in a network that supports packet data. If you select When needed, the phone uses a packet data connection only if you start an application or function that needs it. • Select Access point to set the access point name to use your phone as a modem with your computer. ft • Select High speed packet access—to enable the use of HSDPA (network service) in UMTS networks.
Data management Applications To view and edit settings of applications installed to your phone, select > Settings > Applications. ■ Speech In Speech, you can select the default language and voice used for reading text messages and adjust the voice properties, such as rate and volume. Select > Settings > Speech. ra ft To view details of a voice, scroll right, scroll to the voice, and select Options > Voice details. To test a voice, scroll to the voice, and select Options > Play voice.
Data management Installation files may be transferred to your phone from a compatible computer, downloaded during browsing, or sent to you in a multimedia message, as an e-mail attachment or by using Bluetooth. You can use Nokia Application Installer in Nokia PC Suite to install an application to your phone or a memory card. Installed applications are placed in > Applications > My own. To open Application manager, select > Settings > App. mgr..
Data management Remove an application In the Application manager main view, select Installed, scroll to the software package, and select Options > Remove. ■ File manager To browse, open, and manage files and folders in the phone memory or on a memory card, select > Office > File mgr..
Data management device uses various types of DRM software to access DRM-protected content. With this device you can access content protected with WMDRM, OMA DRM 1.0, and OMA DRM 2.0. If certain DRM software fails to protect the content, content owners may ask that such DRM software's ability to access new DRM-protected content be revoked. Revocation may also prevent renewal of such DRMprotected content already in your device.
Data management To view licences that are not in use, select Not in use. Unused licenses have no media files connected to them. To view detailed information such as the validity status and the ability to send the file, scroll to a licence, and select it. ■ Device manager To open the device manager, select mgr.. ft Update software > Settings > Data mgr. > Device The current software version is displayed in the Updates view.
Connectivity To connect to a server and receive configuration settings for your phone, scroll right to Profiles, scroll to the server profile, and select Options > Start configuration. To edit a server profile, scroll to the profile, and select Options > Edit profile. Contact your service provider or company information management department for the server profile settings. ft 18.
Connectivity A Bluetooth connection is disconnected automatically after sending or receiving data. Bluetooth connection settings Select > Settings > Connectivity > Bluetooth. Bluetooth—to switch Bluetooth connectivity on or off ft My phone's visibility > Shown to all—to allow your phone to be found by other devices with Bluetooth connectivity at all times. To allow your phone to be found for a defined time period, select Define period.
Connectivity 5. If the other device requires pairing before data can be transmitted, a tone sounds and you are asked to enter a passcode. Create your own passcode and share the passcode with the owner of the other device. You do not have to memorize the passcode. Pair and block devices To open a list of paired devices, in the Bluetooth view, scroll right. To pair with a device, select Options > New paired device, select the device with which to pair, and exchange passcodes.
Connectivity connection each time the cable is connected, select Ask on connection > Yes. To use the phone with Nokia PC Suite, select PC Suite. To synchronize media files, such as music, with a compatible version of Windows Media Player, select Media transfer. To use the phone with a PictBridgecompatible printer, select Image transfer. To access files on the inserted memory card as a mass storage device, select Mass storage.
Applications 19. Applications ■ Phone Inspector Use Phone Inspector to check parts of your phone and the voice network. Note: To run tests on the phone, the SmartChip card must be inserted, and the battery must be charged ft Start tests ra To run diagnostic tests on your phone, select Menu > Tools > Phone Inspector > Tests.
Battery information shorten its lifetime. If left unused, a fully charged battery will lose its charge over time. If the battery is completely discharged, it may take several minutes before the charging indicator appears on the display or before any calls can be made. Use the battery only for its intended purpose. Never use any charger or battery that is damaged. ft Do not short-circuit the battery.
Care and maintenance ■ Nokia battery authentication guidelines Always use original Nokia batteries for your safety. To check that you are getting an original Nokia battery, purchase it from an authorized Nokia dealer, and inspect the hologram label using the following steps: ft Successful completion of the steps is not a total assurance of the authenticity of the battery.
Care and maintenance • Keep the device dry. Precipitation, humidity, and all types of liquids or moisture can contain minerals that will corrode electronic circuits. If your device does get wet, remove the battery, and allow the device to dry completely before replacing it. • Do not use or store the device in dusty, dirty areas. Its moving parts and electronic components can be damaged. • Do not store the device in hot areas.
Additional safety information Disposal The crossed-out wheeled-bin symbol on your product, literature, or packaging reminds you that in the European Union all electrical and electronic products, batteries, and accumulators must be taken to separate collection at the end of their working life. Do not dispose of these products as unsorted municipal waste.
Additional safety information questions. Switch off your device in health care facilities when any regulations posted in these areas instruct you to do so. Hospitals or health care facilities may be using equipment that could be sensitive to external RF energy. Implanted medical devices Manufacturers of medical devices recommend that a minimum separation of 15.
Additional safety information Using your device while flying in aircraft is prohibited. Switch off your device before boarding an aircraft. The use of wireless teledevices in an aircraft may be dangerous to the operation of the aircraft, disrupt the wireless telephone network, and may be illegal. ■ Potentially explosive environments D ra ft Switch off your device when in any area with a potentially explosive atmosphere, and obey all signs and instructions.
Additional safety information When making an emergency call, give all the necessary information as accurately as possible. Your wireless device may be the only means of communication at the scene of an accident. Do not end the call until given permission to do so. ■ Certification information (SAR) This mobile device meets guidelines for exposure to radio waves. ft Your mobile device is a radio transmitter and receiver.
Index A camera 47 clock 54 connection manager 67 connectivity 64 contacts 40 memory consumption 40 converter 55 access codes lock code 14 module PIN 15 PIN 14, 15 PIN2 15 PUK 15 PUK2 15 restriction password 15 signing PIN 15 UPIN 15 UPUK 15 active standby 17 alarm clock. See clock.
M media player. See RealPlayer. menu 19 messages outbox 34 service commands 34 service messages 32 SIM messages 34 music player downloading music 43 music shop 43 playlists 42 transferring music 43 music.See music player. T N O one-touch dial. See speed dial. updating software 63 USB 66 V FC R U C paired devices 66 phone inspector 68 phonebook. See contacts. positioning 49 profiles 53 PTT 35 Push to Talk 35 Push to Talk. See PTT. D P RealPlayer recorder 45 restriction password.
ft ra D C FC 78 Model: 6650d-1bH 21 February 2008