Nokia 8600 Luna User Guide Model: 8600d
Issue 1, Part No. XXXXXXXX 0434 DECLARATION OF CONFORMITY Hereby, NOKIA CORPORATION declares that this RM-164 product is in compliance with the essential requirements and other relevant provisions of Directive 1999/5/EC. A copy of the Declaration of Conformity can be found at http://www.nokia.com/phones/ declaration_of_conformity/. The crossed-out wheeled bin means that within the European Union the product must be taken to separate collection at the product end-of life.
THE CONTENTS OF THIS DOCUMENT ARE PROVIDED "AS IS". EXCEPT AS REQUIRED BY APPLICABLE LAW, NO WARRANTIES OF ANY KIND, EITHER EXPRESS OR IMPLIED, INCLUDING, BUT NOT LIMITED TO, THE IMPLIED WARRANTIES OF MERCHANTABILITY AND FITNESS FOR A PARTICULAR PURPOSE, ARE MADE IN RELATION TO THE ACCURACY, RELIABILITY OR CONTENTS OF THIS DOCUMENT. NOKIA RESERVES THE RIGHT TO REVISE THIS DOCUMENT OR WITHDRAW IT AT ANY TIME WITHOUT PRIOR NOTICE. The availability of particular products may vary by region.
Contents Contents For your safety ....................................................................................................5 1. Get started.................................................................................................. 10 2. Your phone.................................................................................................. 17 3. Call functions............................................................................................. 21 4. Navigate the menus.........
For your safety For your safety Read these simple guidelines. Not following them may be dangerous or illegal. Read the complete user guide for further information. SWITCH ON SAFELY Do not switch the phone on when wireless phone use is prohibited or when it may cause interference or danger. ROAD SAFETY COMES FIRST Obey all local laws. Always keep your hands free to operate the vehicle while driving. Your first consideration while driving should be road safety.
For your safety WATER-RESISTANCE Your phone is not water-resistant. Keep it dry. BACK-UP COPIES Remember to make back-up copies or keep a written record of all important information stored in your phone. CONNECTING TO OTHER DEVICES When connecting to any other device, read its user guide for detailed safety instructions. Do not connect incompatible products. EMERGENCY CALLS Ensure the phone is switched on and in service.
For your safety have to make specific arrangements with your service provider before you can utilise network services. Your service provider may need to give you additional instructions for their use and explain what charges will apply. Some networks may have limitations that affect how you can use network services. For instance, some networks may not support all language-dependent characters and services.
General information General information ■ Overview of functions Your phone provides many functions that are practical for daily use, such as text and multimedia messaging, calendar, clock, alarm clock, radio, music player, and built-in camera. Your phone also supports the following functions: • Plug and play online service to get the configuration settings. See Plug and play service p. 14, and Configuration settings service p. 9. • Active standby. See Active standby p. 18. • Audio messaging.
General information PUK codes The personal unblocking key (PUK) code and the universal personal unblocking key (UPUK) code (8 digits) is required to change a blocked PIN code and UPIN code, respectively. The PUK2 code (8 digits) is required to change a blocked PIN2 code. If the codes are not supplied with the SIM card, contact your local service provider for the codes. Barring password The barring password (4 digits) is required when using Call barring service. See Security p. 59.
Get started You may also be able to download updates of phone software (network service). See Phone p. 57, Phone updates. For the availability of different services, pricing, and tariffs, contact your service provider. Important: Use only services that you trust and that offer adequate security and protection against harmful software. ■ Nokia support Check www.nokia.
Get started ■ Install the SIM card and battery Always switch the device off and disconnect the charger before removing the battery. Keep all SIM cards out of the reach of small children. For availability and information on using SIM card services, contact your SIM card vendor. This may be the service provider, network operator, or other vendor. This device is intended for use with BP-5M battery. Always use original Nokia batteries. See Nokia battery authentication p. 82.
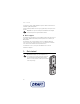
Get started Replace the battery with the gold-coloured contact end aligned with the gold-coloured contacts in the battery slot (1). Press the battery down into the battery slot (2). Slide the back cover into place. ■ Charge the battery Check the model number of any charger before use with this device. This device is intended for use when supplied with power from an AC-6 or DC-6 micro USB charger.
Get started For availability of approved enhancements, please check with your dealer. When you disconnect the power cord of any enhancement, grasp and pull the plug, not the cord. 1. Connect the charger to a wall socket. 2. Connect the lead from the micro USB charger to the micro USB socket on the lower right side of your phone. If the battery is completely discharged, it may take a few minutes before the charging indicator appears on the display or before any calls can be made.
Get started The AC-6 charges the battery much faster than the CA-101. Charging with the AC-6 is recommended when short charging times are needed. ■ Switch the phone on and off Warning: Do not switch the phone on when wireless phone use is prohibited or when it may cause interference or danger. To switch the phone on or off, press and hold the power key. If the phone asks for a PIN or a UPIN code, enter the code (displayed as ****), and select OK.
Get started Digital rights management (DRM) protected content comes with an associated activation key that defines your rights to use the content. If your device has OMA DRM protected content, to back up the content, use the backup feature of Nokia PC Suite. If your device has WMDRM protected content, both the activation keys and the content will be lost if the device memory is formatted. You may also lose the activation keys and the content in case the files on your device get corrupted.
Get started ■ Antenna Your device has an internal antenna located at the bottom of the device. Use the phone with the slide open to avoid contact with the antenna area. Note: As with any other radio transmitting device, do not touch the antenna unnecessarily when the device is switched on. Contact with the antenna affects call quality and may cause the device to operate at a higher power level than otherwise needed.
Your phone 2.
Your phone ■ Open and close the phone To open the phone, push the slide up using the tab located just above the 4-way scroll key. To close the phone, push the tab down to the closed position. To answer calls by opening the slide and end calls by closing the slide, see Slide call handling in Call p. 56. ■ Standby mode When the phone is ready for use, and you have not entered any characters, the phone is in the standby mode.
Your phone to display the information, select View. Left and right arrows at the beginning and end of a line indicate that further information is available by scrolling left or right. To end the active standby navigation mode, select Exit. To organise and change the active standby mode, activate the navigation mode, and select Options > Active standby > My active standby > Options and the following options: Personalise—Assign or change phone features in the standby mode.
Your phone The keypad is locked. The phone does not ring for an incoming call or text message. The alarm clock is set to On. The countdown timer is running. The stopwatch is running in the background. The phone is in flight mode. , The phone is registered to the GPRS or EGPRS network. , A GPRS or EGPRS connection is established. , The GPRS or EGPRS connection is suspended (on hold), for example, if there is an incoming or outgoing call during an EGPRS dial-up connection.
Call functions To unlock the keypad with the slide closed, select Unlock > OK, or open the slide to automatically unlock the keypad. To answer a call when the keyguard is on, press the call key. When you end or reject the call, the keypad automatically locks. For Security keyguard, see Phone p. 57. When the keyguard is on, calls still may be possible to the official emergency number programmed into your device.
Call functions • Press a speed-dialling key, then the call key. • If Speed dialling is set to On, press and hold a speed-dialling key until the call begins. See Speed dialling in Call p. 56. Enhanced voice dialling You can make a phone call by saying the name that is saved in the contact list of the phone. A voice command is added automatically to all entries in the contact list of the phone.
Navigate the menus If a compatible headset supplied with the headset key is connected to the phone, to answer and end a call, press the headset key. Call waiting To answer the waiting call during an active call, press the call key. The first call is put on hold. To end the active call, press the end key. To activate the Call waiting function, see Call p. 56. ■ Options during a call Many of the options that you can use during a call are network services. For availability, contact your service provider.
Write text To rearrange the menu, scroll to the menu you want to move, and select Options > Organise > Move. Scroll to where you want to move the menu, and select OK. To save the change, select Done > Yes. 2. Scroll through the menu, and select an option (for example, Settings). 3. If the selected menu contains further submenus, select the one that you want (for example, Call). 4. If the selected menu contains further submenus, repeat step 3. 5. Select the setting of your choice. 6.
Messaging The phone starts to predict the word you are writing. After you enter a few letters, and if these entered letters are not a word, the phone tries to predict longer words. Only the entered letters are displayed underlined. To insert a special character, press and hold *, or select Options > Insert symbol. Scroll to a character, and select Use. To write compounds words, enter the first part of the word; to confirm it, press the navigation key right.
Messaging ■ Text messages (SMS) With the short message service (SMS) you can send and receive text messages, and receive messages that can contain pictures (network service). Before you can send any text or SMS e-mail message, you must save your message centre number. See Message settings p. 39. To check SMS e-mail service availability and to subscribe to the service, contact your service provider. To save an e-mail address in Contacts, see Save details p. 42.
Messaging Read and reply to an SMS message When you have received a message, 1 message received or the number of new messages with %N messages received are shown. 1. To view a new message, select Show. To view it later, select Exit. To read the message later, select Menu > Messaging > Inbox. If more than one message is received, select the message you want to read. is shown if you have unread messages in Inbox. 2. To view the list of available options while reading a message, select Options. 3.
Messaging You cannot receive multimedia messages during a call or an active browsing session over GSM data. Because delivery of multimedia messages can fail for various reasons, do not rely solely upon them for essential communications. Write and send a MMS message The wireless network may limit the size of MMS messages. If the inserted picture exceeds this limit, the device may make it smaller so that it can be sent by MMS. 1. Select Menu > Messaging > Create message > Multimedia. 2. Enter your message.
Messaging Note: When the phone sends the message, the animated is shown. This is an indication that the message has been sent by your device to the message centre number programmed into your device. This is not an indication that the message has been received at the intended destination. For more details about messaging services, check with your service provider. It takes more time to send a multimedia message than to send a text message.
Messaging ■ Memory full When you receive a message, and the memory for the messages is full, Memory full. Unable to receive messages. is shown. To first delete old messages, select OK > Yes and the folder. Scroll to the desired message, and select Delete. If more messages are to be deleted, select Mark. Mark all the messages you want to delete, and select Options > Delete marked. ■ Folders The phone saves received messages in the Inbox folder.
Messaging Receive a flash message A received flash message is indicated with Message: %U and a few words from the beginning of the message. To read the message, select Show. To extract phone numbers, e-mail addresses, and website addresses from the current message, select Options > Use detail. To save the message, select Save and the folder in which you want to save it. ■ Nokia Xpress audio messaging You can use MMS to create and send a audio message in a convenient way.
Messaging function. To use the e-mail function on your phone, you need a compatible e-mail system. You can write, send, and read e-mail with your phone. You can also save and delete the e-mail on a compatible PC. Your phone supports POP3 and IMAP4 e-mail servers. Before you can send and retrieve any e-mail messages, you must do the following: • Obtain a new e-mail account or use your current account. To check the availability of your e-mail account, contact your e-mail service provider.
Messaging 5. Write the e-mail message. See Write text p. 24. To attach a file to the e-mail, select Options > Attach file and a file from Gallery. 6. To send the e-mail message immediately, select Send > Send now. To save the e-mail in the Outbox folder to be sent later, select Send > Send later. To edit or continue writing your e-mail later, select Options > Save as draft. The e-mail is saved in Outboxes > Drafts.
Messaging E-mail folders Your phone saves e-mail that you have downloaded from your e-mail account in the Inboxes folder. The Inboxes folder contains the following folders: “Account name” for incoming e-mail, Archive for archiving e-mail, Custom 1—Custom 3 for sorting e-mail, Junk where all spam e-mail is stored, Drafts for saving unfinished e-mail, Outbox for saving e-mail that has not been sent, and Sent items for saving e-mail that has been sent.
Messaging the network, the active IM conversation may consume the phone battery faster, and you may need to connect the phone to a charger. Register with an IM service You can do this by registering over the internet with the IM service provider you have selected to use. During the registration process, you will have the opportunity to create the user name and password of your choice. For more information about signing up for IM services, contact your wireless service provider.
Messaging Sessions When connected to the IM service your status as seen by others is shown in a status line: My status: Online, My status: Busy or Status: Appear offline — to change own status, select Change. Below the status line there are three folders containing your contacts and showing their status: Conversations (%N), Online (%N) and Offline (%N). To expand the folder highlight it and select Expand (or press scroll right), to collapse the folder select Collapse (or press scroll left).
Messaging Accept or reject an invitation In the standby mode, when you are connected to the IM service and you receive a new invitation, New invitation received is displayed. To read it, select Read. If more than one invitation is received, scroll to the invitation you want, and select Open. To join the private group conversation, select Accept, and enter the screen name you want to use as your nickname. To reject or delete the invitation, select Options > Reject or Delete.
Messaging Block or unblock messages When you are in a conversation and want to block messages, select Options > Block contact. A confirmation query is shown, select OK to block messages from this contact. To block messages from a specific contact in your contacts list, scroll to the contact in Conversations, Online (%N) or Offline (%N) and select Options > Block contact > OK. To unblock a contact, in the IM main menu select Options > Blocked list.
Messaging To call your voice mailbox, select Menu > Messaging > Voice messages > Listen to voice messages. To enter, search for, or edit your voice mailbox number, select Voice mailbox number. If supported by the network, indicates new voice messages. To call your voice mailbox number, select Listen. ■ Info messages With Info messages (network service), you can receive messages on various topics from your service provider.
Messaging Graphical smileys > Yes—to set the phone to replace character-based smileys with graphical ones Text messages The text message settings affect the sending, receiving, and viewing of text and SMS e-mail messages.
Messaging Select Menu > Messaging > Message settings > Multimedia messages and from the following options: Delivery reports > Yes—to ask the network to send delivery reports about your messages (network service) Image size (multimedia)—to set the image size in multimedia messages. Before sending, images will be reduced to the selected size. Default slide timing—to define the default time between slides in multimedia messages Allow multimedia recept.
Contacts Reply-to address—to enter the e-mail address to which you want the replies to be sent SMTP user name—to enter the name that you want to use for outgoing mail SMTP password—to enter the password that you want to use for outgoing mail Display terminal window > Yes—to perform manual user authentication for intranet connections Incoming server type > POP3 or IMAP4—to select the type of e-mail system that you are using.
Contacts The first number you save is automatically set as the default number, and it is indicated with a frame around the number type indicator (for example, ). When you select a name from contacts (for example, to make a call), the default number is used unless you select another number. 1. Make sure that the memory in use is Phone or Phone and SIM. See Settings p. 46. 2. Search for the contact to which you want to add a detail, and select Details > Options > Add detail.
Contacts To delete a contact, search for the desired contact, and select Options > Delete contact. To delete a number, text item, or an image attached to the contact, search for the contact, and select Details. Scroll to the desired detail, and select Options > Delete and from the options available. Deleting an image or video clip from contacts does not delete it from Gallery.
Contacts ■ Subscribed names You can create a list of contacts whose presence status information you want to be aware of. You can view the information if it is allowed by the contacts and the network. To view these subscribed names, scroll through the contacts, or use the Subscribed names menu. Ensure that the memory in use is Phone or Phone and SIM. See Settings p. 46. To connect to the presence service, select Menu > Contacts > My presence > Connect to 'My presence'.
Contacts Unsubscribe a contact To unsubscribe a contact from the Contacts list, select the contact and Options > Unsubscribe > OK. To unsubscribe from the Subscribed names menu, see View the subscribed names p. 45. ■ Business cards You can send and receive a person’s contact information from a compatible device that supports the vCard standard as a business card.
Call log Select Assign, or if a number has already been assigned to the key, select Options > Change. Select Search and the contact you want to assign. If the Speed dialling function is off, the phone asks whether you want to activate it. See also Speed dialling in Call p. 56. To make a call using the speed-dialling keys, see Speed dialling p. 21. 8.
Settings To view or delete the information on the 10 most recent privacy notifications and requests, select Menu > Log > Positioning > Position log > Open folder or Delete all. 9. Settings ■ Profiles Your phone has various setting groups called profiles, for which you can customise the phone tones for different events and environments. Select Menu > Settings > Profiles, the desired profile, and from the following options: Activate—to activate the selected profile Personalise—to personalise the profile.
Settings Select Options > Save to save the settings or Cancel to leave the settings unchanged. If you select the highest ringing tone level, the ringing tone reaches its highest level after a few seconds. A theme may contain a tone that sounds when you open and close the phone. To switch off the tone, change the setting in Other tones:. Please note that this setting also switches off the warning tones. ■ Display Select Menu > Settings > Display and from the available options.
Settings Screen savers > Open camera—to take a new photo as screensaver Screen savers > Analogue clock or Digital clock—to use a clock as screensaver Graphic downloads—to download more images for the screen saver Time-out—to set the time after which the screen saver is activated Powersaver To automatically activate the screen saver time-out to optimise battery life, select Menu > Settings > Display > Power saver.
Settings enable your phone to display the correct sending time of received text or multimedia messages. For example, GMT -5 denotes the time zone for New York (USA), 5 hours west of Greenwich/London (UK). ■ My shortcuts With personal shortcuts you get quick access to often used functions of the phone. Left selection key To select a function from the list for the left selection key, select Menu > Settings > My shortcuts > Left selection key. See also Standby mode p. 18.
Settings Navigation key To select shortcut functions for the scroll keys, select Menu > Settings > My shortcuts > Navigation key. Scroll to the desired key, and select Change and a function from the list. To remove a shortcut function from the key, select (empty). To reassign a function for the key, select Assign. See Shortcuts in the standby mode p. 19. Voice commands To call contacts and carry out phone functions, say the voice commands. Voice commands are language-dependent.
Settings devices supporting Bluetooth technology, use Nokia approved enhancements for this model. Check with the manufacturers of other devices to determine their compatibility with this device. There may be restrictions on using Bluetooth technology in some locations. Check with your local authorities or service provider. Features using Bluetooth technology or allowing such features to run in the background while using other features, increase the demand on battery power and reduce the battery life.
Settings Bluetooth settings To define how your phone is shown to other Bluetooth devices, select Menu > Settings > Connectivity > Bluetooth > Bluetooth settings > My phone's visibility or My phone's name. If you are concerned about security, turn off the Bluetooth function, or set My phone's visibility to Hidden. Always accept only Bluetooth communication from others with whom you agree.
Settings You can also set the EGPRS dial-up service settings (access point name) on your PC using the Nokia Modem Options software. See Nokia PC Suite p. 80. If you have set the settings both on your PC and on your phone, the PC settings are used. Data transfer Synchronise your calendar, contacts data, and notes with another compatible device (for example, a mobile phone), a compatible PC, or a remote internet server (network service).
Settings To start data transfer, select Menu > Settings > Connectivity > Data transfer and the transfer contact from the list, other than Server synchronisation or PC synchronisation. According to the settings, the selected data is copied or synchronised. The other device also must be activated for receiving data. Synchronise from a compatible PC Before you synchronise data from calendar, notes, and contacts from a compatible PC, you must install the Nokia PC Suite software of your phone on the PC.
Settings Slide call handling > Open slide to answer calls—to answer an incoming call by opening the slide Automatic redial > On—to make a maximum of 10 attempts to connect the call after an unsuccessful call attempt Speed dialling > On—to dial the names and phone numbers assigned to the speed-dialling keys, 2 to 9, by pressing and holding the corresponding number key Call waiting > Activate—to have the network notify you of an incoming call while you have a call in progress (network service).
Settings Phone updates—to receive phone software updates from your service provider (network service). This option may not be available, depending on your phone. See Phone software updates p. 60. Operator selection > Automatic—To set the phone to automatically, select one of the cellular networks available in your area. With Manual you can select a network that has a roaming agreement with your service provider. Confirm SIM serv. actions—See SIM services p. 79.
Settings Activ. default in all apps.—to activate the default configuration settings for supported applications Preferred access point—to view the saved access points. Scroll to an access point, and select Options > Details to view the name of the service provider, data bearer, and packet data access point or GSM dial-up number. Connect to serv. support—to download the configuration settings from your service provider Personal config.
Settings Access codes—to change the security code, PIN code, UPIN code, PIN2 code, or barring password Code in use—to select whether the PIN code or UPIN code should be active Authority certificates or User certificates—to view the list of the authority or user certificates downloaded into your phone. See Certificates p. 78. Security module settings—to view Security module details, activate Module PIN request, or change the module PIN and signing PIN. See also Access codes p. 8.
Gallery Install a software update To start the installation when the installation was cancelled after the download, select Install software update. The software update may take several minutes. If there are problems with the installation, contact your service provider. ■ Restore factory settings To reset some of the menu settings to their original values, select Menu > Settings > Restore factory sett.. Enter the security code. The names and phone numbers saved in Contacts are not deleted. 10.
Media 11. Media When taking and using images or video clips, obey all laws and respect local customs as well as privacy and legitimate rights of others. ■ Camera You can take photos or record video clips with the built-in camera. Take a photo To start the camera, press the scroll up key, or select Menu > Media > Camera. To take a picture in landscape format, hold the phone in a horizontal position. Scroll left or right to change between camera (still image) and video mode.
Media recording, select Continue. To stop the recording, select Stop. The phone saves the recording in Gallery > Video clips. Camera and video options To use a filter with the camera or video, select Options > Effects >Normal > False colours, Greyscale, Sepia, Negative, or Solarise. To change the camera or video settings, select Options > Settings. ■ Media player With the media player you can view, play, and download files, such as images, audio, video, and animated images.
Media Music files stored in a folder in the phone memory or in a folder of the multimedia card will automatically be detected and added to the default track list. To open the music player, select Menu > Media > Music player. Play the music tracks Warning! Listen to music at a moderate level. Continuous exposure to high volume may damage your hearing. When you open the Music player menu, the details of the first track on the default track list are shown. To play, select .
Media Music downloads—to connect to a browser service related to the current track. This function is only available when the address of the service is included in the track. ■ Radio The FM radio depends on an antenna other than the wireless device antenna. A compatible headset or enhancement needs to be attached to the device for the FM radio to function properly. Warning: Listen to music at a moderate level. Continuous exposure to high volume may damage your hearing.
Media Loudspeaker or Headset—to listen to the radio using the loudspeaker or headset. Keep the headset connected to the phone. The lead of the headset functions as the radio antenna. Set frequency—to enter the frequency of the desired radio station You can normally make a call or answer an incoming call while listening to the radio. During the call, the volume of the radio is muted. When an application using a packet data or HSCSD connection is sending or receiving data, it may interfere with the radio.
Organiser To view, edit, or rename a selected set, select Options > View, Edit, or Rename. Not all sets can be edited or renamed. ■ Stereo widening Stereo widening enhances the audio output of the phone by enabling a wider stereo sound effect. To change the setting, select Menu > Media > Stereo widening. 12. Organiser ■ Alarm clock You can set the phone to alarm at a desired time. Select Menu > Organiser > Alarm clock. To set the alarm, select Alarm time, and enter the alarm time.
Organiser device or Yes to make and receive calls. Do not select Yes when wireless phone use may cause interference or danger. ■ Calendar Select Menu > Organiser > Calendar. The current day is indicated by a frame. If there are any notes set for the day, the day is in bold type, and the beginning of the note is shown below the calendar. To view the day notes, select View. To view a week, select Options > Week view.
Organiser You can sort the notes by priority or by deadline, send a note to another phone as a text message or a multimedia message, save a note as a calendar note, or access the calendar. ■ Notes To write and send notes, select Menu > Organiser > Notes. To make a note if no note is added, select Add; otherwise, select Options > Make a note. Write the note, and select Save. Other options include deleting and editing a note.
Applications displayed when the time expires. To start the countdown timer, select Start. To change the countdown time, select Change time. To stop the timer, select Stop timer. If the alarm time is reached when the phone is in the standby mode, the phone sounds a tone and flashes the note text if it is set or displays Countdown time up. To stop the alarm, press any key. If no key is pressed, the alarm automatically stops within 60 seconds. To stop the alarm and delete the note text, select Exit.
Applications ■ Launch a game Your phone software includes some games. Select Menu > Apps. > Games. Scroll to the desired game, and select Open. To set sounds, lights, and shakes for the game, select Menu > Apps. > Options > Application settings. ■ Launch an application Your phone software includes some Java applications. Select Menu > Apps. > Collection. Scroll to an application, and select Open.
Applications Your device may have some bookmarks loaded for sites not affiliated with Nokia. Nokia does not warrant or endorse these sites. If you choose to access them, you should take the same precautions, for security or content, as you would with any internet site. ■ Presenter The presenter enables you to control slide presentations (compatible with Microsoft Office PowerPoint), a software DVD, an MP3 player, or other PC applications remotely from your device.
Web mouse pointer. To return to the list of applications, select Options > Applications list. To quit the presenter, select Options > Exit. 14. Web You can access various mobile internet services with your phone browser. Important: Use only services that you trust and that offer adequate security and protection against harmful software. Check the availability of these services, pricing, tariffs, and instructions with your service provider.
Web Make a connection to the service in one of the following ways: • Select Menu > Web > Home; or in the standby mode, press and hold 0. • To select a bookmark of the service, select Menu > Web > Bookmarks. • To select the last URL, select Menu > Web > Last web address. • To enter the address of the service, select Menu > Web > Go to address. Enter the address of the service, and select OK. ■ Browse pages After you make a connection to the service, you can start browsing its pages.
Web Direct calling While browsing, you can make a phone call and save a name and a phone number from a page. ■ Bookmarks You can save page addresses as bookmarks in the phone memory. 1. While browsing, select Options > Bookmarks; or in the standby mode, select Menu > Web > Bookmarks. 2. Scroll to a bookmark, and select it, or press the call key to make a connection to the page associated with the bookmark. 3.
Web Character encoding > Content encoding—to select the encoding for the browser page content Character encoding > Unicode (UTF-8) web add. > On—to set the phone to send a URL as a UTF-8 encoding. You may need this setting when you access a web page created in foreign language. Screen size > Full or Small—to set the screen layout JavaScript > Enable—to enable the Java scripts ■ Security settings Cookies A cookie is data that a site saves in the cache memory of your phone.
Web To access the Service inbox in the standby mode, when you have received a service message, select Show. If you select Exit, the message is moved to the Service inbox. To access the Service inbox later, select Menu > Web > Service inbox. To access the Service inbox while browsing, select Options > Other options > Service inbox. Scroll to the message you want. To activate the browser and download the marked content, select Retrieve.
Web Security module The security module improves security services for applications requiring a browser connection, and allows you to use a digital signature. The security module may contain certificates as well as private and public keys. The certificates are saved in the security module by the service provider. To view or change the security module settings, select Menu > Settings > Security > Security module settings.
SIM services Digital signature You can make digital signatures with your phone if your SIM card has a security module. Using the digital signature can be the same as signing your name to a paper bill, contract, or other document. To make a digital signature, select a link on a page, for example, the title of the book you want to buy and its price. The text to sign, which may include the amount and date, is shown. Check that the header text is Read and that the digital signature icon ( shown.
PC connectivity 16. PC connectivity You can send and receive e-mail, and access the internet when your phone is connected to a compatible PC through a Bluetooth or a data cable connection. You can use your phone with a variety of PC connectivity and data communications applications. ■ Nokia PC Suite With Nokia PC Suite you can synchronise contacts, calendar, notes, and to-do notes between your phone and the compatible PC or a remote internet server (network service).
Battery information 17. Battery information ■ Charging and discharging Your device is powered by a rechargeable battery. The full performance of a new battery is achieved only after two or three complete charge and discharge cycles. The battery can be charged and discharged hundreds of times, but it will eventually wear out. When the talk and standby times are noticeably shorter than normal, replace the battery.
Battery information ■ Nokia battery authentication Always use original Nokia batteries for your safety. To check that you are getting an original Nokia battery, purchase it from an authorised Nokia dealer, look for the Nokia Original Enhancements logo on the packaging, and inspect the hologram label using the following steps: Successful completion of the four steps is not a total assurance of the authenticity of the battery.
Care and maintenance • For India only: Enter Battery followed by the 20-digit battery code, for example, Battery 12345678919876543210, and send to 5555. National and international operator charges will apply. You should receive a message indicating whether the code can be authenticated. What if your battery is not authentic? If you cannot confirm that your Nokia battery with the hologram on the label is an authentic Nokia battery, please do not use the battery.
Additional safety information • Do not touch the display with hard or angular materials. Objects like earrings or jewelry may scratch the display. • Use a soft, clean, dry cloth to clean any lenses (such as camera, proximity sensor, and light sensor lenses). • Use only the supplied or an approved replacement antenna. Unauthorised antennas, modifications, or attachments could damage the device and may violate regulations governing radio devices. • Use chargers indoors.
Additional safety information ■ Medical devices Operation of any radio transmitting equipment, including wireless phones, may interfere with the functionality of inadequately protected medical devices. Consult a physician or the manufacturer of the medical device to determine if they are adequately shielded from external RF energy or if you have any questions. Switch off your device in health care facilities when any regulations posted in these areas instruct you to do so.
Additional safety information remember that air bags inflate with great force. Do not place objects, including installed or portable wireless equipment in the area over the air bag or in the air bag deployment area. If in-vehicle wireless equipment is improperly installed and the air bag inflates, serious injury could result. Using your device while flying in aircraft is prohibited. Switch off your device before boarding an aircraft.
Additional safety information If certain features are in use, you may first need to turn those features off before you can make an emergency call. Consult this guide or your service provider for more information. When making an emergency call, give all the necessary information as accurately as possible. Your wireless device may be the only means of communication at the scene of an accident. Do not end the call until given permission to do so.
Additional safety information ■ Technical information Dimensions: Width 45 mm (1.77 inches), Length 107 mm (4.21) inches, Depth 15.9 mm (0.62 inch) Weight: < 143 grams (5.04 ounces) with BP-5M Li-polymer Battery (4.
Index A access codes 8 accessories. See enhancements.
equaliser 66 explosive environments 86 F factory settings 61 flash messages 30 FM radio 65 G gallery 61 games 71 GPRS 54 H handsfree. See loudspeaker. hearing aid 85 high-speed circuit switched data 80 HSCSD. See high-speed circuit switched data.
overview functions 8 P pacemakers 85 packet data 54, 80 parts 17 PC connectivity 80 PC Suite 80 phone care 83 configuration 58 keys 17 maintenance 83 open 18 parts 17 settings 57 updates 57, 60 phone lock. See keypad lock.
software updates 57, 60 spam filter 34 speed dialling 21, 46 standby time 88 standby mode 18, 51 status indicators 18 stereo widening 67 stopwatch 70 streaming service 63 subscribed names 45 support 10 switch on and off 14 synchronisation 55 T talk time 88 technical information 88 text character case 24 message 26 predictive text input 24 traditional text input 25 writing 24 themes 48 time settings 50 to-do list 68 92 tones 48 traditional text input 25 U unlock keypad 20 UPIN 14 V vehicles 85 voice com