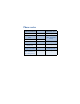
Phone notes My [Model] information Information source My number Wireless provider Phone serial number (ESN) On back of your phone, beneath the battery IMEI Voicemail number Wireless provider Wireless provider customer care Wireless provider Message center number Wireless provider Default recipient number (also known as the e-mail gateway) Wireless provider
The wireless phone described in this guide is approved for use in GSM, TDMA, and AMPS networks. LEGAL INFORMATION Part No. _________, Issue No. ___ ©2001 Nokia Mobile Phones. All rights reserved. Nokia is a registered trademark of Nokia Corporation. Printed in Canada __/2001 Nokia, Nokia Connecting People and the Original Accessories logos are trademarks of Nokia Corporation and/or its affiliates. US Patent No 5818437 and other pending patents. T9 text input software Copyright ©1999-2001.
Radio frequency (RF) signals THIS MODEL PHONE MEETS THE GOVERNMENT’S REQUIREMENTS FOR EXPOSURE TO RADIO WAVES. You wireless phone is a radio transmitter and receiver. It is designed and manufactured not to exceed the emission limits for exposure to radio frequency (RF) energy set by the Federal Communications Commission of the U.S. Government. These limits are part of comprehensive guidelines and establish permitted levels of RF energy for the general population.
While there may be differences between the SAR levels of various phones and at various positions, they all meet the government requirement. The FCC has granted and Equipment Authorization for this model phone with all reported SAR levels evaluated as in compliance with the FCC RF exposure guidelines. SAR information on this model phone is on file with the FCC and can be found under the Display Grant section of http://www.fcc.gov/oet/fccid after searching on FCC ID LJP NPM-2NX.
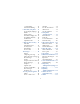
Contents 1 Safety first . . . . . . . . . . . 1 Safety guidelines . . . . . . . . . 1 Quick guide to functions . . 3 Menu shortcuts . . . . . . . . . . 4 2 Welcome to Nokia . . . . . . 5 Get the most out of this guide . . . . . . . . . 5 Sign up with a wireless provider . . . . . . . 6 Before you contact Nokia . . . . . . . . . . . 6 About the antenna . . . . . . . 7 3 Review the basics . . . . . . 8 An illustrated view of the [Model] . . . . . . 8 Remove the back cover . . . . 9 Install the SIM card . . .
Calendar . . . . . . . . . . . . . . 90 Set the time and date . . . 94 Alarm clock . . . . . . . . . . . . 95 Use the Calculator . . . . . . 97 12 Your phone and other devices . . . . . 99 Infrared basics . . . . . . . . . 99 Send and receive information . . . . 100 PC Connectivity . . . . . . . 101 13 The wireless Internet . 103 The Services menu . . . . . 103 WAP settings . . . . . . . . . 104 Launch the browser . . . . 104 14 Fun and games . . . . . 110 Games main menu . . . . . 110 Start a game . . . .
iii
Safety first 1 Safety first Read these simple guidelines before you use your phone. Failure to comply with these guidelines may be dangerous or illegal. • SAFETY GUIDELINES The following are important safety precautions for phone use. Road safety comes first Do not use a hand-held phone while driving. Park the vehicle first. Switch off in hospitals Follow any regulations or rules. Switch your phone off near medical equipment. Switch off while aboard aircraft Mobile phones can cause interference.
Emergency calls Make sure the phone is switched on and in service. If the word Clear appears above the right selection key, press and hold to return to the Start screen where an emergency call can be made. Enter the emergency number and press . Give your location. Do not end the call until told to do so. Be aware of interference All wireless phones may receive interference that could affect performance. Use your phone sensibly Use your phone only in the normal position (next to the ear).
Safety first • QUICK GUIDE TO FUNCTIONS Make a call Answer a call Answer a call with call waiting End a call Ignore a call Redial Adjust call volume Use the in-call menu Use 1-touch dialing Save a name and number Recall a name/number Recall a name/number during a call Enter phone number, press Press or Answer Press Press Press Silence when your phone rings Press twice During a call, press up or down on the side volume key to adjust call volume.
• MENU SHORTCUTS 5 VOICE Voice recorder . . . . . . . . . . . . . 5-1 Record . . . . . . . . . . . . . . . 5-1-1 Recordings list . . . . . . . . . 5-1-2 Voice commands . . . . . . . . . . . 5-2 Profiles . . . . . . . . . . . . . . . 5-2-1 Voice mailbox. . . . . . . . . . 5-2-2 Infrared. . . . . . . . . . . . . . . 5-2-3 Voice recorder . . . . . . . . . 5-2-4 Full list of shortcuts on page 19 1 MESSAGES Write message . . . . . . . . . . . 01-1 Inbox . . . . . . . . . . . . . . . . . . . 01-2 Outbox . . . .
Welcome to Nokia 2 Welcome to Nokia Congratulations on your purchase of the Nokia [Model] mobile phone. The [Model] can be connected to a PC, laptop, or other device using the data cable or built-in IR port. For more information, please refer to the PC Connectivity Guide, which can be downloaded from the Internet along with Nokia PC Suite as follows: 1 Go to www.nokia.com and click on the United States hyperlink under Mobile Phones. 2 Select Phones, and then PC Downloads.
• SIGN UP WITH A WIRELESS PROVIDER To use the network services available in your phone, you’ll need to sign up with a wireless provider. In many cases, the wireless provider will provide descriptions of their services and instructions for using features such as: • Voice mail and voice privacy • Call waiting, call forwarding, and caller ID • Messaging • News and information services • Selected Internet services Wireless providers may differ in their support of features.
Welcome to Nokia Have your phone or accessory handy Please have your phone or with you when contacting either of the numbers below. Customer Interaction Center, Canada Nokia Customer Care Center, USA Nokia Mobile Phones, Inc. 7725 Woodland Center Boulevard Suite #150 Tampa, Florida 33614 Nokia Products Ltd.
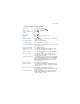
3 Review the basics • AN ILLUSTRATED VIEW OF THE [Model] LEFT SIDE Internal antenna FRONT Earphone Display screen Volume control Selection and Scroll keys End key Talk key Number keys Microphone Headset/TTY/Data cable Connector IR port TOP Charger Jack Power Key BOTTOM 8
Review the basics • REMOVE THE BACK COVER 1 With the phone facing away from you, grip the bottom end with one thumb while pressing the cover release with the other. 2 Slide the cover toward the bottom end of the phone (about 1/4 inch) until it stops. Lift the cover to remove. COVER RELEASE (PRESS IN) • INSTALL THE SIM CARD The SIM slot is between the battery compartment and the bottom end of the phone. • Slide the SIM card into the slot, beveled corner first and gold contacts facing down.
3 Insert the other end of the battery into the battery slot. 4 Replace the cover and slide it toward the top of the phone until it locks into place. • CHARGE THE BATTERY 1 With your phone on or off, connect the plug from the charger to the bottom of the phone. 2 Plug the charger into a standard AC outlet. • After a few seconds, the battery indicator in the display starts to scroll from bottom to top.
Review the basics Note: Unplug the phone and charger once charging is complete. For best performance, charge the battery 24 hours before using for the first time. Charging time depends on the charger and battery. For example, charging time for the BLB-3 battery with the ACP-7U charger is about 4 hours. • REMOVE THE BATTERY 1 Remove the back cover as described on page 9. 2 Pull the battery out with your fingers. Warning:Only use your hands to remove the battery.
• IMPORTANT BATTERY INFORMATION Important: Recharge your battery only with a charger approved by Nokia. You can use your phone while the battery is charging. If the battery is totally empty, it may take a few minutes for the battery indicator to appear in the display while charging. If you switch the phone on when charging is complete, the message Battery full momentarily appears in the display. The BLB-3 battery doesn’t need a full discharge before recharging.
Review the basics • THE START SCREEN The Start screen is the “home base” for your phone and indicates it is in idle mode. What’s on the Start screen HOME Your wireless provider’s name may appear here. Signal strength. A higher bar indicates a stronger signal. Battery charge level. A higher bar indicates more power in the battery.
Icons Your phone uses icons to indicate status, alert you of a message or meeting, and more. Icon Indicates... Icon You are in an active call The Silent profile has been selected Text or number entry mode Keyguard is active You have voice messages You have a message When this icon is blinking, you have a call waiting abc Abc Indicates...
Review the basics • USE THE SELECTION AND SCROLL KEYS The left and right selection keys ( ) are beneath each corner of the display. Between and beneath the selection keys are two scroll keys , positioned one above the other. Selection keys are used to enter, select, and exit menus, submenus, and lists, while scroll keys are used to navigate from within those items. A selection key’s function is always defined by the text that appears above it in the display.
• ADJUST CALL VOLUME With the phone facing you, the volume key is located on the left side of the phone. While in a call When you press the volume key, a bar chart appears in the display indicating the present volume level. • Press the top portion of the volume key to increase your call volume. • Press the bottom portion of the volume key to decrease your call volume. Volume key Front of phone • MAKE AND ANSWER CALLS Use the following table as a quick guide for basic functions.
Review the basics End a call Press Turn Keyguard on Press Menu . With Keyguard on it’s virtually impossible to make an accidental call Turn Keyguard off Press Unlock Silence a call OR Decline a call You can mute the ringing tone of an incoming call without terminating the call. Press Silence and the ringing tone is muted. After pressing Silence, you then have the option to Decline the call • HELP TEXT The [Model] displays brief descriptions of most features. To do this, help text must be activated.
THE MENU NUMBER AND SCROLL BAR As you page through menus, the menu number is indicated in the upper right corner of the display. A scroll bar with a tab also appears on the right side of the display. The tab moves up or down as you page through the menus. 1 When the menu you want appears in the display, press Select. 2 Once inside the menu, use the scroll keys ( ) to highlight an item or page through submenus. Press to open a highlighted item or to enter a submenu.
Review the basics • MENU SHORTCUTS 1 MESSAGES Write message. . . . . . . . . . . . 01-1 Inbox . . . . . . . . . . . . . . . . . . . 01-2 Outbox . . . . . . . . . . . . . . . . . . 01-3 Archive. . . . . . . . . . . . . . . . . . 01-4 Templates. . . . . . . . . . . . . . . . 01-5 My folders . . . . . . . . . . . . . . . 01-6 Erase messages . . . . . . . . . . . 01-7 All read . . . . . . . . . . . . . 01-7-1 Inbox . . . . . . . . . . . . . . . 01-7-2 Outbox. . . . . . . . . . . . . . 01-7-3 Archive. . . . . .
On. . . . . . . . . . . .3-1-2-7-1 Off . . . . . . . . . . .3-1-2-7-2 Accepted caller groups . . . . . . .3-1-2-8 All calls . . . . . . .3-1-2-8-1 Family . . . . . . . . . 3-1-2-8-2 VIP . . . . . . . . . . . . 3-1-2-8-3 Friends . . . . . . . . 3-1-2-8-4 Business . . . . . . . 3-1-2-8-5 Other . . . . . . . . . . 3-1-2-8-6 Silent . . . . . . . . . . . . . . . . . . . . 3-2 Meeting. . . . . . . . . . . . . . . . . . 3-3 Outdoor . . . . . . . . . . . . . . . . . . 3-4 Pager . . . . . . . . . . . . . . . . . . .
Review the basics Level 2 . . . . . . . . . . . 4-5-3-2 Level 3 . . . . . . . . . . . 4-5-3-3 Level 4 . . . . . . . . . . . 4-5-3-4 Level 5 . . . . . . . . . . . 4-5-3-5 Vibrating alert. . . . . . . 4-5-4-1 On. . . . . . . . . . . . . . . 4-5-4-1 Off . . . . . . . . . . . . . . 4-5-4-2 Message alert tone. . . . . 4-5-5 No tone . . . . . . . . . . 4-5-5-1 Standard . . . . . . . . . 4-5-5-2 Special . . . . . . . . . . . 4-5-5-3 Beep once . . . . . . . . 4-5-5-4 Ascending . . . . . . . . 4-5-5-5 Personal . . .
Profiles . . . . . . . . . . . . . . . 5-2-1 Voice mailbox. . . . . . . . . . 5-2-2 Infrared. . . . . . . . . . . . . . . 5-2-3 Recorder . . . . . . . . . . . . . . 5-2-4 Automatic answer. . 4-6-2-2 On . . . . . . . . . . . 4-6-2-2-1 Off. . . . . . . . . . . 4-6-2-2-2 Lights . . . . . . . . . . . . 4-6-2-3 On . . . . . . . . . . . 4-6-2-3-1 Off. . . . . . . . . . . 4-6-2-3-2 Automatic . . . . 4-6-2-3-3 Loopset . . . . . . . . . . . . . . 4-6-3 Use loopset . . . . . . . 4-6-3-1 Yes . . . . . . . . . .
Your phone’s keypad 4 Your phone’s keypad • ENTER CHARACTERS AND NUMBERS Note: The following content focuses on entering text messages, but also applies to any screen that accepts keypad entry, such as web addresses or names in the Phone book. • Press Menu 01-1 (Messages - Write message) to begin writing a message. When the message entry screen first opens, you’ll be in text entry mode.
Use predictive text input Predictive text allows you to write messages using a built-in dictionary. You only need to press each numbered key once to insert each letter. For example, to write Nokia, with the English dictionary selected, press each of the following keys once: (for N) (for O) (for K) (for I) (for A) The display above shows the letters that appear in your display each time a key is pressed.
Your phone’s keypad Available special characters . , ‘ ? ! “ - ( ) @ / : _ ; + & % * = < > > £ $ ¥ ¤ [ ] { } \ ~ ^ î ¿ § # l Switch between ABC and 123 modes • Press and hold until the icon in the upper left corner of the display switches from Abc to 123 (or from 123 to Abc). Switch between uppercase and lowercase text • Press to alternate between upper case (ABC), lower case (abc), and sentence case (Abc) while in text mode.
5 Phone book One of the most useful features in the [Model] is its powerful Phone book. You can store up to 500 names and their associated web, e-mail, and street addresses within the Phone book. Each name, or entry as it is called, has room for up to 5 numbers of various types and 3 text entries. • OPEN THE PHONE BOOK 1 At the Start screen, press Names. The submenus in the following table appear in the display. Use the scroll keys ( ) to highlight an option.
Phone book Phone book menu Voice tags Show a list of voice dialing numbers, if you’ve assigned voice tags to any Phone book entries Service nos. List the fax, data, and voice numbers saved to your SIM card by your wireless provider Own numbers Display the phone number assigned to your phone Caller groups Setup a caller group. You can define ringing tones and graphics for up to five groups in your Phone book.
ASSIGN A TYPE TO A NUMBER 1 At the Start screen, press one of the scroll keys ( display your Phone book entries. ) to 2 Scroll to the entry containing the numbers you wish to change and press Details. 3 Use the scroll keys to highlight the number you wish to change and press Options. 4 Scroll to Change type and press Select. 5 Scroll to the number type of your preference and press Select. A confirmation message appears in the display.
Phone book Display Phone book entries quickly To display any entries in your Phone book quickly, just press one of the scroll keys ( ) from the Start screen. Edit names 1 At the Start screen, press Names and scroll to Edit name. 2 Press Select and scroll to the name you wish to change. 3 Press Edit, modify the name as desired, and press OK once you’ve finished.
Important: If you enter the wrong security code 3 times in a row, the phone is blocked and won’t accept a code for 5 minutes. Assign a primary number For names containing more than one number, assign the most-dialed number as the primary number. The primary number is the number dialed when you dial a name containing multiple numbers. 1 At the Start screen, press book entries. or to display a list of Phone 2 Scroll to a name containing multiple numbers and press Details.
Phone book Setup a caller group 1 At the Start screen, press Names, scroll to Caller groups, and press Select. The following Caller groups are available. • Family • Friends 2 • VIP • Business • Other Use the scroll keys ( ) to highlight a group.
Feature Phone SIM Number capacity Up to 5 numbers per name One per name Up to 5 numbers per name Can use Voice dialing? Yes Yes Yes Can transfer names/numbers to another phone? Via IR or PC Suite Yes, via SIM Yes, via SIM No Up to 3 text entries per name Can store text Up to 3 text information such as entries per street address, ename mail address, note? Phone and SIM Select a memory 1 At the Start screen, press Names, scroll to Settings, and press Select.
Phone book • COPY PHONE BOOK ENTRIES 1 At the Start screen, press Names, scroll to Copy, and press Select. 2 Scroll to From phone to SIM card or From SIM card to phone and press Select. The following options appear in the display: One by one Select and copy entries one by one All Copies all entries from the SIM card or Phone *Primary nos. Copies only primary numbers. This appears only if you select From phone to SIM.
• BUSINESS CARDS Create a business card Business cards aren’t stand-alone entities stored in your phone, they are actually Phone book entries that have been sent to a compatible device via IR or SMS. Send a business card to another device You can send Phone book entries to other compatible devices via IR or SMS. Phone book entries sent in this manner are known as “business cards” (vCards). Note: If using IR, make sure IR on the other device is enabled.
Phone book TO SAVE THE BUSINESS CARD Press Show, press Options, scroll to Save and press Select. TO DISCARD THE BUSINESS CARD Press Exit, then press OK when you’re asked to confirm. • VIEW SERVICE NUMBERS Your wireless provider may have saved your phone, data, and fax numbers to your SIM card. To view these numbers: 1 At the Start screen, press Names, Scroll to Service nos. and press Select. A list of numbers, if any are available, appear in the display.
1 If # missed call appears in the display, press List. The phone number appears in the display. 2 Press Options to view details, edit, erase, and more. See “Missed call options” in the following table for more information. OR 1 At the Start screen, press Menu 2-1 (Call log - Missed calls). After a brief pause, a list of missed calls appear in the display (if any exist). 2 Scroll to a number and press Options to display the options listed in the following table.
Phone book View received calls Received calls are those that have been answered at one time or another. 1 At the Start screen, press Menu 2-2 (Call log - Received calls). After a brief pause, a list of received calls appear in the display (if any exist). 2 Scroll to a number and press Options to display the options listed in the following table. 3 Scroll to an option, press Select to activate the option or enter its submenu.
3 Scroll to a number and press Options to display the options listed in the following table. 4 Scroll to an option, press Select to activate the option or enter its submenu.
Phone book View call duration • For ALL CALLS. At the Start screen, press Menu 2-5-4 (Call log - Call timers - Duration of all calls). The total duration of all calls (missed, dialed, and received) appears in the display. • For the LAST CALL. At the Start screen, press Menu 2-5-1 (Call log - Call timers - Duration of last call). The duration of your last call appears in the display. • For DIALED CALLS. At the Start screen, press Menu 2-5-2 (Call log Call timers - Duration of dialed calls).
6 Use voicemail If you subscribe to voicemail, your wireless provider will furnish you with a voice mailbox number. You need to save this number to your phone to use voicemail. When you receive a voice message, your phone lets you know by beeping, displaying a message, or both. If you receive more than one message, your phone shows the number of messages received. • SAVE YOUR VOICE MAILBOX NUMBER Your wireless provider may have already saved your voice mailbox number to your phone.
Use voicemail Listen to your voice messages Once you’ve setup voicemail, you can dial the number one of three ways: • Dial the number using the keypad • Press and hold • Press Listen if there’s a notification message in the display Once you connect and the pre-recorded greeting begins, press enter your user ID, and follow the recorded instructions.
INSERT DIALING CODES Press to cycle through available dialing codes, Once the desired code appears, pause briefly to insert the code into the dialing string. Available dialing codes are as follows: * Bypasses a set of instructions + Precedes an international telephone number p Pauses for 2.5 seconds before sending any numbers that follow w Wait.
Advanced features 7 Advanced features • IN-CALL OPTIONS You have numerous options while in a call. The options listed on the following pages are those available in the most common situations, such as when you are in a call or when a call is on hold. 1 Press Options while performing any of the following in-call activities. 2 Use your scroll keys to highlight an option. 3 Press Select to activate an option or enter its submenu.
With a call on hold Record Record the current phone conversation Equalizer Select an equalizer set or create a custom set of your own End call Terminate the call New call Place a new call Phone book Display the Phone book menu Menu Change the audio properties of your phone Mute Mute the current call.
Advanced features With one call active and another on hold Mute Mute the current call. You can hear the other person but they can’t hear you Swap Switch form the active call to the one on hold. • CALL WAITING If supported by your wireless provider, call waiting notifies you of an incoming call while you’re in a call. You can then accept, reject, or ignore the incoming call. When you receive an incoming call 1 At first, the name or number appears in the display.
Place a new call with one on hold • While in a call, enter the number for the second call and press The first caller is put on hold. • Switch between the two calls by pressing Swap or • End the active call by pressing • To end both calls, press Options, scroll to End all calls, and press Select • CALL FORWARDING Call forwarding tells your network to redirect incoming calls to another number. Important: Call forwarding is network-dependent and may not work the same in all networks.
Advanced features Call forwarding options Forward when not able to take calls Forward calls that are not picked up. You can also specify a time delay (10, 15, 20, 25, 30 sec). Forward all fax calls Forward all calls to a fax mailbox Forward all data calls Forward all calls to a data mailbox Cancel all call forwarding 3 Cancel all call forwarding Scroll to the option of your choice and press Select. 4 Scroll to Activate and press Select.
ACTIVATE OR DEACTIVATE AUTOMATIC REDIAL 1 At the Start screen, press Menu 4-3-4 (Settings - Call settings Automatic redial). 2 After a brief pause, On and Off appear in the display. Scroll to your choice and press Select. • VOICE DIAL You can select up to 10 entries in your Phone book to dial by voice. First, you’ll need to assign a “voice tag” to those entries you select.
Advanced features 3 Scroll to Add voice tag, press Select, and then press Start. 4 After the phone beeps, pronounce the voice tag clearly into the microphone from a distance of 6 - 12 inches. 5 If the recording fails, the phone asks if you want to try again. Press OK to try again or Back to exit. Voice dial a number 1 At the Start screen, press and hold Names. The phone beeps and Please speak now appears in the display. 2 Within 3 seconds, pronounce the tag into the microphone.
• VOICE COMMAND You can command your phone to perform 4 different functions with your voice. Voice command works similar to voice dialing, so you’ll need to associate a voice tag to each command. Note: Voice command will not work with the data cable attached. Add a voice tag for a command 1 At the Start screen, press Menu 5-2 (Voice - Voice command). 2 After a brief pause, the following commands appear in the display.
Advanced features Found: appears in the display and the command is performed. EXECUTE A VOICE COMMAND WITH THE HEADSET After you’ve associated a voice tag with a command, you can execute a voice command with the optional HDC-9P headset attached. 1 At the Start screen, press and hold the remote button on the headset. The phone beeps and Please speak now appears in the display. 2 Pronounce the tag for one of the four available commands.
Record a memo 1 At the Start screen, press Menu 5-1-1 (Voice - Voice recorder - record). 2 After a brief pause, your phone begins recording and a progress bar appears in the display to indicate recorded time versus time left. 3 Press Stop to end the recording. 4 Enter a title for the recording (up to 14 characters) and press OK. View recorded memos • At the Start screen, press Menu 5-1-2 (Voice - Voice recorder Recordings list). After a brief pause, your memo or list of memos appear in the display.
Advanced features 5 Press OK and the recording is erased. Record a phone conversation 1 While in a call, press Options, scroll to Record, and press Select. 2 Your phone begins recording the conversation. A progress bar and timer appear in the display, indicating the amount of time left. 3 Press Stop to abort the recording. The recording is saved as the time and date.
5 Enter a new name for the entry and press OK. ERASE 1-TOUCH DIALING NUMBERS 1 At the Start screen, press Names, scroll to 1-touch dialing and press Select. 2 Scroll to the number that you wish to erase and press Options. 3 Scroll to Erase and press Select. You’re asked to confirm the erasure. 4 Press OK to erase the key assignment. • INTERNATIONAL DIALING International numbers require a prefix specific to the country from which you’re calling.
Customize your phone 8 Customize your phone • SET THE DISPLAY LANGUAGE 1 At the Start screen, press Menu 4-4-1 (Settings - Phone settings - Language). After a brief pause English, Français, Español, or Portuguêse appear in the display. 2 Scroll to the language of your choice and press Select. Note: The Language setting affects the time and date formats of the Clock, Alarm clock, and Calendar. • PROFILES You can pre-select how your phone behaves in different environments using profiles.
2 Scroll to the profile you wish to personalize and press Select. 3 Scroll to Customize and press Select. 4 Use the scroll keys to highlight any of the following options. Once you’ve highlighted option you’d like to customize, press Select. Note: You cannot rename the Normal profile.
Customize your phone 2 Scroll to the profile you wish to set for expiration and press Select. 3 Scroll to Timed and press Select. 4 Enter the time for the profile to expire and press OK. The timed profile appears in the display along with a small “clock” icon. Select and customize an accessory profile Note: You must have a headset or other accessory attached to your phone prior to selecting the Accessory settings menu.
IF YOU SELECTED TTY/TDD • Use TTY - Enable the use of a TTY/TDD device. Scroll to Yes or No and press Select. Note: If the loopset is enabled, you’ll be asked to disable the loopset before enabling TTY/TDD. Press Yes to disable the loopset (thus enabling TTY/TDD). Press No to leave the loopset enabled. • AUDIO SETTINGS Much like a stereo, you can customize the audio for your [Model]. Choose from a list of equalizer presets or create a custom set of your own.
Customize your phone 3 Scroll to a set and press Select. The equalizer setting appears in the display. Press OK to activate your selection or Back to return. Create a Custom equalizer set 1 At the Start screen, press Menu 4-3-2 (Settings - Call settings - Equalizer). 2 After a brief pause, a list of equalizer sets appears in the display. Scroll to Set 1 (or Set 2) and press Select. 3 Scroll to Edit and press Select. Set 1 appears in the display with the first bar highlighted.
Note: Methods for downloading ringing tones vary with wireless providers. Some providers allow you to send ringing tones to your phone via the Internet, but may charge for this service. Contact your wireless provider for details. When you receive a ringing tone Ringing tone received appears in the display. LISTEN TO THE TONE 1 Press Options, scroll to Playback, and press OK. 2 To stop playing the tone, press Quit or .
Customize your phone LPS-1 Mobile Inductive Loopset The LPS-1 loopset gives hearing-impaired users access to digital telephony for the first time. People using a T-coil equipped hearing aid can make and receive calls without noise interference. HOW THE LOOPSET WORKS The LPS-1 transmits sound to any hearing aid equipped with a T-coil. The sound from the phone is amplified and background noise is eliminated.
• A cable for connecting the TTY to your phone. Usually supplied by the manufacturer of the TTY device • The Nokia TTY adapter HDA-8, which can be purchased as an accessory Important: The Nokia TTY adapter HDA-8 is for use with compatible TTY devices and headsets only. Please check your TTY device or headset to ensure that the connection is compatible. Nokia Original headsets attach directly to the phone and do not require this adapter.
Customize your phone 4 When the receiving party answers, begin typing your conversation on the TTY. End a TTY call • Press on the phone Receive a TTY call 1 Make sure the TTY and phone are connected. 2 When the phone vibrates (this setting is up to the user), press to answer the call, and then type your response on the TTY. 3 To hang up, press on the phone. • OPTIONAL HEADSET The HDE-1 headset can be purchased separately as an accessory.
9 Manage phone security You can lock your keypad, restrict selective calls, and use security codes to secure your phone against accidental or unauthorized use. • LOCK AND UNLOCK THE KEYPAD Remember to lock your phone’s keypad to prevent accidental calls. If the keypad is locked, it unlocks when you receive a call. After the call it automatically reactivates. LOCK THE KEYPAD • At the Start screen, press Menu the display. UNLOCK THE KEYPAD • At the Start screen, press Unlock the display. .
Manage phone security Set your security level 1 At the Start screen, press Menu 4-7-3 (Settings - Security settings - Security level). 2 After a brief pause, you’re prompted to enter the security code. The default code is 12345. Enter the security code and press OK. 3 Scroll to Off, Memory, or Phone and press OK. • FIXED DIALING Fixed dialing allows you to define which numbers require PIN2 entry before they can be dialed. Fixed dialing must be supported by your wireless provider.
Note: If you enter the wrong security code five times in succession, you won’t be able to enter a code for five minutes, even if you power off the phone between incorrect entries. CHANGE YOUR SECURITY CODE Once you change the security code from its preset of 12345, keep the new code secret, and in a safe place separate from your phone. 1 Press Menu 4-7-4-1 (Settings - Security settings - Access codes Change security code).
Manage phone security CHANGE YOUR PIN CODE Before you can change your PIN code, you’ll need to set your phone to ask for the PIN code at start-up. See “PIN code request”, which immediately precedes this section. 1 Press Menu 4-7-4-2 (Settings - Security settings - Access codes Change PIN code). 2 After a brief pause, you’re prompted to enter the current PIN code. Enter the PIN code and press OK. 3 You’re prompted to enter the new PIN code. Enter the new PIN code and press OK.
Personal unblocking key (PUK) codes PUK and PUK2 codes are used to restore blocked PIN and PIN2 codes. Both PUK and PUK2 codes are eight characters in length and cannot be changed. PUK and PUK2 codes must be obtained from your wireless provider. Important: If you enter an incorrect PUK or PUK2 code 10 times in succession, the message SIM rejected appears on the screen and the SIM card can no longer be used. You must contact your wireless provider for a new SIM card.
Messages 10 Messages If you’re subscribed to a message service, you can send and receive messages to compatible phones that also have a message service. You can also send and receive picture messages, email, and faxes if supported by your network. Composed messages can be up to 160 characters in length. However, you can received “linked” messages as large as 459 characters. Linked messages are actually several messages tied together.
1 At the Start screen, press Menu - Select, and scroll until Message settings appears in the display. 2 Press Select, scroll to Default profile, and press Select again. 3 Scroll to Message center number and press Select. a) If the box which appears in the display is empty, enter the number given by your wireless provider (up to 21 digits) and press OK. 4 If the box is full, leave the number as is and press OK.
Messages Special characters . , ‘ ? ! “ - ( ) @ / : _ ; + & % * = < > > £ $ ¥ ¤ [ ] { } \ ~ ^ î ¿ § # l Use four-way scrolling Navigate special characters using the 2, 4, 6, and 8 keys much as you would a joystick. Once a character is highlighted press to insert the character into your message. Scroll up Scroll right Scroll left Insert character Scroll down • WRITE AND SEND A MESSAGE 1 At the Start screen, press Menu 01-1 (Messages - Write message).
3 Compose a message using the keypad, then press Options. 4 Scroll to Send and press Select. 5 Enter the recipient’s phone number, including the area code, and press OK. Your message is sent. Tip: Press Find to retrieve a number from your Phone book. • READ MESSAGES When you receive a message, your phone beeps and Message received appears in the display as well as the unopened letter icon ( ). 1 Press Show to read the message, or press Exit to move the message to your inbox.
Messages Note: The message *Some text missing* indicates part of the message has not been received. This is normal, and the message content will be updated as soon as the missing text arrives. If memory is full, you may have to delete a message from your inbox before your phone can update the missing text. Reply to a message 1 While viewing a message, press Options, scroll to Reply, and press Select. 2 Scroll to a pre-composed reply, or choose an Empty screen, and press Select.
First, write down a couple of numbers Write down your Message center number and Default recipient number (also known as the “e-mail gateway” number) in the following table. You may need these numbers when setting up your phone for e-mail. Number Where to find it Write the number below Message center number The same number used for SMS.
Messages 10 Scroll until Rename sending profile appears in the display and press Select. 11 Enter a name for the profile (such as “e-mail”) and press OK. • COMPOSE AND SEND E-MAIL Note: See “Tips for composing a message” on page 70 for ways to write messages faster. 1 At the Start screen, press Menu 01-1 (Messages - Write message). After a brief pause, the message entry screen appears in the display. 2 Compose your message using the keypad and press Options.
Download pictures You can download pictures, or receive them from compatible phones via SMS to use in messages and caller groups. You can also create pictures and send them to your phone or other compatible phones using Nokia PC Suite. Note: Methods for downloading pictures vary with wireless providers. Some providers allow you to send pictures to your phone from a web page. Contact your wireless provider for details.
Messages Tip: Attach pictures before adding text. You can then check remaining space for text in the upper right corner of the display. 4 Scroll to Attach picture and press Select. A list appears in the display (Picture 1, Picture 2, and so on). 5 Scroll to a picture and press View. 6 Press Attach to insert the picture into your message, otherwise: a) Press Back, scroll to another picture, and press View again. b) Press Attach to insert the picture into your message.
Send a template message 1 At the Start screen, press Menu 01-5 (Messages - Templates). After a brief pause, the templates folder opens to display a list of templates. 2 Scroll to the template of your choice and press Select. Available templates are as follows: Message Templates “Please call” “Meeting is cancelled” “I’m at home. Please call” “I’m late. I will be there at” “I’m at work. Please call” “See you in” “I’m in a meeting.
Messages d) Press OK to save or No to exit. 4 Enter the recipient’s number and press OK. The template is sent. • You can also press Find to retrieve a number from your Phone book. Create a custom template 1 Press Menu 01-1 (Messages - Write message). After a brief pause, the message entry screen appears in the display. 2 Compose your custom template and press Options. 3 Scroll to Save message, and press Select. 4 Scroll to the Templates folder and press OK. Your message is saved as a template.
3 Once the folder opens, scroll to the message you wish to view and press Select. Inbox folder Messages are automatically stored in the inbox after they’ve been read or if you press when Message received appears on the Start screen. Outbox folder Sent messages are automatically saved in the Outbox. Archive folder To make sure that certain messages won’t be overwritten when memory becomes full, move some of your messages to the Archive folder.
Messages 3 Scroll until My folders appears in the display and press Open. 4 Any folders that you’ve created appear in the display. Scroll to the folder you wish to remove and press Options. 5 Scroll to Delete folder and press OK. 6 You’re asked to confirm the deletion. Press OK if you wish to delete and Back if you wish to exit. Move a message to a folder 1 While viewing the message, press Options. 2 Scroll to Move and press Select. 3 Scroll to the destination folder and press OK.
Erase all messages in a folder 1 At the Start screen, press Menu 01 (Messages). 2 After a brief pause, Write message appears in the display. 3 Scroll until Erase messages appears in the display and press Select. 4 Scroll to the desired folder or message type that you wish to erase and press OK. You’re asked to confirm your erasure. 5 Press OK to empty the folder. • PREDICTIVE TEXT Writing messages with predictive text is much easier than the traditional method.
Messages Write with predictive text Predictive text allows you to write using a built-in dictionary, and is the default method of entering text. With predictive text input, you only need to press each numbered key once for each letter. For example, to write Nokia, with the English dictionary selected, press the following keys once: (for N) (for O) (for K) (for I) (for A) The display above shows the letters for each key pressed.
11 Your personal organizer The [Model] has many useful features for organizing your everyday life, including a calendar, to-do list, and alarm clock. It also has a calculator that can easily convert domestic and foreign currency, plus a new feature called Wallet for making purchases on-line. In this chapter you’ll learn how to use your phone as a personal digital assistant.
Your personal organizer Create a wallet code The first time you access Wallet, you’ll be asked to create a personalized wallet code. The wallet code can be 4 -10 digits in length. 1 At the Start screen, press Menu 6-3 (Organizer - Wallet). After a brief pause, you’re prompted to enter a wallet code. 2 Enter the 4 - 10 digit code of your choice and press OK. Wallet prompts you to verify the code. Note: Create a code that is unique, yet easy to remember.
3 Scroll to Settings and press Select. 4 Scroll to Code request and press Select. You’re prompted to enter the wallet code. 5 Enter the wallet code and press OK. 6 Scroll to On (or Off to deactivate) and press Select. A message appears in the display confirming you’ve activated code request. Reset the wallet code If you forget the wallet code and wish to erase all the information stored in Wallet, follow these steps.
Your personal organizer Card entry fields Card info Enter the card holder, type, number, verification value, expiration day, expiration month, and expiration year User info Enter your user name and password Shipping info Enter your first, middle, and last name, company name and address, city, state, zip code, and country Billing info Enter your first, middle, and last name, company name and address, state, zip code, country, phone number, e-mail address Receipt info Enter the receipt to e-mail add
5 Scroll to Save and press Select. 6 Enter a title for the note and press Options. 7 Scroll to Save and press Select. Your note is saved. NOTE OPTIONS Press Options while composing a note to display the list in the following table: Options while composing a note Save Save the note Insert word Return to composing the note.
Your personal organizer Options while viewing notes Sort Sort the list of notes by name or date Erase Erase the selected note Erase all Erase all notes 3 Use the scroll keys to highlight an option. Use the selection keys to select an option or exit the list.
• CALENDAR The calendar keeps track of reminders, calls you need to make, meetings, and birthdays. It can even sound an alarm for any of these events. Open the Calendar At the Start screen, press Menu 6-1 (Organizer - Calendar). After a brief pause, the Month view appears in the display with the current date highlighted by a black box. Use four-way scrolling Month view You can move the cursor in some calendar views using the 2, 4, 6, and 8 keys much the same as a joystick.
Your personal organizer Jump to a date 1 Press Menu 6-1 (Organizer - Calendar). After a brief pause, the month view appears in the display. 2 Press Options, scroll to Go to date, and press Select. 3 Enter the date (for example 12/15/2002) and press OK. The month view appears in the display with the “jump date” highlighted. Make a note for a specific date You can choose from four types of notes; Meeting, Call, Birthday, and Memo.
View calendar notes - the Day view After you created some calendar notes, you can view them as follows: 1 At the Start screen, press Menu 6-1 (Organizer - Calendar). After a brief pause, the month view appears in the display with the current date highlighted. Any dates that contain calendar notes will be in bold font. 2 Jump, or scroll to the date containing the notes you wish to view. 3 Press Options, scroll to View day, and press Select. Any notes you have for the day will appear in a list format.
Your personal organizer Note options Send note Send the note to another device via Infrared or SMS as text or in vCal format Copy Copy the note. You can then “past” the note to another date Settings Set the date and time, date and time format, the day each week starts, and whether you want your notes to auto-erase after a specified time Send a Calendar note to another device SEND A NOTE VIA INFRARED OR SMS Note: If sending via Infrared, ensure the other device is set to receive data via IR.
RECEIVE CALENDAR NOTES FROM ANOTHER DEVICE When you receive a Calendar note, your phone displays Calendar note received. You can then save the note in your Calendar and set an alarm for any date and time. VIEW RECEIVED CALENDAR NOTES 1 When your phone displays Calendar note received, press Show. 2 The text of your note appears in the display. Use the scroll keys to view the entire message, if necessary. SAVE RECEIVED CALENDAR NOTES 1 After viewing the Calendar note, press Options.
Your personal organizer • If your clock was previously “shown” in the display, it will now be hidden from view. Change the time format You can set the time format for am/pm or 24 hour format (military time). 1 Press Menu 4-2-1-3 (Settings - Time settings - Clock - Time format). After a brief pause, 24-hour and am/pm appear in the display. 1 Scroll to 24-hour or am/pm and press OK. Set the date 1 Press Menu 6-1 (Organizer - Calendar). After a brief pause, the month view appears in the display.
2 After a brief pause, On and Off appear in the display. 3 Scroll to On and press Select. You’re prompted to set the alarm time. 4 Enter the time for the alarm in hh:mm format and press OK. 5 Alarm on appears briefly in the display. upper right corner of the Start screen. also appears in the When the alarm sounds Your phone beeps, vibrates, and the display lights up. Stop and Snooze appear in the bottom of the display. WITH THE PHONE ON Press Stop to shut the alarm off. OR Press Snooze.
Your personal organizer • USE THE CALCULATOR 1 At the Start screen, press Menu 7 (Calculator). After a brief pause, the calculator screen appears in the display. 2 Enter the first number in your calculation. • Press to enter a decimal point • Press Clear to erase any mistakes • Press to cycle through and select the add (+), subtract (-), multiply (*), and divide (/) characters 3 Enter the second number in your calculation. 4 Press Options. The following list of options appear in the display.
Currency conversion You can convert foreign currency to domestic, or vica versa directly from the Start screen. 1 At the Start screen, enter a currency amount to convert. 2 Press Options, scroll to one of the following and press Select: To home Converts foreign currency to domestic currency To foreign Converts domestic currency to foreign currency Note: If you haven’t done so already, you’re prompted to enter the exchange rate. Tip: To enter a decimal, press 3 .
Your phone and other devices 12 Your phone and other devices The [Model] is capable if interacting with, or connecting to a variety of devices using IR (infrared) or the DLR-3P serial cable. The [Model] can exchange information with other phones, desktop and laptop PCs, and handheld devices. It can also function as a wireless modem when connected to PCs and handheld devices. • INFRARED BASICS Your phone can send and receive certain types of data by way of the phone’s infrared (IR) port.
Check the status of an IR connection The status of an IR connection is shown by the infrared icon . • When appears steady, there is an IR connection between your phone and the other device. • When • When blinks, your phone is trying to connect to the other device or the connection has been lost. doesn’t appear, no IR connection exists. • SEND AND RECEIVE INFORMATION You can send business cards (using the industry-standard v.
Your phone and other devices Send calendar notes You can send and receive calendar notes using the same basic procedures as those found in the section “Send a business card to another device” on page 100. SEND A CALENDAR NOTE TO ANOTHER DEVICE From the selected calendar day’s day list: 1 Scroll to the note you wish to send and press Options. 2 Scroll to Send note and press Select. 3 Point the infrared ports at each other. 4 Scroll to Send via IR and press Select to start data transfer.
Once you establish this connection, you can access your phone information from your PC, or use your phone as a wireless modem. It may also be possible to make this same serial connection between your phone and an Infrared-equipped laptop or IR-equipped desktop PC using your phone’s infrared port.
The wireless Internet 13 The wireless Internet Note: Check with your wireless provider for WAP service availability. WAP is the mobile device’s equivalent of the Internet. The mobile community began developing WAP in the late 1990s so that mobile device users could access the Internet. Today, most WAP sites are composed of text, hyperlinks, and low-resolution graphics.
• WAP SETTINGS It shouldn’t be necessary to manually configure the browser on your phone. Normally this is done by your wireless provider once you’ve subscribed to the feature. Contact your wireless provider if you have problems using the browser. Your wireless provider and WAP Because WAP content is designed to be viewed from your phone, your wireless provider now becomes your “wireless Internet provider” as well.
The wireless Internet Navigate a WAP page ELEMENTS COMMON TO MOST PAGES Header line - Shows the current location. Active hyperlink - Highlighted and awaiting a press of Select. Hyperlink - Used to Navigate to other cards or sites. Scroll to select the link and click Select. Text - Use the scroll keys to move through the text. The cursor will automatically jump to the next hyperlink to activate it. Selection list - Text in brackets. Press Select to display additional choices or links.
4 Scroll to Open link and press OK. The browser menu 1 At the Start screen, press Menu 10 (Services). After a brief pause, the options listed in the following table appear in the display. 2 Scroll to an option. Press Select to activate the option or enter its submenu.
The wireless Internet Options while browsing Press Options while browsing. The following menus appear on the screen: Browser options on-line Home Go to your home page Bookmarks Display a list of saved bookmarks Edit or Select Edit the currently selected browser element (for example, a checklist or text entry field), or selects the active (highlighted) hyperlink. Go to address Enter an address manually Use number Captures numbers longer than 3 digits.
Make purchases on-line You can make purchases on-line (UNDER DEVELOPMENT) Bookmarks You can save the addresses of up to 25 of your favorite sites as bookmarks. If a WAP site’s developers have included a title for the card, the name of the card appears in the bookmark list (example: Yahoo! News, ebay on WAP). If the site has no title, then the site’s address will appear as a bookmark (example: www.yahoo.com/news.wml). SAVE AN ADDRESS AS A BOOKMARK 1 Navigate to the desired site and press Options.
The wireless Internet DOWNLOAD A RINGING TONE Your phone can store up to 10 new ringing tones (sent from the Web, via SMS, or created using Nokia PC Suite). For more information about downloading ringing tones, contact your wireless provider. PLAY, SAVE, OR ERASE A RINGING TONE Once your phone receives a new ringing tone, your phone displays the message Ringing tone received. 1 Press Options, then choose Playback, Save, or Erase. 2 Press OK.
14 Fun and games The [Model] is programmed with four interesting and challenging games, some of which can be played via IR against another opponent. Warning: Do not switch on the phone to use this function when wireless phone use is prohibited or when it may cause interference and danger. • GAMES MAIN MENU Press Menu 8 (Games) at the Start screen. After a brief pause you’re presented with the following menu. 1 Select game - Select from Snake II, Sugarbowl, Bumper, and Pairs II.
Fun and games Bumper Get your highest score by keeping the ball on the table using the flippers. Press and hold to launch the ball. Hold down to get more launch power. Use keys and to control the flippers. Use and to nudge the table - but not too much or the game will tilt! You can visit games services on the Internet to download new tables. Contact your wireless provider for details. Pairs II Reveal pictures to find pairs with as few tries as possible. Use the , , , and keys to move the cursor.
15 Accessories Extended 1000 mAh Li-Ion Battery (BLB-3) Provides up to 5.2 hours talk time and up to 14 days standby time. Rapid Cigarette Lighter Charger (LCH-9) Rapid charges the phone’s battery from your vehicle. Compact Desktop Charging Stand DCH-8 Compact and stylish, this stand provides a convenient spot in which to charge the phone.
Accessories Rapid Travel Charger (ACP-8U) This lightweight rapid travel charger is ideal for active travelers. It plugs directly into the phone and can also be used with the compact Compact Desktop Charging Stand (DCH-8). Also available: Standard Travel Charger (ACP-7U) Headset Kit (HDC-9P) The headset provides handsfree operation and has an answer/end button located on the microphone. It connects directly to the phone, requiring no additional adapter.
Leather Carrying Case (CSL-17) Luxurious leather case protects your phone and has a convenient, integrated belt clip. Data Cable (DLR-3P) For e-mail, faxes, Internet and other data transmissions. Easy and convenient connection with no modem or PC card needed. Compatible with: Connectivity Deskstand (DCH-8D) Complete Car Kit (CARK-91H) Provides handsfree use and connection to an external antenna. Includes Privacy Handset (HSU-1) for private conversations.
Reference information 16 Reference information This section provides information about your phone’s batteries, accessories, chargers, safety guidelines and technical information. Be aware that the information in this section is subject to change as batteries, chargers, and accessories change. • BATTERIES AND CHARGERS This phone is intended for use when supplied with power from the ACP7U charger. Other usage could invalidate any approval given to this apparatus and might be dangerous.
Do not short-circuit the battery. Accidental short-circuiting can occur when a metallic object, like a coin, a clip, or a pen causes a direct connection of the + and - terminals of the battery, which are metal strips on the end of the battery. An example of short-circuiting could occur if you carry a spare battery in your pocket or purse, where the battery could come into contact with such objects as a coin. Short-circuiting could damage either the battery or the connecting object.
Reference information • IMPORTANT SAFETY INFORMATION Traffic safety Don’t use a hand-held telephone while driving a vehicle. If you’re using a hand-held phone, park the vehicle before conversing. Always secure the phone in its holder and don’t place the phone on the passenger seat or where it can break loose in a collision or sudden stop. Operating environment Remember to follow any special regulations and always switch off your phone wherever forbidden, or when it may cause interference or danger.
Hearing aids Some digital wireless phones may interfere with hearing aids. In the event of such interference, consult your wireless provider. Other medical devices Operation of any radio transmitting equipment, including cellular phones, may interfere with the functionality of inadequately protected medical devices. Consult a physician or the manufacturer of the medical device to determine if it is adequately shielded from external RF energy, or if you have any questions.
Reference information or butane), areas where the air contains chemicals or particles, such as grain, dust or metal powders, and any other area where you would be advised to turn off your vehicle engine. Vehicles Only qualified personnel should install or service the phone in a vehicle. Faulty installation or service may be dangerous and invalidate the warranty.
Emergency calls Important: This phone, like any wireless phone, operates using radio signals and cannot be guaranteed to connect in all conditions. Therefore, you should never rely solely upon any wireless phone for essential communications (such as medical emergencies). Remember, to make or receive any calls the phone must be switched on and in a service area with adequate signal strength.
Care and maintenance 17 Care and maintenance Your phone is a product of superior design and craftsmanship and should be treated with care. The suggestions below will help you to fulfill any warranty obligations and to enjoy this product for many years. When using your phone, battery, charger, or any accessory: • Keep all parts and accessories out of small children’s reach. • Keep all parts and accessories dry. Precipitation, humidity, and liquids contain minerals that will corrode electronic circuits.
• TROUBLESHOOTING The following table lists some common problems and their solutions.
Frequently Asked Questions (FAQ) 18 Frequently Asked Questions (FAQ) Q. What if my phone is lost or stolen? A. Contact your wireless provider immediately. Q. Does the phone have to be on in order for me to receive a call? A. Yes. Q. What is my security code? A. Your default security code is 12345. If you’ve changed your security code and forgotten the new code, contact your wireless provider. Q. How do I lock the keypad? A. Press Menu . Q. How do I unlock the keypad? A. Press Unlock . Q.
Q. How do I download a custom ringing tone? A. You can send tones to your phone over the Internet, using SMS, or you can create custom tones and send them to your phone or another compatible phone using PC Suite. Call your wireless provider for more information. Q. Where is my phone’s model number and Serial number? A. On the information label, which is on back of the phone under the battery. The model number of this phone is [Model]. Q. How do I change the contrast on the display? A.
Glossary 19 Glossary Term Definition antenna The portion of your phone designed to transmit and receive the wireless signal antenna jack The connector used to attach an external antenna to your mobile phone (typically used by the Handsfree kit) battery The source of power for your phone when its not connected to the charger bookmark An Internet site or address (URL) saved to your phone’s memory.
Term Definition fax call A call placed or received where phone functions as a data/fax modem, connected to your PC via the DLR-3P cable or Infrared (IR). home system The wireless system on which you are a subscriber. IMEI International Mobile Equipment Identifier. Identifies your phone on the wireless network. Internet An network that connects computer networks and organizational computer facilities around the world. IrDA Infrared Data Association.
Glossary Term Definition ringing option The way your phone plays (or does not play) the selected ringing tone when you have an incoming call. For example; ascending, descending. ringing tone The tone that your phone plays (or doesn’t play) when you have an incoming call. The [Model] has 40 available ringing tones. ringing volume The audible level of your phone’s ringing tones. screen or display Your phone’s display.
Term Definition voice mailbox The repository on your wireless provider’s network for all voice mail messages voice memo A message recorded by your phone’s internal recorder warning tones The collection of tones or melodies that are played when your phone alerts you to a variety of situations WAP Wireless Application Protocol.
[Model] Technical information 20 [Model] Technical information Weight 125 grams (4.4 ounces) with BLB-3 mAh Li-ion Battery Wireless networks AMPS 800/TDMA 800 and1900, GSM 1900 Size (volume) 6.7 cubic inches (110 cc) Frequency range (Tx) AMPS - 824 - 849 Mhz TDMA 800: 824 - 849 TDMA 1900: 1850 - 1910 Mhz GSM 1900: 1850 - 1910 Mhz Frequency range (Rx) AMPS - 869 - 894 Mhz TDMA 800: 869 - 894 TDMA 1900: 1930 to 1990 Mhz GSM 1900: 1930 - 1990 Tx output power 1 W (Max) Battery voltage 3.
21 Nokia One-Year Limited Warranty Nokia Inc. (“NOKIA”) warrants that this cellular phone (“Product”) is free from defects in material and workmanship that result in Product failure during normal usage, according to the following terms and conditions: 1 The limited warranty for the Product extends for ONE (1) year beginning on the date of the purchase of the Product.
Nokia One-Year Limited Warranty itemized receipt. 6 The Consumer shall bear the cost of shipping the Product to the Customer Service Department of NOKIA. NOKIA shall bear the cost of shipping the Product back to the Consumer after the completion of service under this limited warranty.
a) The Consumer shall return the Product to the place of purchase for repair or replacement processing. b) If “a” is not convenient because of distance (more than 50 miles) or for other good cause, the Consumer may contact the Customer Service Department at NOKIA, at the phone number listed on page 134, for further instructions. c) The Consumer shall ship the Product prepaid and insured. Expenses related to removing the Product from an installation are not covered under this limited warranty.
Nokia One-Year Limited Warranty used components that have been reprocessed to allow machine compliance with Product performance and reliability specifications. 10 ANY IMPLIED WARRANTY OF MERCHANTABILITY, OR FITNESS FOR A PARTICULAR PURPOSE OR USE, SHALL BE LIMITED TO THE DURATION OF THE FOREGOING LIMITED WRITTEN WARRANTY. OTHERWISE, THE FOREGOING LIMITED WARRANTY IS THE CONSUMER’S SOLE AND EXCLUSIVE REMEDY AND IS IN LIEU OF ALL OTHER WARRANTIES, EXPRESS OR IMPLIED.
warranty including the provider or seller of any extended warranty or service agreement. 13 This is the entire warranty between NOKIA and the Consumer, and supersedes all prior and contemporaneous agreements or understandings, oral or written, and all communications relating to the Product, and no representation, promise or condition not contained herein shall modify these terms. 14 This limited warranty allocates the risk of failure of the Product between the Consumer and NOKIA.
22 Index Numerics 1-touch dialing assign a key . . . change numbers erase numbers . make a call . . . . . . . .53 . . . . .53 . . . . .54 . . . . .53 [Model], illustrated . . .. . .8 A abc and 123 modes switching between . . .25 access codes . . . . . . . . .65 accessibility accessibility solutions .60 alternate formats . . . .60 contact . . . . . . . . . . .60 features . . . . . . . . . .61 mobile inductive loopset 61 other features . . . . . .61 TTY . . . . . . . . . . . . .61 website . . . . . . . . .
unauthorized use . . . 121 assign a number type . . . 28 assigning voice tags . . . . 48 audio setttings . . . . . . . 58 automate voicemail . . . . 41 automatic redial . . . . . . 47 B back cover, removing . . . . 9 battery charging . . . . . . . . . 10 important information 12 information . . . . . . 115 installing . . . . . . . . . . 9 operating range . . . . 116 prolonging life . . . . . 12 removal . . . . . . . . . . 11 temperature range . . 116 voltage . . . . . . . . .
call timers, clearing . . . .39 call waiting . . . . . . . . . .45 end both calls . . . . . .45 end the active call . . . .45 end the active call only 45 reject a call . . . . . . . .45 reject a waiting call . . .45 switch between calls . .45 when receiving an incoming call . . . . .45 with call on hold . . . . .46 calls ending . . . forwarding ignoring . . making . . . redial last . rejecting . . . . . . . . . .45 . . . . . . . .46 . . . . . . . . .3 . . . . . . . .16 . . . . . . . . .3 . . . . . . . .
dlr-3p . . . . . . . . . . . . . 114 download connectivity software . . . pictures . . . . ringing tones . 102, 103 . . . . . . 76 . . . . . . 59 E e-mail . . . . . . . . . . . . . 73 compose and send . . . important numbers . . setup an e-mail profile 75 74 74 end both calls . . . . . . . . 45 end the active call . . . . . 45 entering addresses . . . . . . . names and numbers notes, to phonebook number types . . . . text . . . . . . . . . . . . 28 . . 27 . . 28 . . 27 . . 23 equalizer . . . . . . . . .
in-call options . . . . . . . .43 Infrared connections . . . .99 interference . . . . . . . . . . .2 international dialing . . . .54 IR activating . . . . . . connecting to a PC IR status . . . . . . . receiving a business card . . . . sending a business card . . . . sending a reminder note . . . . . .99 . .101 . .100 . .101 . .100 M meeting note . . . . . . . . .91 memo note . . . . . . . . . .91 memory phone . . . . . phone and sim select . . . . . . SIM card . . . . . . . . . .32 . . . . . .32 . . . .
navigation of phone menus . . . using scroll method using shortcuts . . . network services about . . 17 . . 17 . . 18 ............6 Nokia pc suite . . . . . . . 102 number types . . . . . . . . 27 phone size . . . . . . . . . 129 phone weight . . . . . . . 129 picture messages . . . 76 . . . 77 . . . 76 PIN 2 code . . . . . . . . . . 67 compose and send modifying . . . . . when received . . . PIN code changing . . . . . PIN code request O options while in a call . . . . . .
. . . . . . . . . .55 . . . . . . . . . .56 . . . . . . . . . .57 PUK codes . . . . . . . . . . .68 R rapid travel charger . . .113 read messages . . . . . . . .72 receive a TTY call . . . . . .63 received calls . . . . . . . . .37 selecting timed . . tty/tdd . record a phone conversation . . . .53 record a voice memo . . . .52 recorded memos, viewing 52 reference information batteries and chargers 115 reject a call . . . . . . . . . .45 reminders . . . . . . . . . .101 remove the battery . . . . .
SIM card templates capacity . . . . . . copying entries . emergency calls . if rejected . . . . installing . . . . . non-owner . . . . PIN code . . . . . removing . . . . . security levels . . selecting memory service numbers . . . . . 31 . . . . 33 . . . 120 . . . . 68 .....9 . . . . 64 . . . . 66 . . . . 11 . . . . 64 . . . . 32 . . . . 35 size, phone . . . . . . . . . 129 software download . . . 102 spare battery charger . . 112 special characters . . 71 . . 71 speed dialing . . . . . . . . .
use with headset voice dial .49, 51 .49 .48 .49 voice recorder . . . . . . . .51 erase memos . . . . . . .52 playback a memo . . . .52 playback memos . . . . .52 record a memo . . . . . .52 W wallet change or erase a tag notes about voice tags using . . . . . . . . . . . record a phone conversation . . view memos . . . . . . view recorded memos .53 .52 .52 voice tags . . . . . . . . . . .48 assign . . . . . . . . . . .48 assigning . . . . . . . . .48 change or erase . . . . .49 changing . . . . . . .