-
-
Microsoft Visual Studio 2010 ® ® A Beginner’s Guide
-
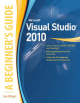
About the Author Joe Mayo started his software development career in 1986, working on an RCA Spectrum 70 mainframe computer, programming in assembly language where input was via Hollerith card, output was a line printer, and the debugging experience was a light panel where you had to push buttons to load registers and step through commands. Since then, Joe has worked with various mini-computers, workstations, and PCs.
-
Microsoft Visual Studio 2010 ® ® A Beginner’s Guide Joe Mayo New York Chicago San Francisco Lisbon London Madrid Mexico City Milan New Delhi San Juan Seoul Singapore Sydney Toronto
-
Copyright © 2010 by The McGraw-Hill Companies. All rights reserved. Except as permitted under the United States Copyright Act of 1976, no part of this publication may be reproduced or distributed in any form or by any means, or stored in a database or retrieval system, without the prior written permission of the publisher. ISBN: 978-0-07-166896-5 MHID: 0-07-166896-9 The material in this eBook also appears in the print version of this title: ISBN: 978-0-07-166895-8, MHID: 0-07-166895-0.
-
To my son, Kamo.
-
This page intentionally left blank
-
Contents at a Glance PART I Understanding Visual Studio 2010 Essentials 1 Introducing Visual Studio 2010 ........................................... 2 Learning Just Enough C# or VB.NET: Basic Syntax ..................... 3 35 3 Learning Just Enough C# and VB.NET: Types and Members ............ 67 4 Learning Just Enough C# and VB.NET: Intermediate Syntax ...........
-
viii Microsoft Visual Studio 2010: A Beginner’s Guide 10 Designing Silverlight Applications . . . . . . . . . . . . . . . . . . . . . . . . . . . . . . . . . . . . . . . . 285 11 Deploying Web Services with WCF . . . . . . . . . . . . . . . . . . . . . . . . . . . . . . . . . . . . . . . 299 PART IV Enhancing the VS 2010 Experience 12 Customizing the Development Environment 13 Extending Visual Studio 2010 PART V . . . . . . . . . . . . . . . . . . . . . . . . . . . . . . 341 . . . . . . . . . . . .
-
Contents ACKNOWLEDGMENTS . . . . . . . . . . . . . . . . . . . . . . . . . . . . . . . . . . . . . . . . . . . . . . . . . . . . . . . . . . . xvii INTRODUCTION . . . . . . . . . . . . . . . . . . . . . . . . . . . . . . . . . . . . . . . . . . . . . . . . . . . . . . . . . . . . . . . . . . xix PART I Understanding Visual Studio 2010 Essentials 1 Introducing Visual Studio 2010 . . . . . . . . . . . . . . . . . . . . . . . . . . . . . . . . . . . . . . . . . . . What Is Visual Studio 2010 About? . . . . .
-
x Microsoft Visual Studio 2010: A Beginner’s Guide Floating Windows . . . . . . . . . . . . . . . . . . . . . . . . . . . . . . . . . . . . . . . . . . . . . . . . . . . . . . . . . . . . Tabbed Windows . . . . . . . . . . . . . . . . . . . . . . . . . . . . . . . . . . . . . . . . . . . . . . . . . . . . . . . . . . . . . Closing and Opening Windows . . . . . . . . . . . . . . . . . . . . . . . . . . . . . . . . . . . . . . . . . . . . . . . Modifying Environment Settings after Setup . . . . . . . . . . .
-
Contents Returning Data and Using Method Results . . . . . . . . . . . . . . . . . . . . . . . . . . . . . . . . . . . . Method Snippets . . . . . . . . . . . . . . . . . . . . . . . . . . . . . . . . . . . . . . . . . . . . . . . . . . . . . . . . . . . . . . Coding Fields and Properties . . . . . . . . . . . . . . . . . . . . . . . . . . . . . . . . . . . . . . . . . . . . . . . . . . . . . . . . Declaring and Using Fields . . . . . . . . . . . . . . . . . . . . . . . . . . . . . . . . . . . . . . . . . .
-
xii Microsoft Visual Studio 2010: A Beginner’s Guide Compiling Applications . . . . . . . . . . . . . . . . . . . . . . . . . . . . . . . . . . . . . . . . . . . . . . . . . . . . . . . . . . . . . Building Solutions/Projects . . . . . . . . . . . . . . . . . . . . . . . . . . . . . . . . . . . . . . . . . . . . . . . . . . . Rebuilding Solutions/Projects . . . . . . . . . . . . . . . . . . . . . . . . . . . . . . . . . . . . . . . . . . . . . . . . . Cleaning Solutions/Projects . . . . . . . . . . . . . .
-
Contents Learning Language Integrated Query (LINQ) . . . . . . . . . . . . . . . . . . . . . . . . . . . . . . . . . . . . . . . Querying Object Collections with LINQ . . . . . . . . . . . . . . . . . . . . . . . . . . . . . . . . . . . . . . Creating a LINQ Projection with Anonymous Types .......................... Using LINQ to Sort Collection Results . . . . . . . . . . . . . . . . . . . . . . . . . . . . . . . . . . . . . . . . Handling Data with LINQ to SQL .............................................
-
xiv Microsoft Visual Studio 2010: A Beginner’s Guide Assigning MasterPage Files . . . . . . . . . . . . . . . . . . . . . . . . . . . . . . . . . . . . . . . . . . . . . . . . . . . Partial Views (a.k.a. User Controls) . . . . . . . . . . . . . . . . . . . . . . . . . . . . . . . . . . . . . . . . . . . Managing Routing . . . . . . . . . . . . . . . . . . . . . . . . . . . . . . . . . . . . . . . . . . . . . . . . . . . . . . . . . . . . . . . . . . Building a Customer Management Application . . . . . . .
-
Contents Writing Macros . . . . . . . . . . . . . . . . . . . . . . . . . . . . . . . . . . . . . . . . . . . . . . . . . . . . . . . . . . . . . . . . . . . . . Recording a Macro . . . . . . . . . . . . . . . . . . . . . . . . . . . . . . . . . . . . . . . . . . . . . . . . . . . . . . . . . . . Saving a Macro . . . . . . . . . . . . . . . . . . . . . . . . . . . . . . . . . . . . . . . . . . . . . . . . . . . . . . . . . . . . . . . Editing Macros . . . . . . . . . . . . . . . . . . . . . . . . . . . . .
-
This page intentionally left blank
-
Acknowledgments A work of this magnitude is never the ramblings of a single author, but a successful combination of dedication from a team of highly skilled professionals. I would like to personally thank several people who helped make this book possible. Jane Brownlow, Executive Editor, helped kick off the book and got it started on the right path. Megg Morin, Acquisitions Editor, took the reins from Jane and led the rest of the way.
-
This page intentionally left blank
-
Introduction V isual Studio has been the primary integrated development environment (IDE) for Microsoft software development for several years. Visual Studio 2010 (VS), the subject of this book, is therefore a mature evolution, building upon the success of its predecessors. This book will show you how to leverage Visual Studio 2010 to your advantage, increasing your skill set, and helping you become more productive in building software. The software you will learn to write will be for .
-
xx Microsoft Visual Studio 2010: A Beginner’s Guide This book has 13 chapters and is divided into four parts and a couple of appendixes as reference material. The following provides an overview of each section: ● Part I: Understanding Visual Studio 2010 Essentials Chapter 1 begins with an explanation of what VS is, its benefits to you, and what type of applications VS will help you build.
-
Introduction Extensible Markup Language (XML) called XML Application Markup Language (XAML). Considering that this is a beginner’s book, I added a couple of appendixes that cover XML and XAML. I recommend that you read the appendixes before reading Chapters 8 and 10.
-
This page intentionally left blank
-
Part I Understanding Visual Studio 2010 Essentials
-
This page intentionally left blank
-
Chapter 1 Introducing Visual Studio 2010 3
-
4 Microsoft Visual Studio 2010: A Beginner’s Guide Key Skills & Concepts ● Learn What Visual Studio 2010 Can Do for You ● Install and Choose Among Installation Options ● Understand What Types of Applications You Can Build Y our first experience with Visual Studio (VS) 2010 is often installation. As with most software, VS is rather easy to install; this chapter describes the installation process and gives you tips to help understand available options.
-
Chapter 1: Introducing Visual Studio 2010 automatically generated code. VS offers many premade controls, which include skeleton code, saving you from having to write your own code for repetitive tasks. Many of the more complex controls contain wizards that help you customize the control’s behavior, generating code based on wizard options you choose. Rapid Coding Experience The VS editor optimizes your coding experience.
-
6 Microsoft Visual Studio 2010: A Beginner’s Guide Installing Visual Studio 2010 Hopefully the preceding discussion whets your appetite on what VS can do for you. If you haven’t already installed VS, this section walks you through the setup process. The guidance along the way will explain how to choose among available options to customize the installation to your needs.
-
Chapter 1: Introducing Visual Studio 2010 Figure 1-2 Setup Welcome window 2. The next window you’ll see, Figure 1-2, is the welcome window, titled Microsoft Visual Studio 2010. Figure 1-2 shows that I’m installing the Ultimate version. Installation for other versions is similar, but the number of features available to install varies.
-
8 Microsoft Visual Studio 2010: A Beginner’s Guide Figure 1-3 Setup Licensing window 3. In Figure 1-3, you’ll see what components will be installed. You’ll need to read the VS license to ensure you understand what the terms are. The licensing terms can differ, depending on what type of package you acquired and your particular country or region. Once you’ve read the license, you’ll need to check “I have read and accept the license terms” to proceed.
-
Chapter 1: Introducing Visual Studio 2010 Figure 1-4 Setup Customization window your first installation and you have plenty of storage, you might want to go through the list and check everything to take a look at what is available. You can always return to this installation later and make adjustments. The configuration screen in Figure 1-4 shows that you can also change the location of where to install VS.
-
10 Microsoft Visual Studio 2010: A Beginner’s Guide Figure 1-5 Setup Progress window 5. During the installation, the VS installer will need to reboot your computer, showing the restart message in Figure 1-6. Make sure you close any applications you currently have open so that you don’t lose your work, and then click Restart Now.
-
Chapter 1: Introducing Visual Studio 2010 Figure 1-7 Setup Success window 6. When installation completes without error, you’ll see the Success window, shown in Figure 1-7. If you have errors during installation, this window will give you guidance on what to do to solve the problem. Your installation is now almost complete. You can install product documentation by clicking the Install Documentation button, shown in Figure 1-7.
-
12 Microsoft Visual Studio 2010: A Beginner’s Guide Figure 1-8 Checking for service releases Figure 1-9 Default Environment Settings window
-
Chapter 1: Introducing Visual Studio 2010 The choice you make for default environment settings depends a lot on what language or environment you’ll use to write software in. The environment settings choice isn’t locked in stone and can be reset if you decide you don’t like the settings. A later section of this chapter, “Modifying Environment Settings after Setup,” explains how to change environment settings.
-
14 Microsoft Visual Studio 2010: A Beginner’s Guide Figure 1-10 Visual Studio 2010 Start screen The Menu At the very top left of Figure 1-10, you’ll see the menu bar, which includes the words “File,” “Edit,” “View,” “Tools,” and so on. The menu bar is a standard part of most windows applications. Besides standard file management functionality, the File menu is where you visit to create new projects. The File menu also gives you access to recently opened files and projects.
-
Chapter 1: Introducing Visual Studio 2010 The Tools menu contains a grab-bag of functionality; for instance, you can attach a debugger to see your other programs run, line by line; connect to a database for data; set add-ins, macros, and more. One very important menu item on the Tools menu is Options, which exposes hundreds of settings for customizing your VS environment. You can use the Test menu to find all of the functionality for performing unit tests to test your new software one part at a time.
-
16 Microsoft Visual Studio 2010: A Beginner’s Guide Toolbox On the far left side of Figure 1-10 is a vertical tab, titled Toolbox, which contains a contextsensitive list of controls that can be dragged and dropped onto the current designer surface. The term “context-sensitive” means that certain items are visible or hidden, depending on where you’ve clicked last or what context you are working in, such as creating or editing a new Web page.
-
Chapter 1: Introducing Visual Studio 2010 Figure 1-11 Window title bar icons Expanding and Collapsing Windows Hovering over the Toolbox tab will expand the Toolbox and display a set of three icons in the title bar of the Toolbox window: Window Position (down arrow), Hide (pin), and Close (cross). You can see what the Toolbox window looks like when expanded in Figure 1-12; the pin in the Hide icon is sideways and the vertical tab still appears in the left margin.
-
18 Microsoft Visual Studio 2010: A Beginner’s Guide If you move the carat away from the Toolbox, the Toolbox will collapse and turn back into a tab on the left side of the screen. For any collapsed window, such as the Toolbox, you can expand that collapsed window and click the Hide (pin) icon to pin the window, which will make the window layout similar to the Solution Explorer.
-
Chapter 1: Introducing Visual Studio 2010 Figure 1-14 Dragging a window for docking As shown in Figure 1-14, you’ll see a visual set of icons appear over the workspace, indicating the docking zones where you can move the window to. The shadow of the window will show what the new location will be whenever you drag a window into a docking zone. Dropping the window into the docking zone will move the window from its old docking zone into the new docking zone.
-
20 Microsoft Visual Studio 2010: A Beginner’s Guide Figure 1-15 Floating a window Tabbed Windows An example of using the Dock As Tabbed Document option is the Start page. Any window set as Dock As Tabbed Document will appear as a new tab in the work area, along with all the other windows set as Dock As Tabbed Document. For example, if the Toolbox is set as Dock As Tabbed Document, it will become a tabbed document in the same group as the Start window, as shown in Figure 1-16.
-
Chapter 1: Introducing Visual Studio 2010 Figure 1-16 Tabbed document windows Closing and Opening Windows Clicking the Close icon on a window title bar will close the window. Another way to close the window is by selecting the Hide option from the Window Position icon menu. Reopening a window depends on what type of window it is: VS or Project Item. If the window is from VS, you can re-visit the View menu and select the window you need to open.
-
22 Microsoft Visual Studio 2010: A Beginner’s Guide Modifying Environment Settings after Setup Reasons for modifying environment settings include wanting to reset everything back to a default, importing shared settings from another developer, or switching between settings for different projects. This section will explain how to modify your settings and achieve each of these goals.
-
Chapter 1: Introducing Visual Studio 2010 Exporting Selected Environment Settings We’ll start off with export, which you might use to share your settings with another developer. This could also be useful if you planned to make significant changes to your settings and wanted a backup in case you wanted to revert to previous settings. To perform the export, choose the “Export selected environment settings” option from Figure 1-17 and click Next to display the Choose Settings To Export window in Figure 1-18.
-
24 Microsoft Visual Studio 2010: A Beginner’s Guide Figure 1-19 Name Your Settings File window The two text boxes in Figure 1-19 are for a filename and path where the settings file will be saved. Notice that the default filename includes the date, which could be helpful if you ever need to restore settings. Click Finish, which will perform the export and show you the Complete window in Figure 1-20 after the export operation is done. Click Close to close the window.
-
Chapter 1: Introducing Visual Studio 2010 Figure 1-20 Export Complete window open VS and select Tools | Import and Export Settings, which opens the Import and Export Settings Wizard shown in Figure 1-17. Choose the “Import selected environment settings” option and click Next to view the Save Current Settings window shown in Figure 1-21. TIP You can search for various color schemes for Visual Studio on the Internet to download. One site, at the time of this writing, is http://winterdom.
-
26 Microsoft Visual Studio 2010: A Beginner’s Guide Figure 1-21 Save Current Settings window The Save Current Settings window allows you to back up your current environment settings before changing them. If you do a backup, you will be able to restore later in case something doesn’t work out the way you intended with the import. You can choose not to back up also. Click Next to view the Choose A Collection Of Settings To Import window in Figure 1-22.
-
Chapter 1: Introducing Visual Studio 2010 Figure 1-22 Choose A Collection Of Settings To Import window click Browse and navigate to the location where a settings file is located. After selecting a settings file, click Next, which brings you to the Choose Settings To Import window shown in Figure 1-23. The Choose Settings To Import window allows you to specify only those settings that you want in your environment. It will only update the settings checked in Figure 1-23.
-
28 Microsoft Visual Studio 2010: A Beginner’s Guide Figure 1-23 Choose Settings To Import window Your import is now complete, and you can click the Close window. Another settings option is to reset your current settings to one of the VS default options, explained next. Resetting All Settings You could reset settings if you wanted to restore the default settings in VS or if you wanted to switch between default VS settings.
-
Chapter 1: Introducing Visual Studio 2010 Figure 1-24 Import Complete window Figure 1-25 shows that you can select among a set of default settings for VS. Each of these default settings are the same as what you selected during installation, previously shown in Figure 1-9 and the Default Settings branch of Figure 1-22. Choose a setting and click Finish, which starts the reset operation. When the reset is done, you’ll see the Reset Complete window, shown in Figure 1-26.
-
30 Microsoft Visual Studio 2010: A Beginner’s Guide Figure 1-25 Default Collection Of Settings window Familiarization with Visual Studio Project Types Visual Studio includes a plethora of project types, making it easy to build applications with premade templates. The following discussion will show how to find what project types are available and describe what those project types are. To see what projects are available, select File | New | Project, as shown in Figure 1-27.
-
Chapter 1: Introducing Visual Studio 2010 Figure 1-26 Reset Complete window In addition to a new project, Figure 1-27 shows that you can create a new Web site, just open a file for editing, or open a wizard that creates a new project from existing files. We’ll look at many of these options later in the book, but let’s take a look at the New Project window, Figure 1-28, which opened as a result of selecting File | New | Project.
-
32 Microsoft Visual Studio 2010: A Beginner’s Guide Figure 1-27 Selecting a New Project via the File menu earlier in this chapter, the default set of project types would have been VB and C# projects would be listed in the Other Languages branch. The following sections describe the types of projects available, some of which you’ll learn how to create later in this book.
-
Chapter 1: Introducing Visual Studio 2010 Figure 1-28 New Project window Other windows projects include Windows Services, which are applications that are always on and run as a service in the background without a GUI, Class Libraries for holding reusable code often referred to as middleware, and Control Libraries for holding graphical controls that can be dragged-and-dropped from the Toolbox onto a visual designer within VS. Web Projects Web projects include ASP.
-
34 Microsoft Visual Studio 2010: A Beginner’s Guide Office Projects For years, developers have been writing Visual Basic for Applications (VBA) programs to automate Microsoft Office applications. An Office project allows you to automate Office applications through .NET using languages such as VB and C#. Supported Office applications include Excel, Word, Project, PowerPoint, Outlook, Visio, and InfoPath. SharePoint Projects SharePoint is a technology for building portal-style Web applications.
-
Chapter 2 Learning Just Enough C# or VB.
-
36 Microsoft Visual Studio 2010: A Beginner’s Guide Key Skills & Concepts ● Learn Basics of Starting a Project ● Use the VS Editor ● Code Expressions and Statements T he .NET platform supports several different programming languages. Since all of the languages run on the same platform and share the same class libraries, language choice becomes a personal choice of preference. In other words, you can accomplish the same tasks, regardless of what programming language you use. With .
-
Chapter 2: Learning Just Enough C# or VB.NET: Basic Syntax Figure 2-1 The New Project window To get started, open VS and select File | New | Project. You’ll see the New Project window, shown in Figure 2-1. Your first task is to select Console Application as the program type. Then set the program name to FirstProgram and specify a location of your choice for where the project will be created. Other features of the New Project window include the ability to specify the .
-
38 Microsoft Visual Studio 2010: A Beginner’s Guide Along the very top center of the dialog shown in Figure 2-1, the .NET Framework is the set of class libraries, runtime, and languages that is the development platform supported by VS. VS allows you to target multiple versions of the .NET Framework, including versions 2.0, 3.0, 3.5, and 4.0. VS will compile your code against the version you choose. Generally, you’ll want to begin all new projects with the latest version, 4.
-
Chapter 2: Learning Just Enough C# or VB.NET: Basic Syntax into a project depend on the project type. For example, there are project items that are part of a WPF application but wouldn’t be part of a Console application. Of particular interest in the FirstProgram project is the file named Program.cs (or Module1.vb if programming in VB), which is a code file, as we’ll discuss in the next section.
-
40 Microsoft Visual Studio 2010: A Beginner’s Guide The skeleton code in Listing 2-1 is what VS created when the new Console application was created. It is there to give you a head start on writing your program. What you now have is a whole computer program. This program doesn’t do much of anything at this point, but it will actually run and then end itself. Looking at the whole program, you can see that there are sets of nested curly braces in the C# code.
-
Chapter 2: Learning Just Enough C# or VB.NET: Basic Syntax that belong to each instance. If an object such as Customer has methods that belong to each instance, those methods are not static. However, if the Customer object type has a method that is static, then there would only be a single copy of that method that is shared among all Customer objects.
-
42 Microsoft Visual Studio 2010: A Beginner’s Guide which you’ll see many times throughout this book. The Console application defined the skeleton code class to have the name Program. In reality you can name the class anything you want. Whatever names you choose should make sense for the purpose of the class. For example, it makes sense for a class that works with customers to be named Customer and only contain methods that help you work with customers.
-
Chapter 2: Learning Just Enough C# or VB.NET: Basic Syntax The using directives at the top of the C# part of Listing 2-1 are really a shortcut that makes it easier for you to write code. For example, the System namespace contains the Console class. If the using System directive were not present, you would be required to write System.Console.WriteLine instead of just Console.WriteLine. This was a short example, but using directives can help clean up your code and make it more readable.
-
44 Microsoft Visual Studio 2010: A Beginner’s Guide The following sections examine various elements of the Code editor, starting with class and member locators. Class and Member Locators The two drop-down lists, class locator and member locator, at the top of the editor are for navigating the code.
-
Chapter 2: Learning Just Enough C# or VB.NET: Basic Syntax Figure 2-4 The Bookmarks window One of the entries in Table 2-1, CTRL-W, B opens the Bookmarks window shown in Figure 2-4, allowing you to manage bookmarks throughout your application. The bookmark has a toolbar, which is the same toolbar that appears in VS when the editor window is active. The actions on the toolbar include the items from Table 2-1, plus the ability to move between folders.
-
46 Microsoft Visual Studio 2010: A Beginner’s Guide Figure 2-5 The Options window Figure 2-6 C# code editor options
-
Chapter 2: Learning Just Enough C# or VB.NET: Basic Syntax The Options window in Figure 2-6 is opened to Text Editor, C#, Formatting New Lines. As you can see, there are very detailed settings for even how the editor automatically formats new lines and where braces appear. If the code doesn’t format the way you want it to, visit this page to set the options to what you please. Saving Time with Snippets Snippets are important to learn because they will save you time.
-
48 Microsoft Visual Studio 2010: A Beginner’s Guide Figure 2-8 Filling in the Snippet template You can identify snippets in the completion list by the torn paper icon. At this point, you can press the TAB key to complete the namespace keyword. Then press TAB again to produce a template where you can fill out the highlighted fields. Figure 2-8 shows the results of creating a namespace snippet by typing n and pressing TAB, TAB.
-
Chapter 2: Learning Just Enough C# or VB.NET: Basic Syntax Coding Expressions and Statements There are various types of statements you can write with both C# and VB, including assignment, method invocations, branching, and loops. We’ll start off by looking at primitive types, such as integers and strings, and then I’ll show how to build expressions and set values by performing assignments. Then you’ll learn about branching statements, such as if and switch in C# or the case statement in VB.
-
50 Microsoft Visual Studio 2010: A Beginner’s Guide You know that there is a dot operator between Console and WriteLine, so go ahead and type the period character, which causes VS to display “Console.” in the editor and show you a new completion list that contains members of the Console class that you can now choose from. NOTE So, I’ll admit that I spent a couple paragraphs trying to explain to you how to save a single keystroke, but that’s not the only thing you should get out of the explanation.
-
Chapter 2: Learning Just Enough C# or VB.NET: Basic Syntax Figure 2-10 Intellisense options Notice that there is a text box titled “Committed by typing the following characters,” which contains a set of characters that will cause VS to type the rest of the selected identifier in the completion list plus the character you typed. Referring back to Step 4, this is how you know that a period commits the current selection. You now have a program that does something; it can print a message to the console.
-
52 Microsoft Visual Studio 2010: A Beginner’s Guide To run with debugging, either select Debug | Start Debugging or press F5. Because of the way the application is coded so far, the Command Prompt window will quickly run and close; you might miss it if you blink your eyes. To prevent this, you can add a Console.ReadKey statement below Console.WriteLine, which will keep the window open until you press any key. Here’s the updated Main method: C#: static void Main(string[] args) { Console.
-
Chapter 2: Learning Just Enough C# or VB.NET: Basic Syntax VB C# .
-
54 Microsoft Visual Studio 2010: A Beginner’s Guide Consistent with Table 2-2, C# uses int and VB uses Integer as their native type definitions for a 32-bit signed integer. Additionally, you see age defined in both C# and VB using the .NET type, Int32. Notice that the .NET type is the same in both languages. In fact, the .NET type will always be the same for every language that runs in .NET. Each language has its own syntax for the .NET types, and each of the language-specific types is said to alias the .
-
Chapter 2: Learning Just Enough C# or VB.NET: Basic Syntax The Ternary and Immediate If Operators The C# ternary and VB immediate if operators allow you to test a condition and return a different value depending on whether that condition is true or false. Listing 2-2 shows how the ternary and immediate if operators work.
-
56 Microsoft Visual Studio 2010: A Beginner’s Guide Listing 2-3 An example of an enum C#: public enum BankAccount { Checking, Saving, Loan } VB: Enum BankAccount Checking Saving Loan End Enum Listing 2-4 shows how you can use the BankAccount enum: Listing 2-4 Using an enum C#: BankAccount accountType = BankAccount.Checking; string message = accountType == BankAccount.Checking ? "Bank Account is Checking" : "Bank Account is Saving"; VB: Dim accountType As BankAccount = BankAccount.
-
Chapter 2: Learning Just Enough C# or VB.NET: Basic Syntax The accountType enum variable is a BankAccount and is initialized to have the value of the Checking member of BankAccount. The next statement uses a ternary operator to check the value of accountType, evaluating whether it is Checking. If so, message is assigned with the first string. Otherwise, message is assigned with the second string. Of course, we know it’s the first string because the example is so simple that you can see it is coded that way.
-
58 Microsoft Visual Studio 2010: A Beginner’s Guide Figure 2-11 The C# if statement snippet template itself, so we call it a clause because it can be part of an if statement. An example of an else clause is shown here: C#: if (result > 48) { Console.WriteLine("result is > 48"); } else { Console.WriteLine("result is <= 48"); } VB: If result > 48 Then Console.WriteLine("Result is > 48") Else Console.
-
Chapter 2: Learning Just Enough C# or VB.NET: Basic Syntax As shown in Figure 2-11, the template brings you to a highlighted field for specifying the condition of the if statement. For C#, type the condition you want evaluated and press ENTER; the snippet completes by placing your carat within the if statement block. For VB, just place your cursor where you want to begin typing next. In C#, the else statement snippet is similar to if.
-
60 Microsoft Visual Studio 2010: A Beginner’s Guide Figure 2-13 A switch snippet template is required. When the program executes a break statement, it stops executing the switch statement and begins executing the next statement after the last curly brace of the switch statement. For the VB example, the Select Case statement uses name as the condition and executes code based on which case matches name. The Case Else code block will run if no other cases match.
-
Chapter 2: Learning Just Enough C# or VB.NET: Basic Syntax In C#, you normally just add the case statements you need. However, there is a special feature of the switch snippet that makes it even more efficient to use enums, creating a case for each enum value automatically. In the following example, we use the accountType variable of the enum type BankAccount from Listing 2-3.
-
62 Microsoft Visual Studio 2010: A Beginner’s Guide Figure 2-15 The C# for loop snippet template In the preceding C# loop, i is a variable of type int, the loop will continue to execute as long as i is less than 3, and i will be incremented by one every time after the loop executes. The condition, i < 3, is evaluated before the loop executes, and the loop will not execute if the condition evaluates to false.
-
Chapter 2: Learning Just Enough C# or VB.NET: Basic Syntax and hold objects in memory in different forms, which could be Stack, List, Queue, and more. Here’s an example that loops on an array of strings: C#: string[] people = { "Megan", "Joe", "Silvia" }; foreach (var person in people) { Console.WriteLine(person); } VB: Dim people = {"Megan", "Joe", "Silvia"} For Each person As String In people Console.
-
64 Microsoft Visual Studio 2010: A Beginner’s Guide Figure 2-18 The VB For Each loop snippet template While Loops A while loop will allow a block of code to execute as long as a specified condition is true. Here’s an example that does a countdown of numbers: C#: int count = 3; while (count > 0) { Console.WriteLine("count: " + count); count--; } VB: Dim count As Integer = 3 While count > 0 Console.
-
Chapter 2: Learning Just Enough C# or VB.NET: Basic Syntax Figure 2-20 The VB while loop snippet template Do Loops You can use a do loop if you want the code in the loop to execute at least one time. Here’s an example that demonstrates a simple menu that obtains user input: C#: string response = ""; do { Console.Write("Press 'Q' and Enter to break: "); response = Console.ReadLine(); } while (response != "Q"); VB: Do Console.Write("Press Q and Enter to break: ") response = Console.
-
66 Microsoft Visual Studio 2010: A Beginner’s Guide Figure 2-22 The VB do loop while snippet template Fill in the condition on the do loop and press ENTER, placing the carat in the do loop block. For a VB Do snippet type ?, TAB, C, ENTER, C, ENTER, and use an arrow key to select the variant of Do loop that you want. Figure 2-22 shows an example of the Do Loop While template. Summary Working with languages is a core skill when building .NET applications. Two of the most used languages in .
-
Chapter 3 Learning Just Enough C# and VB.
-
68 Microsoft Visual Studio 2010: A Beginner’s Guide Key Skills & Concepts ● Create Classes ● Write Methods ● Code Fields and Properties A type is a general term for classes, modules, enums, and more. This chapter will specifically discuss the class type, which allows you to create your own custom types. You’ll also see the value of a class when you learn about class members. You’ll see how the field, method, and property class members can be used.
-
Chapter 3: Learning Just Enough C# and VB.NET: Types and Members { public class Employee { public string FirstName; } } VB: Public Class Employee Public Dim FirstName As String End Class The C# Employee class is nearly the same as the Program class that you created in the preceding chapter, except that the class name here is Employee. In VB, you’ve only created a module before, and the Employee class is your first class for this book.
-
70 Microsoft Visual Studio 2010: A Beginner’s Guide Now that you can define a new class, create an instance from that class, and use it, the next section shows you another feature of classes called inheritance. Class Inheritance One class can reuse the members of another through a feature known as inheritance.
-
Chapter 3: Listing 3-4 Learning Just Enough C# and VB.NET: Types and Members Code using inheritance C#: Cashier cashr = new Cashier(); cashr.FirstName = "May"; VB: Dim cashr As New Cashier cashr.FirstName = "May" According to Listing 3-4, Cashier does not have a field named FirstName. However, Employee does have a FirstName field and Cashier derives from Employee. Because of inheritance, Cashier automatically inherits FirstName, and the code in Listing 3-4 is perfectly legal.
-
72 Microsoft Visual Studio 2010: A Beginner’s Guide Just type in the class name in the field and press ENTER. The carat will locate to the inside of the class block. Now that you know how to create classes, you’ll need to know how to add members, starting with methods. Writing Methods You can divide your algorithms into blocks of code called methods. In different programming languages, methods are called functions, procedures, or subroutines.
-
Chapter 3: Learning Just Enough C# and VB.NET: Types and Members C#: (MessagePrinter.cs) using using using using System; System.Collections.Generic; System.Linq; System.Text; namespace FirstProgram { class MessagePrinter { public static void PrintMessageStatic() { Console.WriteLine("Hello from a static method."); } public void PrintMessageInstance() { Console.WriteLine("Hello from an instance method."); } } } VB (Module1.vb): Module Module1 Sub Main() MessagePrinter.
-
74 Microsoft Visual Studio 2010: A Beginner’s Guide Listing 3-5 has two types of methods, static and instance. In VB, shared methods are the same as static. You can tell which type of method each is because static methods have the static modifier (shared in VB), but instance methods don’t have a static (or shared in VB) modifier. First, let’s look at the static (shared) method declaration, and then you’ll see how it’s called.
-
Chapter 3: Learning Just Enough C# and VB.NET: Types and Members Since PrintMethodInstance is an instance method, you call it differently; through an instance of its containing type, which the following code repeats from Listing 3-5: C#: MessagePrinter msgPrint = new MessagePrinter(); msgPrint.PrintMessageInstance(); VB: Dim msgPrint As New MessagePrinter() msgPrinter.PrintMessageInstance() As this example shows, the type of msgPrint is MessagePrinter.
-
76 Microsoft Visual Studio 2010: A Beginner’s Guide { MessagePrinter msgPrint = new MessagePrinter(); string[] customerNames = { "Jones", "Smith", "Mayo" }; string reportTitle = "Important Customer Report"; msgPrint.PrintCustomerReport(customerNames, reportTitle); } } C# (MessagePrinter.cs): using using using using System; System.Collections.Generic; System.Linq; System.Text; namespace FirstProgram { public void PrintCustomerReport( string[] customers, string title = "Customer Report") { Console.
-
Chapter 3: Learning Just Enough C# and VB.NET: Types and Members VB (MessagePrinter.vb): Public Class MessagePrinter Sub PrintCustomerReport(ByVal customers As String(), ByVal title As String) Console.WriteLine(title) Console.WriteLine() For Each name In customers Console.WriteLine(name) Next End Sub End Class Parameters are a comma-separated list of identifiers, along with the type of each identifier, which clearly indicates what type of parameter the method is expecting.
-
78 Microsoft Visual Studio 2010: A Beginner’s Guide VB: Sub PrintCustomerReport( ByVal customers As String(), Optional ByVal title As String = "Customer Report") Console.WriteLine(title) Console.WriteLine() For Each name In customers Console.WriteLine(name) Next End Sub The preceding code requires callers to pass an array of customers, but it does not require a title. When writing methods, optional parameters must be listed last. Here’s a method call without the optional parameter: C#: custProg.
-
Chapter 3: Learning Just Enough C# and VB.NET: Types and Members namespace FirstProgram { class Program { static void Main(string[] args) { Calc mathProg = new Calc(); int squaredInt = mathProg.SquareInt(3); Console.WriteLine("3 squared is " + squaredInt); Console.ReadKey(); } } } C# (Calc.cs): using using using using System; System.Collections.Generic; System.Linq; System.Text; namespace FirstProgram { public class Calc { public int SquareInt(int number) { return number * number; } } } VB (Module1.
-
80 Microsoft Visual Studio 2010: A Beginner’s Guide Figure 3-2 The VB sub snippet template VB (Calc.vb): Public Class Calc Public Function SquareInt(ByVal number As Integer) As Integer Return number * number End Function End Class For the C# example, notice how the return type of the SquareInt method is type int, rather than the keyword void that was used in our methods before. Whenever you specify a return type, the method must return something whose type is the same as the return type declared.
-
Chapter 3: Learning Just Enough C# and VB.NET: Types and Members Coding Fields and Properties A field is a variable that is a member of a class (type), as opposed to variables that are declared inside of methods, which are called local variables or locally scoped variables. Properties are type members that give you functionality that is a cross between fields and methods. You can read and write to a property just as you can to a field.
-
82 Microsoft Visual Studio 2010: A Beginner’s Guide public void Credit(decimal amount) { accountBalance += amount; } public void Debit(decimal amount) { accountBalance -= amount; } public decimal CurrentBalance { get { return accountBalance; } set { if (value < 0) { // charge fee } accountBalance = value; } } } } VB: Module Module1 Private Dim accountBalance As Decimal = 100 Sub Main() Credit(100) Debit(50) Console.WriteLine("Balance: " & CurrentBalance) Console.
-
Chapter 3: Learning Just Enough C# and VB.NET: Types and Members Public Property CurrentBalance() As Decimal Get Return accountBalance End Get Set(ByVal value As Decimal) If value < 0 Then ' charge fee End If accountBalance = value End Set End Property End Module Look at where accountBalance is declared: at the beginning of the Program (Module1 in VB) class block. It is at the same scope as Main and other methods, meaning that it is a member of Program (Module1 in VB), just like Main, Credit, and Debit.
-
84 Microsoft Visual Studio 2010: A Beginner’s Guide set { if (value < 0) { // charge fee } accountBalance = value; } VB: Public Property CurrentBalance() As Decimal Get Return accountBalance End Get Set(ByVal value As Decimal) If value < 0 Then ' charge fee End If accountBalance = value End Set End Property Properties have accessors, named get and set, that allow you to add special logic when the property is used.
-
Chapter 3: Learning Just Enough C# and VB.NET: Types and Members Since the CurrentBalance property returns the value of the accountBalance field, the Console.WriteLine statement will print the value read from CurrentBalance to the command line. Many of the properties you’ll write will simply be wrappers around current object state with no other logic, as in Listing 3-9.
-
86 Microsoft Visual Studio 2010: A Beginner’s Guide Listing 3-10 Auto-implemented properties C#: public string FirstName { get; set; } VB: Public Property FirstName As String Figure 3-4 The C# property snippet template The automatic property, FirstName, is logically equivalent to the expanded FirstName with accessors and backing field. Behind the scenes, the compiler produces the expanded version where the backing field is guaranteed to have a unique name to avoid conflicts.
-
Chapter 3: Learning Just Enough C# and VB.NET: Types and Members Summary You are now able to create classes to define your own custom types. After learning how to create classes and use class instances, also known as objects, you learned how to add fields, methods, and properties to your class definition. The methods discussion was more in-depth, showing you how to define parameters and return values.
-
This page intentionally left blank
-
Chapter 4 Learning Just Enough C# and VB.
-
90 Microsoft Visual Studio 2010: A Beginner’s Guide Key Skills & Concepts ● Use Delegates and Events ● Implement Interfaces ● Code with Arrays and Generics I n previous chapters, you learned basic syntax and how to create your own types. This chapter rounds out the bare essentials of what you need to know with delegates and events, interfaces, and a quick introduction to arrays and generics.
-
Chapter 4: Learning Just Enough C# and VB.NET: Intermediate Syntax The next section will add more logic to the set accessor in CurrentBalance in the next listing and raise an event for the calling code. Events An event is a type of class member that allows your class or class instance to notify any other code about things that happen within that class. To help you understand the use of events, this section will associate an event with the accountBalance of an account.
-
92 Microsoft Visual Studio 2010: A Beginner’s Guide { Program account = new Program(); account.OverDraft += new EventHandler(account_OverDraft); account.CurrentBalance = -1; Console.ReadKey(); } public decimal CurrentBalance { get { return accountBalance; } set { if (value < 0) { if (OverDraft != null) { OverDraft(this, EventArgs.Empty); } } accountBalance = value; } } static void account_OverDraft(object sender, EventArgs e) { Console.
-
Chapter 4: Learning Just Enough C# and VB.NET: Intermediate Syntax Console.ReadKey() End Sub Public Event OverDraft As EventHandler Public Sub AccountOverdraft (ByVal sender As Object, ByVal e As EventArgs) Console.WriteLine("Overdraft Occurred") End Sub End Module Listing 4-1 has an event named OverDraft. The OverDraft event is public and is declared with the event keyword.
-
94 Microsoft Visual Studio 2010: A Beginner’s Guide Delegates Delegates let you hook up methods as the receiver to specific events. The delegate specifies the allowable signature, the number of arguments, and their types, of a method that is allowed to be hooked up to the event as a listener or handler.
-
Chapter 4: Learning Just Enough C# and VB.NET: Intermediate Syntax In the C# example, the += syntax is for assigning a delegate to an event (using a bit of programmer slang, this syntax is commonly said to “wire up an event”). The VB example uses AddHandler and AddressOf to assign the AccountOverDraft method to the OverDraft event. In the C# example, the delegate is a new instance of EventHandler and the event is OverDraft.
-
96 Microsoft Visual Studio 2010: A Beginner’s Guide Figure 4-2 Code completion for handler method creation As you can see, the Editor pops up a tooltip instructing you to type TAB to create a new delegate instance. Type TAB and Code Completion will pop up another tooltip for creating the handler method, as shown in Figure 4-2. In Figure 4-2, you can see that Code Completion is suggesting a method name for you. You have a choice of pressing TAB or changing the method name and then pressing TAB.
-
Chapter 4: Learning Just Enough C# and VB.NET: Intermediate Syntax Creating an Interface To create an interface, right-click the project in Solution Explorer, select Add | New Item, select Code under the language branch in Installed Templates, and select the Interface item. Name the Interface IAccount and click Add. By standard convention, you will always name any interface class you create with a name that starts with an uppercase letter I.
-
98 Microsoft Visual Studio 2010: A Beginner’s Guide Making Classes Implement the Interface To create a class, right-click the project in Solution Explorer, select Add | New Item, select Code under the language branch in Installed Templates, and select the Class item. Name the class Checking and click Add. Using the same procedure as Checking, add another class, but name it Saving. Listings 4-3 and 4-4 show the two new classes.
-
Chapter 4: Learning Just Enough C# and VB.NET: Intermediate Syntax ' Implement Checking logic CurrentBalance += amount Console.Writeline("Added " & amount.ToString() & " to Checking Account") End Sub Public Sub Debit(ByVal amount As Decimal) Implements IAccount.Debit ' Implement Checking logic CurrentBalance -= amount Console.Writeline("Debited " + amount.ToString() + " from Checking Account") End Sub Public Property CurrentBalance As Decimal Implements IAccount.
-
100 Microsoft Visual Studio 2010: A Beginner’s Guide public decimal CurrentBalance { get; set; } } } VB: Public Class Saving Implements IAccount Public Sub Credit(ByVal amount As Decimal) Implements IAccount. Credit ' Implement Saving logic CurrentBalance += amount Console.Writeline("Added " & amount.ToString() & " to Saving Account") End Sub Public Sub Debit(ByVal amount As Decimal) Implements IAccount.Debit ' Implement Saving logic CurrentBalance -= amount Console.Writeline("Debited " + amount.
-
Chapter 4: Learning Just Enough C# and VB.NET: Intermediate Syntax In the C# listing, following the class name by a colon and then the interface name specifies that the class will implement the interface. The VB listing uses the Implements keyword to indicate that Checking and Saving classes implement the IAccount interface. Looking at both Checking and Saving, you can see that they have the Credit, Debit, and CurrentBalance members that are specified in IAccount.
-
102 Microsoft Visual Studio 2010: A Beginner’s Guide Saving[] savingAccounts = GetSavingAccounts(); foreach (var savingAcct in savingAccounts) { savingAcct.
-
Chapter 4: Learning Just Enough C# and VB.
-
104 Microsoft Visual Studio 2010: A Beginner’s Guide GetCheckingAccounts, which I did on purpose so that you’ll see different ways to use loops; but this doesn’t affect the calling code because it’s encapsulated in individual methods. The point to make here is that GetCheckingAccounts will only return Checking class instances and GetSavingsAccounts will only return Saving class instances. The rest of the algorithm in the ProcessPayrollForCheckingAndSavingAccounts method mirrors the processing for Checking.
-
Chapter 4: Learning Just Enough C# and VB.NET: Intermediate Syntax VB: Sub ProcessPayrollForAllAccounts() Dim accounts As IAccount() = GetAllAccounts() For Each account In accounts account.
-
106 Microsoft Visual Studio 2010: A Beginner’s Guide Figure 4-3 The C# interface snippet template invokes the Credit method on the runtime Checking or Saving instance. Your code that you wrote for Checking.Credit and Saving.Credit will execute as if your code called them directly as in Listing 4-5. Also observe that we’ve eliminated the duplication because one algorithm, namely IAccount.Credit() in our example, works on both Checking and Saving objects.
-
Chapter 4: Learning Just Enough C# and VB.NET: Intermediate Syntax Applying Arrays and Generics Whatever code you write will typically need to group objects into a single collection of that object type. For this, you can use an array, which is a container that can have zero or many elements, each holding an instance of a particular type. You’ll soon see how to use an array to locate the elements (items) you want. There are also generic collection classes in the .
-
108 Microsoft Visual Studio 2010: A Beginner’s Guide VB: Sub ArrayDemo() Dim stats(2) As Double stats(0) = 1.1 stats(1) = 2.2 stats(2) = 3.3 Dim sum As Double = 0 For i As Integer = 0 To 2 sum += stats(i) Next Console.WriteLine( stats(0) & " + " & stats(1) & " + " & stats(2) & " = " & sum) End Sub In the C# example of Listing 4-7, you can see that the stats variable is declared as double[], an array of type double.
-
Chapter 4: Learning Just Enough C# and VB.NET: Intermediate Syntax Coding Generics Generics are language features that allow you to write a piece of code that will work with multiple types efficiently. A generic class definition has a placeholder for the type you want it to represent, and you use this placeholder to declare the type you want to work with. There is an entire library of generic collections in .NET as well as generic types across the entire .NET Framework Class library.
-
110 Microsoft Visual Studio 2010: A Beginner’s Guide In .NET, the generic List type is declared as List, or List(Of T) in VB. The T is a type placeholder, where you can specify any type you want. For example, you could create a List for integers or a List for strings, which would be List(Of Integer) and List(Of String) in VB, respectively. In Listing 4-8, you can see that checkAccts is declared as List (List(Of Checking) in VB).
-
Part II Learning the VS 2010 Environment
-
This page intentionally left blank
-
Chapter 5 Creating and Building Projects 113
-
114 Microsoft Visual Studio 2010: A Beginner’s Guide Key Skills & Concepts ● Work with Projects and Solutions ● Set Properties in the Properties Window ● Reference and Use Class Libraries ● Compile and Run Projects ● Use the Class Designer P rojects and solutions are VS’s way of helping you organize your code for both development and deployment.
-
Chapter 5: Creating and Building Projects a project inside of a solution. Different project types have unique settings and options, but we’ll start by creating a Console application, which will reduce unnecessary detail and help focus on the common features of all project types. Creating a New Project As a shortcut, press CTRL-SHIFT-N to open the New Project window, shown in Figure 5-1. CTRL-N will only open a single file, which you can’t compile, so don’t forget the SHIFT key.
-
116 Microsoft Visual Studio 2010: A Beginner’s Guide VS will update the Solution Name with the same name. In a multiproject solution, this might not make sense. So, first type the project name and then you can provide a name for the solution that is more appropriate. In Figure 5-1, you can see that the project is named ProjectDemo and the solution is named SolutionDemo. VS allows you to put spaces in the names.
-
Chapter 5: Creating and Building Projects Figure 5-2 The Solution Explorer window change this by selecting Tools | Options | Projects And Solutions and checking the box for Always Show Solution. You can add multiple projects to a solution, as well as folders for organizing the projects. Right-click the solution name in the Solution Explorer and select Add | New Project, and you can add more projects. Add | Existing Project allows you to add a project that already exists to your opened solution.
-
118 Microsoft Visual Studio 2010: A Beginner’s Guide solution selected, all you’ll see is the Add A New Solution Folder button, so you’ll need to select a project before the Show All Files button will display. An example of a hidden file is the bin folder hierarchy that contains the output of your project when you compile. Examining Property Settings Each project has associated settings that you can configure.
-
Chapter 5: Creating and Building Projects to all projects. The following sections describe each of the features of the Application settings tab. Assembly Name VS projects create either *.dll or *.exe assemblies. The assembly name provides the filename for this project and defaults to the name of your project. From Figure 5-3, you can see that Assembly Name is set to ProjectDemo. Since this is a Console application, the output would be a *.exe. It follows that the filename would be ProjectDemo.exe.
-
120 Microsoft Visual Studio 2010: A Beginner’s Guide TIP If you have a WPF project, its Output Type is set to Windows Application. If you switched the Output Type of a WPF application to Console Application, you would see the Console window appear also. This might be useful for some intermediate debugging where you could emit Console.WriteLine messages.
-
Chapter 5: Creating and Building Projects If you select the Resources option, you can include a Win32 resources file, which you can then access through code in your application. This is another advanced scenario beyond the scope of this book. Assembly Information Clicking Assembly Information shows the window in Figure 5-4. This information is included in the assembly metadata when you build your project. Most of the information in this window is self-explanatory.
-
122 Microsoft Visual Studio 2010: A Beginner’s Guide Figure 5-5 File Properties window As you can see in Figure 5-5, the Assembly Information from the project properties is included with the file. This is convenient for you (or an end user) to be able to open the file and read pertinent information, especially version information, to know you’re working with the correct assembly, for debugging, or just to know what is on your system.
-
Chapter 5: Creating and Building Projects Assembly references are added to a project to tell the compiler where to find the types it is using in an application. When your compiler runs, it will know what types you have in your code and looks through the set of referenced assemblies to find that type. Adding an assembly reference doesn’t add all of the code from the referenced assembly to your code; it just tells the compiler where to look.
-
124 Microsoft Visual Studio 2010: A Beginner’s Guide (GAC), which is a shared repository of assemblies. Microsoft and third parties will place assemblies in the GAC to make it easier to share them by any programs. The COM tab shows all of the COM applications currently registered on your computer. For example, if you wanted to communicate with Excel, you would click the COM tab and add a reference to the version of Microsoft Office Excel that you are working with.
-
Chapter 5: Creating and Building Projects Figure 5-7 The VB My Project References tab open the Properties window by double-clicking My Project, click the References tab, select the reference to delete, and click Remove. Figure 5-7 shows the VB References tab. VB includes additional functionality on the References tab. For example, you can click Add to add a reference. You also click Unused References to remove references for assemblies that are not being used in your code.
-
126 Microsoft Visual Studio 2010: A Beginner’s Guide Within the SolutionDemo solution, we’ll create a new project for a class library. Right-click SolutionDemo and select Add | New Project. This time, select Class Library instead of Console Application and name it ClassLibraryDemo. Clicking OK will add a new Class Library Project to your SolutionDemo Solution. You will now have two projects in your solution.
-
Chapter 5: Creating and Building Projects If you’re using C# when you do this, VS will ask if you want to change the class filename from Class1 to Student. VB will make the class name change automatically, without asking. This is a convenient way to keep your classes and filenames in sync. It is common to create only one class per file. Listing 5-1 shows the new student file after renaming and adding code to make it functional. Listing 5-1 Class library code C#: using using using using System; System.
-
128 Microsoft Visual Studio 2010: A Beginner’s Guide Listing 5-2 Application code calling class library code C#: using using using using System; System.Collections.Generic; System.Linq; System.Text; using ClassLibraryDemo; namespace ProjectDemo { class Program { static void Main(string[] args) { string studentName = "Joe"; Student myStudent = new Student(); List grades = myStudent.GetStudentGrades(studentName); Console.
-
Chapter 5: Creating and Building Projects For Each grade In grades Console.WriteLine(" - " & grade) Next Console.ReadKey() End Sub End Module One item to draw your attention to in Listing 5-2 is the using directive (Imports in VB), specifying that you can use the types in the ClassLibraryDemo namespace without fully qualifying them. After that, you can see how Listing 5-2 creates instances of Student and myStudent and calls GetStudentGrades. TIP The call to Console.
-
130 Microsoft Visual Studio 2010: A Beginner’s Guide but projects that are untouched will be reused as is. A build is typically the fastest option during normal development because building only items that are out of date means that there are likely items that don’t need to be built. Be aware, though, that you’ll occasionally need to build everything to make sure you aren’t accidentally working with old code.
-
Chapter 5: Creating and Building Projects Normally, a full rebuild ensures that you have the most up-to-date outputs available. You could also perform a clean operation to ensure all outputs were removed and then perform a build to see which outputs were created. This might give you insight into whether the build on a solution was including all of the projects. In normal circumstances, VS manages all of your dependencies for you, as described in the next section.
-
132 Microsoft Visual Studio 2010: A Beginner’s Guide Figure 5-8 Project Dependencies window Figure 5-9 The Project Build Order tab
-
Chapter 5: Creating and Building Projects CAUTION Don’t alter project dependencies unless you really know what you are doing. The results could be severe in that it can take a long time to fix dependencies in a large project. The automatic dependency management provided by VS is very dependable, and you should rely upon it whenever possible. Managing Compilation Settings The project property pages include a tab for compiler settings. You set compiler settings for each individual project.
-
134 Microsoft Visual Studio 2010: A Beginner’s Guide namespace. You can also build code that depends on your own custom constants by adding your own constants to the Conditional Compilation Symbols box as a commaseparated list of strings. C# allows you to write code that is classified as unsafe, meaning that you can use pointers and other features in an unsafe context. Unsafe code is still managed code (managed by the CLR).
-
Chapter 5: Creating and Building Projects Figure 5-11 The VB Compile Options page Most of the VB and C# compiler options are similar, except for Option Explicit, Option Strict, Option Compare, and Option Infer. In VB, variable declaration before use can be turned off. When Option Explicit is on, you must declare any variables before use.
-
136 Microsoft Visual Studio 2010: A Beginner’s Guide Navigating a Project with Class View An alternate way to work with projects is via Class view, which allows you to view solutions and project artifacts through the logical layout of the code. In C#, you can open Class view by pressing CTRL-W, C or select Class View from the View menu. In VB you can open Class view by pressing CTRL-SHIFT, C or select View | Other Windows | Class View. Figure 5-12 shows the Class View window.
-
Chapter 5: Creating and Building Projects Using the Class Designer When working with a project, it can sometimes be helpful to have a high-level view of the project contents, especially if someone else has created the project and you haven’t worked with that project before. This is where the Class Designer can help. In addition to code visualization, another capability of the Class Designer is to give you a basic tool to perform some design yourself. We’ll look at visualizing existing classes first.
-
138 Microsoft Visual Studio 2010: A Beginner’s Guide Class Details window provides additional details on the members of the Program.cs class. Figure 5-13 is a minimal diagram of one class with a single method, Main, and you would have seen all of the classes in the current project if there were more. This could be a good way to help you learn about an existing base of code.
-
Chapter 5: Creating and Building Projects class named Staff, a normal class named Teacher, an inheritance relationship where Teacher derives from Staff, and an association from Program to Staff. To create a new object, drag-and-drop the object from the Toolbox to the Class Designer surface; you’ll see an input window similar to Figure 5-15.
-
140 Microsoft Visual Studio 2010: A Beginner’s Guide Listing 5-3 Code generated from the Class Designer C#: using using using using System; System.Collections.Generic; System.Linq; System.Text; namespace ProjectDemo { /// /// Teaches Classes /// public class Teacher : Staff { /// /// Grade student papers /// /// Papers to grade public void GradePapers(List papers) { throw new System.
-
Chapter 5: Creating and Building Projects is the same as the visual object in the class diagram, and the GradePapers method is the same as specified in the Class Details window. You can also see the comment on Teacher as specified in the Property window. All that’s left for you to do is replace the call to throw new System.NotImplementedException with your own code in C# or just add your code to GradePapers in VB. Summary You should now know how to create a solution and a project.
-
This page intentionally left blank
-
Chapter 6 Debugging with Visual Studio 143
-
144 Microsoft Visual Studio 2010: A Beginner’s Guide Key Skills & Concepts ● Exploring Available Debugging Tools ● Setting Breakpoints ● Inspecting Program State ● Solving Problems with VS Debugging Tools M ore often than we would like, our code has bugs. Fortunately, when bugs do happen, you have a lot of help with VS. This chapter shows you how to use the VS debugger to fix problems by setting breakpoints, stepping through code, and inspecting program state.
-
Chapter 6: Debugging with Visual Studio Listing 6-1 Example code for chapter C#: Program.cs using System; namespace DebugAndTestDemo { class Program { static void Main() { Customer cust = new Customer(); cust.Discount = .1m; Order ord = new Order(); ord.AddItem(5.00m); ord.AddItem(2.50m); cust.Order = ord; decimal discount = cust.GetOrderDiscount(); Console.WriteLine("Customer Discount: {0}", discount); Console.ReadKey(); } } } C#: Customer.
-
146 Microsoft Visual Studio 2010: A Beginner’s Guide namespace DebugAndTestDemo { class Order { private List orderItems = new List(); public decimal Total { get { decimal amount = 0; foreach (var item in orderItems) { amount = amount + item; } return amount; } } public void AddItem(decimal amount) { orderItems.Add(amount); } } } VB: Module1.vb Module Module1 Sub Main() Dim cust As Customer = New Customer() cust.Discount = 0.1D Dim ord As Order = New Order() ord.AddItem(5D) ord.AddItem(2.
-
Chapter 6: Debugging with Visual Studio VB: Customer.vb Class Customer Property Discount As Decimal Property Order As Order Function GetOrderDiscount() As Decimal Return Order.Total * Discount End Function End Class VB: Order.vb Class Order Private orderItems As New List(Of Decimal) Public ReadOnly Property Total() As Decimal Get Dim amount As Decimal = 0 For Each item In orderItems amount = amount + item Next Return amount End Get End Property Sub AddItem(ByVal item As Decimal) orderItems.
-
148 Microsoft Visual Studio 2010: A Beginner’s Guide This program calculates the total monetary discount that a customer would receive for that order by calling the GetOrderDiscount method on the Customer instance, which then returns the calculated discount amount to be subsequently displayed on the console. Essentially, we created a couple of object instances, cust and ord, gave the object instances the data they needed, and told the object instances to do some work for us.
-
Chapter 6: Debugging with Visual Studio Figure 6-1 The Call Hierarchy window From the perspective of reuse, many call sites to a method could indicate that the method is relatively generic and reusable. While a low number of call sites might not indicate the reusability of a method, zero call sites certainly indicates that the method is not being used and can potentially be eliminated. A lot of call sites could also indicate that a change to a method can have a significant impact.
-
150 Microsoft Visual Studio 2010: A Beginner’s Guide If you’ve been working on your code and want to update the Call Hierarchy window, click Refresh. Every time you view Call Hierarchy, the selected item is added to the list. You can use the Remove Root button to delete an item from the list. The Toggle Details Pane button shows and hides the Details pane, which shows the code and location of the call site.
-
Chapter 6: Debugging with Visual Studio Figure 6-2 The Build (C#) and Compile (VB) Properties tab Do a build of your application, which will produce various files suitable for debugging. To view these files, right-click the solution, project, or folder in Solution Explorer and select Open Folder in Windows Explorer. Then navigate to the bin\Debug folder, which should look similar to Figure 6-3. There are four files in Figure 6-3, two for the application and two to support running in the debugger.
-
152 Microsoft Visual Studio 2010: A Beginner’s Guide Figure 6-3 The Debug Output folder should not deploy them with your application; they would just take up extra space and not serve a purpose. You normally want vshost files in place when debugging in VS. There are various debugger settings you can configure in VS that affect your session and modify the vshost configuration files. Open the properties page and click the Debug tab, shown in Figure 6-4.
-
Chapter 6: Debugging with Visual Studio Figure 6-4 Debug properties Web application. Generally, you’ll only use Start Project for a desktop application. The property pages change for Web applications, which automatically run in a browser. You can add a space-separated list of values for command-line arguments. If you’re building an application that needs to be run from a command window or from a command script, this method is very useful to test and debug a specific command-line configuration.
-
154 Microsoft Visual Studio 2010: A Beginner’s Guide window specifies the location of the executable file of the program to be debugged, that the output folder is shared, and that your application has permissions on the shared folder. The focus of this book is on managed code, which runs on the .NET CLR. VS has the ability to debug unmanaged code, such as that written in C++ that communicates directly with the operating system.
-
Chapter 6: Debugging with Visual Studio Figure 6-5 Debugging options As you can see in Figure 6-5, there are a variety of options that allow you to configure debugging. The primary difference between project settings and Options settings is that project settings are for that one project, but Options settings let you change the settings for all projects and have those settings, when applicable, apply to any new projects you create.
-
156 Microsoft Visual Studio 2010: A Beginner’s Guide Creating a Breakpoint To create a breakpoint, you need to open a project and have a code file open in the editor. A good project choice would be the example application with code from Listing 6-1. In the VS editor, there is a margin on the left side. If you click in this margin, VS will set a breakpoint on the matching code statement. Clicking a statement in code to give it the focus and pressing F9 sets a breakpoint too.
-
Chapter 6: Debugging with Visual Studio TIP If you write a program that is doing a lot of work, or very little work but is stuck in an endless loop that you inadvertently created, you can pause execution by selecting the blue pair of vertical bars button found to the left of the square blue stop button. When you do this, your program stops at whatever line of code it was executing at the moment you selected the pause button. You can then resume from that point.
-
158 Microsoft Visual Studio 2010: A Beginner’s Guide Figure 6-7 The Breakpoints window Managing Breakpoints Over time, breakpoints can be set across many locations in your project. You can manage all of these breakpoints in a central location by selecting Debug | Windows | Breakpoints, which will show the window in Figure 6-7. Much of the functionality of the Breakpoints window has been explained already, except that the toolbar options apply to all of the breakpoints that are currently checked.
-
Chapter 6: Debugging with Visual Studio Operation Explanation Step Over Executes the code in the current line and moves to the next line of code where it again pauses, waiting for your instruction. Perform a Step Over by selecting Debug | Step Over, pressing F10, or clicking the Step Over button in the toolbar. You can also right- click and select this option. Most Visual Studio developers will have the F10 shortcut memorized in short order.
-
160 Microsoft Visual Studio 2010: A Beginner’s Guide Inspecting Application State Application state is the value of variables in your code, the current path of execution, or any other information that tells you what your program is doing. While debugging, it’s important to be able to view application state and compare what is really happening to what you expected to happen. VS gives you various windows for viewing application state, which you’ll learn about in this section.
-
Chapter 6: Debugging with Visual Studio Figure 6-9 The Autos window list can be quite long, depending on how many variables are in scope. You would want to use the Locals window to find any variables being affected by the current algorithm. In comparison, Figure 6-9 shows the Autos window. Notice that the Autos window provides a more fine-grained view of both variables and the properties of objects from the current and previous lines.
-
162 Microsoft Visual Studio 2010: A Beginner’s Guide The Locals and Autos windows can sometimes become crowded with too many variables and slow you down as your code gets more complex, especially when the variables you’re interested in are at the bottom of the list or so far apart that you must scroll between them. Another benefit of the Watch window is that you can drill down into an object to show a value without continuously expanding the tree view. An example of this is to type cust.Order.
-
Chapter 6: Debugging with Visual Studio The Call Stack Window If you recall from the previous section on design-time tools, the Call Hierarchy window gives you a view of the code at design time. On a related note, you also have the ability to view the path of execution during runtime via the Call Stack window.
-
164 Microsoft Visual Studio 2010: A Beginner’s Guide Figure 6-13 The Quick Watch window the Quick Watch window will show that expression. Figure 6-13 shows the Quick Watch window in use. Clicking the Reevaluate button, shown in Figure 6-13, will show the results of evaluation in the Value area. The Value area will only hold the current expression. If you want to save an expression, click Add Watch, which will load the expression into a Watch window.
-
Chapter 6: Debugging with Visual Studio Figure 6-14 A pinned value VS will locate the pinned value after the line, and you might not see the value if it occurs on a long line that exceeds the width of your screen. Fortunately, you can click the pinned value and drag it to where you want on the screen. To avoid confusion, remember to keep the pinned value located close to the variable whose value is displayed.
-
166 Microsoft Visual Studio 2010: A Beginner’s Guide Figure 6-15 The Debug History window IntelliTrace could be useful if you stepped over a statement that changed the value of a variable and needed to go back to see what the variable value was before you stepped. Figure 6-15 shows this scenario, where the highlighted event, Breakpoint hit: Main, allows you to view Locals or Call Stack.
-
Chapter 6: Debugging with Visual Studio handling bad data and fixing null references. The program itself is not particularly sophisticated, but it contains just enough logic to lead you down a rat hole and show you how to work your way out. First, we’ll look at the program, and then we’ll follow up with two bug-fixing exercises.
-
168 Microsoft Visual Studio 2010: A Beginner’s Guide The CustomerRepository Class In this program, we create a class that is solely responsible for working with data. This is a common pattern, which is called the Repository pattern. The following CustomerRepository class has a method that returns a list of Customer objects: C#: using System.Collections.
-
Chapter 6: Debugging with Visual Studio { .FirstName = "Jean " }, New Customer With { .FirstName = "Wim", .LastName = "Meister" } } Return customers End Function End Class The GetCustomers method returns a List (List(Of Customer) in VB). For the purposes of this discussion, how the GetCustomers method works won’t matter. Such a method could easily get customers from a database, Web service, or other object. For simplicity, GetCustomers initializes a List with Customer objects.
-
170 Microsoft Visual Studio 2010: A Beginner’s Guide foreach (var cust in customers) { // 1. First Bug if (searchName == cust.FirstName) { Console.WriteLine( "Found: {0} {1}", cust.FirstName, cust.LastName); customerFound = true; } } if (!customerFound) { Console.WriteLine("Didn't find customer."); } Console.ReadKey(); } } VB: Module Module1 Sub Main() Dim custRep As New CustomerRepository Dim customers As List(Of Customer) customers = custRep.
-
Chapter 6: Debugging with Visual Studio If (customerFound = False) Then Console.WriteLine("Didn't find customer.") End If Console.ReadKey() End Sub End Module Notice that the searchName variable is set to “Jean”. Within the loop, the searchName is compared with the FirstName property of each Customer instance for equality. Here’s the output from when the program runs: Didn't find customer.
-
172 Microsoft Visual Studio 2010: A Beginner’s Guide 4. Next, set a breakpoint on the if statement, right-click the breakpoint, and set the condition as follows: C#: cust.FirstName == "Jean" VB: cust.FirstName = "Jean" The goal here is to see what happens when the if statement finds the record matching the searchName. At this point, we’re assuming that Jean does exist in the data. Working with a small program, you can use windows such as Autos, Locals, or Watch to find this record.
-
Chapter 6: Debugging with Visual Studio look at is much fewer and you can save time. If you have multiple records, you can press F5 and the breakpoint will pause on each record, allowing you to inspect the value. In this case, the record set is so small that we hit the right record immediately. 7. Press F10 to step over the if condition. This will tell us whether the condition is being evaluated properly.
-
174 Microsoft Visual Studio 2010: A Beginner’s Guide representation of the data where any characters that don’t have a readable representation appear as dots. You can see “.J.e.a.n.” on the first line of the third column. .NET characters are 16-bit Unicode, and the data for the character only fills the first byte, resulting in the second byte being set to 00, causing the dots between characters you see in the first column.
-
Chapter 6: Debugging with Visual Studio { Console.WriteLine( "Found: {0} {1}", firstName, lastName); customerFound = true; } VB: Dim firstName As String = cust.FirstName.Trim() Dim lastName As String = cust.LastName.Trim() If (searchName = cust.FirstName) Then Console.WriteLine( "Found: {0} {1}", cust.FirstName, cust.LastName) customerFound = True End If Next Notice that the fix was to use the string.Trim method to remove the extraneous space from the data, assigning the clean results to local variables.
-
176 Microsoft Visual Studio 2010: A Beginner’s Guide the program. In this particular example, VS pauses on the line that cleans LastName properties, repeated here for your convenience: C#: var firstName = cust.FirstName.Trim(); var lastName = cust.LastName.Trim(); VB: Dim firstName As String = cust.FirstName.Trim() Dim lastName As String = cust.LastName.
-
Chapter 6: Debugging with Visual Studio You want the NullReferenceException to be raised because it protects you from performing an invalid operation in your code. After you’ve found the null value and ascertained the reason, it’s time to find out why the value is null in order to make an informed decision on a fix. 3. In the Immediate window, type the following command: C#: customers.IndexOf(cust) VB: ?customers.
-
178 Microsoft Visual Studio 2010: A Beginner’s Guide Additionally, you can drill down into the customers collection in one of the debugging windows, such as Autos, Locals, or Watch, inspecting the Customer object at index 1. If you recall from Step 3 in the preceding sequence, the Customer object we’re interested in is at index 1.
-
Chapter 6: Debugging with Visual Studio If cust.LastName Is Nothing Then lastName = "" Else lastName = cust.LastName.Trim() End If If (searchName = firstName) Then Console.WriteLine( "Found: {0} {1}", cust.FirstName, cust.LastName) customerFound = True End If This code fixes the problem two different ways, giving you more than one way to solve the problem, depending on the style you prefer. In essence, the solution checks the FirstName and LastName properties to see if they are null (Nothing in VB).
-
180 Microsoft Visual Studio 2010: A Beginner’s Guide Summary You are now able to debug code. The section “Development-Time Code Tools” explained how to view the structure of your code at development time. You learned how to set breakpoints along with the many conditions available for breakpoint customization. The section “Stepping Through Code” explained how to navigate through your application, stepping into and out of methods and changing the executable location of your application.
-
Chapter 7 Working with Data 181
-
182 Microsoft Visual Studio 2010: A Beginner’s Guide Key Skills & Concepts ● Work on SQL Server Databases with Visual Studio 2010 ● Query Data with Language Integrated Query (LINQ) ● Use LINQ to SQL to Query and Manipulate SQL Server Data M ost of the work we do each day involves data, and most of the data we work with comes from databases. Because of the importance of data in our applications, this chapter introduces how to work with data in VS.
-
Chapter 7: Working with Data Figure 7-1 Server Explorer View | Server Explorer or pressing CTRL-ALT-S. Server Explorer, shown in Figure 7-1, allows you to work with databases, servers, and SharePoint. Servers give you access to the various types of services for managing an operating system, such as Event Logs, Performance Counters, and Services. It is very convenient to be able to access these services in VS during development.
-
184 Microsoft Visual Studio 2010: A Beginner’s Guide Figure 7-2 Create New SQL Server Database To create a database, right-click Data Connections in Server Explorer, and select Create New SQL Server Database. This will show the Create New SQL Server Database window, shown in Figure 7-2. In Figure 7-2, the server name is .\sqlexpress. The dot before the backslash represents the current machine name, and the sqlexpress is the name for the SQL Server Express database.
-
Chapter 7: Working with Data Adding Tables The database itself will hold data for customers, orders, and order details that we introduced in the preceding chapter. The data will be held in tables that we’ll create in this section. In later sections, I’ll show you how to perform Create, Read, Update, and Delete (CRUD) operations on this data. Right now, you’ll learn how to create the tables.
-
186 Microsoft Visual Studio 2010: A Beginner’s Guide The CustomerID has a primary key symbol, which is created by right-clicking the column and selecting Set Primary Key. If you needed a composite key (multiple columns that define a key), which you don’t in this simple example, you would press CTRL and click each column that belongs to the key and then right-click and select Set Primary Key.
-
Chapter 7: Working with Data Figure 7-5 The Order table customer data. Notice that you need only type a name in the Name column (replacing the word NULL) and do not need to enter a value for the CustomerID, since we’ve made the CustomerID column auto-increment. In a database of any sophistication, you have multiple tables. In the MyShop database, a Customer has an Order.
-
188 Microsoft Visual Studio 2010: A Beginner’s Guide can have zero or more orders. A foreign key can help manage the relationship between Customer and Order. The mechanics of creating a foreign key relationship is that you put the foreign key column in the child table, Order, and have the foreign key column refer to the primary key of the parent table, Customer.
-
Chapter 7: Working with Data Figure 7-7 Configuring a foreign key relationship In the primary key table drop-down, shown in Figure 7-7, select Customer, which automatically selects the primary key, CustomerID. (Note: If you don’t see this behavior, check to see that you’ve set your primary key columns and saved those table changes as described earlier.) In the list, under Foreign Key Table in Figure 7-7, you’ll initially see OrderID, which is the primary key of the order table.
-
190 Microsoft Visual Studio 2010: A Beginner’s Guide Figure 7-8 Foreign key relationship Save warning message TIP Figure 7-7 shows an editable Relationship Name field. In many cases, you won’t care what this name is because it follows a standard convention of FK_Child_Parent. However, sometimes you have multiple relationships between the same tables, which means that VS appends an incremental number to the end of the name.
-
Chapter 7: Working with Data Figure 7-9 A database diagram the symbols—the key and the infinity symbol at the end of the line connecting the two tables—is what is important). As shown in Figure 7-9, the database diagram shows you tables, columns, and relationships. You can use this window to add new tables and relationships. When you want to create a new table, right-click the design surface, select Add Table, and use the Visual Designer to configure the table, as in previous examples.
-
192 Microsoft Visual Studio 2010: A Beginner’s Guide copy of the diagram, right-click and copy to clipboard or select File | Print. You can also add multiple diagrams to the Database Diagrams folder, allowing you to have multiple different views for your convenience. In addition to tables and diagrams, you can add database views, stored procedures, functions, synonyms, types, and assemblies.
-
Chapter 7: Working with Data To execute this stored procedure, right-click the stored procedure in the database in Server Explorer and click Execute. You’ll see output similar to the following if there are records in the customer table: Running [dbo].[GetCustomers]. Name -------------------------------------------------Meg Joe May No rows affected. (3 row(s) returned) @RETURN_VALUE = 0 Finished running [dbo].[GetCustomers]. In addition to execution, you can debug the stored procedure in VS.
-
194 Microsoft Visual Studio 2010: A Beginner’s Guide options found after clicking the arrow button to expand Database Tools and then selecting Table And Database Designers is “Prevent saving changes that require table re-creation.” VS will not allow you to save a foreign key change to existing tables. However, by unchecking “Prevent saving changes that require table re-creation,” you’ll be able to save foreign key changes to an existing table.
-
Chapter 7: Working with Data Listing 7-2 A program demonstrating how to make a LINQ to objects query C#: using System; using System.Collections.Generic; using System.
-
196 Microsoft Visual Studio 2010: A Beginner’s Guide Console.ReadKey(); } } VB: Class Customer Property FirstName As String Property LastName As String End Class Module Module1 Sub Main() Dim custList As New List(Of Customer) From { New Customer With { .FirstName = "Joe", .LastName = "Zev" }, New Customer With { .FirstName = "May", .LastName = "Lee" }, New Customer With { .FirstName = "Meg", .LastName = "Han" } } Dim customers = From cust In custList Where cust.FirstName.
-
Chapter 7: Working with Data Both the C# and VB examples from Listing 7-2 contain similar LINQ queries. To clarify, the following examples show both the C# LINQ query: var customers = from cust in custList where cust.FirstName.StartsWith("M") select cust; and the VB LINQ query: Dim customers = From cust In custList Where cust.FirstName.
-
198 Microsoft Visual Studio 2010: A Beginner’s Guide Creating a LINQ Projection with Anonymous Types You can customize what is returned by the select clause by using what is called an anonymous type. This customization of return values is called a projection. Anonymous types facilitate custom projections, allowing you to return the results of a LINQ query in a form that you specify without needing to declare a new type ahead of time.
-
Chapter 7: Working with Data only have a FullName property. Notice how the foreach loop uses the FullName property, instead of the FirstName property from Listing 7-2. The beauty of this anonymous type is that we don’t really care what type of object is generated for us by the LINQ query, as long as that object has the new property associated with it that we specified, FullName in this case, which it does.
-
200 Microsoft Visual Studio 2010: A Beginner’s Guide Handling Data with LINQ to SQL The LINQ to SQL provider allows you to communicate with SQL Server databases. There are many other types of providers, such as LINQ to Entities for generic databases (which includes SQL Server), LINQ to XML for XML data sources, and LINQ to Oracle for Oracle databases. The preceding section showed you how to use the in-memory provider, LINQ to Objects.
-
Chapter 7: Working with Data To add entities to the LINQ to SQL Designer, open Server Explorer, select a database, and open the Tables folder. Then drag and drop the Customer and Order tables from Server Explorer to the left surface of the LINQ to SQL Designer. You can see the Customer and Order classes in Figure 7-11, along with properties corresponding to the fields of each table in the database. The line between Customer and Order is called an association.
-
202 Microsoft Visual Studio 2010: A Beginner’s Guide The default zoom level for the Designer is 100%, but you can change this by rightclicking, select Zoom, and select a zoom level percent. This might be useful if you wanted a higher-level view where you could fit more objects onto the screen at one time.
-
Chapter 7: Working with Data LINQ to SQL generates a lot of code for you, and the Properties window allows you to modify parts of that code through the Code Generation section. To see this section, be sure your Properties window has the “Categorized” button selected near the top left side, and not the Alphabetical “AZ” button. You can also see the database connection string, which is created when you dragged and dropped from Server Explorer to the Designer and saved.
-
204 Microsoft Visual Studio 2010: A Beginner’s Guide Console.ReadKey(); } } } VB: Module Module1 Sub Main() Dim myShop As New MyShopDataContext Dim customers = From cust In myShop.Customers Where cust.Name IsNot "Joe" Select cust For Each cust In customers Console.WriteLine("Name: " & cust.Name) Next Console.
-
Chapter 7: Working with Data A data context is the code that is generated by VS when you run the LINQ to SQL item wizard. The Main method instantiates MyShopDataContext, which is the data context. The name came from when the LINQ to SQL item wizard ran and your naming of the *.dbml file. LINQ to SQL queries are made with the data context, which contains a property that holds a collection of the class type that the property is named after, myShop.Customers and myShop.Orders in this case.
-
206 Microsoft Visual Studio 2010: A Beginner’s Guide foreach (var custOrd in customers) { Console.WriteLine( " Name: " + custOrd.Name + " Date: " + custOrd.Date); } VB: Dim myShop As New MyShopDataContext Dim customers = From cust In myShop.Customers From ord In cust.Orders Select New With { .Name = cust.Name, .Date = ord.OrderDate } For Each custOrd In customers Console.WriteLine( " Name: " & custOrd.Name & " Date: " & custOrd.
-
Chapter 7: Working with Data query, a join query will combine two tables that have matching keys. Here’s an example of a join query that accomplishes the exact same task as the preceding select many query: C#: var myShop = new MyShopDataContext(); var customers = from cust in myShop.Customers join ord in myShop.Orders on cust.CustomerID equals ord.CustomerID select new { Name = cust.Name, Date = ord.OrderDate }; foreach (var custOrd in customers) { Console.WriteLine( " Name: " + custOrd.
-
208 Microsoft Visual Studio 2010: A Beginner’s Guide The select many and join clauses are synonymous with SQL inner joins because there must be a foreign key in a child table that matches a parent in the parent table before any records for the parent will be returned. To address the issue of needing to get parents that don’t have children, you must perform a left outer join. To perform the equivalent of a SQL left outer join in LINQ, you must use a standard operator called DefaultIfEmpty.
-
Chapter 7: Working with Data For Each custOrd In customers Console.WriteLine( " Name: " & custOrd.Name & " Date: " & custOrd.Date) Next And the output is Name: Name: Name: Name: Meg Joe May May Date: Date: Date: Date: 1/1/1800 12:00:00 AM 1/5/2010 12:00:00 AM 10/5/2010 12:00:00 AM 10/23/2010 12:00:00 AM For C#, the left outer join is accomplished the same way as a join except for two additional lines: the into clause and the second from clause.
-
210 Microsoft Visual Studio 2010: A Beginner’s Guide VB: Dim myShop As New MyShopDataContext Dim customers As IEnumerable = myShop.GetCustomers() For Each custOrd In customers Console.WriteLine("Name: " & custOrd.Name) Next And here’s the output: Name: Meg Name: Joe Name: May Just call myShop.GetCustomers and you’ll receive a collection of Customer objects. There are many more advanced scenarios that you can handle with LINQ, but this is just a beginner’s guide.
-
Chapter 7: Working with Data VB: Function InsertCustomer() As Integer Dim cust = New Customer With { .Name = "Jim" } Dim myShop As New MyShopDataContext myShop.Customers.InsertOnSubmit(cust) myShop.SubmitChanges() Return cust.CustomerID End Function As shown here, each collection property, such as Customers, has an InsertOnSubmit method that takes an object of the collection’s type, Customer in this case. Don’t forget to call SubmitChanges, or else you won’t see any changes to your data.
-
212 Microsoft Visual Studio 2010: A Beginner’s Guide VB: Sub UpdateCustomer(ByVal custID As Integer) Dim myShop As New MyShopDataContext Dim customers = From cust In myShop.Customers Where cust.CustomerID = custID Select cust Dim firstCust As Customer = customers.SingleOrDefault() If (firstCust IsNot Nothing) Then firstCust.Name = "James" End If myShop.SubmitChanges() End Sub In the previous queries for the customer whose name was Jim, change the object to James and saves changes.
-
Chapter 7: Working with Data Customer firstCust = customers.SingleOrDefault(); if (firstCust != null) { myShop.Customers.DeleteOnSubmit(firstCust); } myShop.SubmitChanges(); } VB: Sub DeleteCustomer(ByVal custID As Integer) Dim myShop As New MyShopDataContext Dim customers = From cust In myShop.Customers Where cust.CustomerID = custID Select cust Dim firstCust As Customer = customers.SingleOrDefault() If (firstCust IsNot Nothing) Then myShop.Customers.DeleteOnSubmit(firstCust) End If myShop.
-
214 Microsoft Visual Studio 2010: A Beginner’s Guide used in multiple later chapters that show you how to build user interfaces. Pay attention to how the UI code holds on to IDs and then uses them when calling code that interacts with the database. You’ll see many different examples, but most of the examples that you see and then use in your own programs will be variations of what you’ve learned here. Summary This chapter showed you how to work with the VS database tools.
-
Part III Building Programs with VS 2010
-
This page intentionally left blank
-
Chapter 8 Building Desktop Applications with WPF 217
-
218 Microsoft Visual Studio 2010: A Beginner’s Guide Key Skills & Concepts ● Perform Screen Layout ● Use Controls ● Work with Data in the UI W indows Presentation Foundation (WPF) is a .NET technology for building desktop applications. The result of building a WPF application is an *.exe file that you can run directly on your computer or deploy and run on any other computer that has .NET installed.
-
Chapter 8: Building Desktop Applications with WPF solution name. I’m naming the examples in the chapter as MyShop to continue the idea of customers who buy products that started in Chapter 7 when discussing data. Figure 8-1 shows the new WPF application in VS, including a Toolbox, a Designer, and a Solution Explorer. The Toolbox contains controls, which are user interface (UI) elements, such as Button and Textbox, that you can drag and drop onto the Designer. NOTE There is another .
-
220 Microsoft Visual Studio 2010: A Beginner’s Guide Similarly, if you add a TextBox element to the XAML, you’ll see the visual representation of that TextBox in Design. You have various controls for manipulating the windows. Both Design and XAML have zoom controls. The zoom tool on Design is a slider in the upper-left corner, and zoom for XAML is a drop-down control in the lower-left corner. You can also zoom by clicking either Design or XAML and moving the mouse wheel.
-
Chapter 8: Building Desktop Applications with WPF Figure 8-2 Adding columns and rows to a Grid The arrow in the Grid border allows you to reposition the column or row border. You can remove the column or row border by selecting the arrow in the Grid border and dragging the arrow off the window. CAUTION Don’t press the DELETE key when you have a border selected. You’ll accidentally delete your Grid, which you might have spent some time on.
-
222 Microsoft Visual Studio 2010: A Beginner’s Guide Figure 8-3 Column and row sizing options whatever space remains after the other columns’ sizes are set. After you’ve added content to your Grid, you can use these sizing options to experiment with the layout that you want. One thing to notice in Figure 8-3 is the number in the Grid border for each row and column. These numbers tell you the size in pixels for each row and column they appear upon.
-
Chapter 8: Building Desktop Applications with WPF Figure 8-4 Using a StackPanel layout select the grid, which is added by default to a new project, and delete the Grid. Figure 8-4 shows a StackPanel that contains multiple button controls. In Figure 8-4, it doesn’t matter where you try to lay the buttons—the StackPanel will always lay them out one after the other. In addition to vertical layout, the StackPanel can lay out controls horizontally.
-
224 Microsoft Visual Studio 2010: A Beginner’s Guide Figure 8-5 DockPanel layout Width properties. Removing the Height and Width properties allows the DockPanel to expand and cover the entire window. Figure 8-5 shows a DockPanel with Label controls in each docking position. Every time you drag and drop a control onto the design surface of a DockPanel, the control will take the center position by default. To specify where the control should dock, open the Properties window and set the DockLayout.
-
Chapter 8: Building Desktop Applications with WPF Figure 8-6 The WrapPanel Layout control Figure 8-6 demonstrates how you can lay out a group of controls to fill an available space. In the case of the CheckBox controls, the Orientation of the WrapPanel is set to Vertical (the default is Horizontal). When the number of CheckBox controls fills the vertical column, remaining CheckBoxes wrap to the next column.
-
226 Microsoft Visual Studio 2010: A Beginner’s Guide Figure 8-7 The Canvas Layout control Now that you know how to use the layout controls, the next section takes a closer look at WPF controls in general, giving you tips on how to use them in your application. Using WPF Controls WPF includes many controls for helping you build user interfaces. This section groups the controls into categories, including text, selection, containers, information, shapes, and decorators.
-
Chapter 8: Building Desktop Applications with WPF Window Menu Keystroke Toolbox View | Toolbox CTRL-W, X Solution Explorer View | Solution Explorer CTRL-W, L Designer Double-click *.
-
228 Microsoft Visual Studio 2010: A Beginner’s Guide In Figure 8-8, you can see the Toolbox with the Button control selected. The Designer shows a Button control that has been dragged and dropped. In practice, you’ll be adding this control into some type of layout control so that you can position it appropriately on the screen. Below the Designer, the Button control appears in the XAML for this window. If you are uncomfortable looking at XAML, you can review Appendix B as a refresher.
-
Chapter 8: Building Desktop Applications with WPF Figure 8-9 The Properties window Events tab TIP Controls have default events. The significance of default events is that if you double-click the control in the Designer, VS will generate an event handler for the default event. To be more specific, consider the Button control whose default event is the Click event. If you double-click the Button control in the Designer, VS will generate an event handler for the Click event.
-
230 Microsoft Visual Studio 2010: A Beginner’s Guide using System.Windows.Navigation; using System.Windows.Shapes; namespace ControlsCS { /// /// Interaction logic for MainWindow.xaml /// public partial class MainWindow : Window { public MainWindow() { InitializeComponent(); } private void button1_Click(object sender, RoutedEventArgs e) { } } } VB: Class MainWindow Private Sub Button1_Click( ByVal sender As System.Object, ByVal e As System.Windows.RoutedEventArgs) Handles Button1.
-
Chapter 8: Building Desktop Applications with WPF to user actions. In addition to creating the event handler in the code-behind, VS adds the method name to the Click event on the Events tab in the Properties window, shown in Figure 8-9. In addition to creating the handler method and assigning the method name in the Properties window, VS adds the method as an attribute to the Button control in the XAML, shown here.
-
232 Microsoft Visual Studio 2010: A Beginner’s Guide Figure 8-10 Readable button ID and event handler name VB: Class MainWindow Private Sub Button1_Click( ByVal sender As System.Object, ByVal e As System.Windows.RoutedEventArgs) End Sub Private Sub NewOrderButton_Click( ByVal sender As System.Object, ByVal e As System.Windows.RoutedEventArgs) Handles NewOrderButton.
-
Chapter 8: Building Desktop Applications with WPF The previous code shows both the old button1_Click (Button1_Click in VB) event handler and the new NewOrderButton_Click event handler. You might wonder why the button1_Click event handler wasn’t deleted when you deleted it from the Click event in the Properties window, but there’s a good reason for this. What if you had already written code in the event handler? VS leans toward the safe side and does not delete your code.
-
234 Microsoft Visual Studio 2010: A Beginner’s Guide Notice that the class in this code is named NewOrder, illustrating that a window is just another class. As you know, you can instantiate classes and call their methods, which is the technique you’ll use to open this window from the NewOrder_Click event handler in the code-behind of the MainWindow window. In practice, you’ll populate the NewOrder window with whatever controls you need to implement a new order.
-
Chapter 8: Building Desktop Applications with WPF following sections show you how to perform create, read, update, and delete (CRUD) operations via WPF. You’ll first see how to insert data, using VS tools to construct a data entry screen. Then you’ll learn how to read, modify, and delete data through a DataGrid. We’ll start with single value binding. To make the examples more interesting, I added extra fields to the tables.
-
236 Microsoft Visual Studio 2010: A Beginner’s Guide Figure 8-11 Choosing a new data source On the Select The Data Objects window, check the box next to each object you want to bind in your application. The example in this chapter uses Customer and Order objects, which you can see checked in Figure 8-12. Clicking Finish will configure the data source for use in the application. You can view data sources by selecting Data | Show Data Sources, shown in Figure 8-13.
-
Chapter 8: Figure 8-12 Selecting data objects Figure 8-13 The Data Sources window Building Desktop Applications with WPF 237
-
238 Microsoft Visual Studio 2010: A Beginner’s Guide Figure 8-14 Changing the control type for a field In Figure 8-14, the CustomerID is being changed to a ComboBox because it makes more sense to give the user the option of selecting a customer from a list for a new order, rather than typing in an ID number. Also, the object defaults to a Grid control, but in this first example, we only want to add a new order, meaning that the control type should be changed to Detail.
-
Chapter 8: Building Desktop Applications with WPF Figure 8-15 Controls bound via a data source This is another reason it’s important to be able to read the XAML for a window, so you can see how objects like this are added and configure them if you need to. In our case, we need to know the name of the CollectionViewSource, which is orderViewSource. We need to add an Order object to the CollectionViewSource so that the controls that are bound to it have a place to save data that the user enters.
-
240 Microsoft Visual Studio 2010: A Beginner’s Guide VB: Private Sub Window_Loaded( ByVal sender As System.Object, ByVal e As System.Windows.RoutedEventArgs) Handles MyBase.Loaded Dim OrderViewSource As System.Windows.Data.CollectionViewSource = CType(Me.FindResource("OrderViewSource"), System.Windows.Data.CollectionViewSource) 'Load data by setting the CollectionViewSource.Source property: 'OrderViewSource.
-
Chapter 8: Building Desktop Applications with WPF VB: Private Sub Window_Loaded( ByVal sender As System.Object, ByVal e As System.Windows.RoutedEventArgs) Handles MyBase.Loaded Dim OrderViewSource As CollectionViewSource = CType(FindResource("OrderViewSource"), CollectionViewSource) OrderViewSource.Source = New List(Of Order) From { New Order With { .OrderDate = DateTime.Now } } CustomerIDComboBox.ItemsSource = From cust In New MyShopDataContext().
-
242 Microsoft Visual Studio 2010: A Beginner’s Guide The previous example assigns the results of a LINQ query for Customer objects to the customerIDComboBox, but this is only the first step to getting the combo box to work properly; you must specify which property of Customer must display, which property of Customer maps to Order, and which property of Order to bind the selected item to. To do this binding, open the NewOrder.
-
Chapter 8: Building Desktop Applications with WPF that was assigned to the Source property of the orderViewSource in Window_Loaded. Coming full circle, the orderViewSource is what the default binding of the containing Grid layout is based on; it was set when dragging and dropping the Order data source onto the Design surface. Now you have an input form that displays data, allowing the user to enter new order information. After the user fills in the form, you need to save the data, which is discussed next.
-
244 Microsoft Visual Studio 2010: A Beginner’s Guide Dim ordList As List(Of Order) ordList = CType(OrderViewSource.Source, List(Of Order)) Dim ord As Order ord = ordList.FirstOrDefault() Dim ctx As New MyShopDataContext ctx.Orders.InsertOnSubmit(ord) ctx.SubmitChanges() MessageBox.Show("Order Saved!") End Sub Before the SaveButton_Click event handler ends, it shows a message box to the user with a status message, Order Saved.
-
Chapter 8: Building Desktop Applications with WPF Figure 8-16 Displaying information in a Grid C#: private MyShopDataContext m_ctx = new MyShopDataContext(); private void Window_Loaded(object sender, RoutedEventArgs e) { CollectionViewSource orderViewSource = FindResource("orderViewSource") as CollectionViewSource; orderViewSource.Source = from ord in m_ctx.Orders select ord; } VB: Dim m_ctx As New MyShopDataContext Private Sub Window_Loaded( ByVal sender As System.Object, ByVal e As System.Windows.
-
246 Microsoft Visual Studio 2010: A Beginner’s Guide Dim OrderViewSource As CollectionViewSource = CType(FindResource("OrderViewSource"), CollectionViewSource) OrderViewSource.Source = From ord In m_ctx.Orders Select ord End Sub This code loads orders into the Grid. Notice that the MyShopDataContext, m_ctx, is a field outside of the Window_Loaded method handler. It is raised to field level so that the same instance can be used in multiple methods.
-
Chapter 8: Building Desktop Applications with WPF using m_ctx, which is a field, both the Window_Loaded method and the UpdateButton_ Click method are using the same object instance. When making changes in the Grid, those changes are saved in the Order objects for the changed rows. The Order objects notify MyShopDataContext that they have changed, which is a service of LINQ to SQL. The UpdateButton_Click method uses m_ctx, which is the MyShopDataContext that knows about the changes to the Order objects.
-
This page intentionally left blank
-
Chapter 9 Creating Web Applications with ASP.
-
250 Microsoft Visual Studio 2010: A Beginner’s Guide Key Skills & Concepts ● Learn What MVC Means ● Create Models ● Create Controllers ● Create Views ● Work with Data in ASP.NET MVC A SP.NET is a .NET technology for building Web applications. VS provides support for building a Web application through windows such as the Toolbox, Designer, and Properties windows, as well as the Solution Explorer. This chapter shows you how to use ASP.NET MVC.
-
Chapter 9: Creating Web Applications with ASP.NET MVC Request Controller View Model Figure 9-1 The Model View Controller pattern View, and the Controller, including relationships. There are variations of the relationship between Model, View, and Controller, so rather than a theoretically correct depiction of all scenarios, Figure 9-1 is a simplification that should help you get started. In Figure 9-1, you can see that the Controller references both the View and the Model.
-
252 Microsoft Visual Studio 2010: A Beginner’s Guide you have the option to choose Yes or No. Choosing Yes will add a unit testing project to the solution. You can choose either option, which won’t matter right now because we’ll not be covering this topic here, but it is definitely worth exploring on your own. Figure 9-2 shows the new project in Solution Explorer.
-
Chapter 9: Creating Web Applications with ASP.NET MVC ● The Scripts folder holds JavaScript files, which include the jQuery and ASP.NET AJAX client libraries. JavaScript helps make Views more interactive and can be effective in providing a pleasing user experience. ● The Global.asax file holds code that runs at different periods during the application life cycle; we’ll investigate this file when looking at routing later in this chapter. ● The web.
-
254 Microsoft Visual Studio 2010: A Beginner’s Guide The skeleton code produced by VS gives you some working examples that you can build on and move forward. One item that VS doesn’t produce is the Model, which is discussed next. Creating the Models As stated previously, the Model represents the data for the application. The example in this section uses LINQ to SQL to produce the Model for this application.
-
Chapter 9: Creating Web Applications with ASP.NET MVC return View(); } public ActionResult About() { return View(); } } } VB: _ Public Class HomeController Inherits System.Web.Mvc.Controller Function Index() As ActionResult ViewData("Message") = "Welcome to ASP.NET MVC!" Return View() End Function Function About() As ActionResult Return View() End Function End Class Listing 9-1 demonstrates how closely ASP.NET MVC is tied to conventions. Notice that the class name is HomeController.
-
256 Microsoft Visual Studio 2010: A Beginner’s Guide TIP You can change your VS Web server’s port number. If you open your project’s property page by right-mouse clicking on the project in Solution Explorer and select Properties, then select the Web tab on the left, under Servers, you can specify a specific port or make other Web server choices. For ASP.NET MVC, the important part of the URL is /Home/About. Home is the name of the Controller, and ASP.
-
Chapter 9: Creating Web Applications with ASP.NET MVC Listing 9-2 A View’s HTML <%@ Page Language="C#" MasterPageFile="~/Views/Shared/Site.Master" Inherits="System.Web.Mvc.ViewPage" %> Home Page <%= Html.Encode(ViewData["Message"]) %>
To learn more about ASP.NET MVC visit PAGE 281
258 Microsoft Visual Studio 2010: A Beginner’s Guide Organizing View Files The file structure in Figure 9-2 shows that Views appear in the Views folder and have a *.aspx file extension. Each subfolder under the Views folder corresponds to a Controller, and the Views within the subfolder correspond generally to Controller actions. When a Controller passes control to a View, by calling View, ASP.
-
Chapter 9: Creating Web Applications with ASP.NET MVC
<asp:ContentPlaceHolder ID="TitleContent" runat="server" />